Now that you've finally made it to Wardner's inner sanctum, there's only a few traps that you have to overcome before you face him in battle. This stage is made up of a series of chambers, and you must fall from one to the next. Fall through the gap on the left to visit the first chamber.
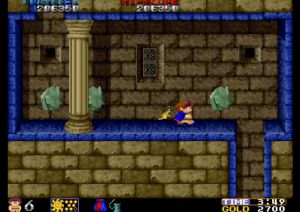
- Sphinx heads
- The first chamber contains three sphinx heads. When you arrive, they will be floating in the middle of the room. You'll have to shoot the left head to get them moving. Once you do, they will bounce off one another and the walls. They fly just high enough for you to duck underneath them. You'll need to approach the hole on the right side of the room by ducking under the heads and inching forward whenever you have an opportunity to do so. You have enough time, so don't try to go to far and risk getting hit. The middle head has a tendency to alternate traveling with the left head or the right head. You're safest to move when the middle head is moving on the opposite side of the room as you. (Note that in the FDS version, the faerie can interfere with the heads and sometimes cause the middle head to move erratically, making it difficult to clear the room.)
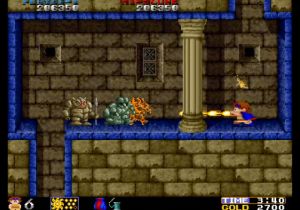
- Rock guard
- The next chamber will feature a lone enemy that stands on the left side of the room before the gap. Whenever you shoot him, he jumps up in the air and stomps on the ground. This causes four rock monsters to fall from the ceiling, grow in size, and approach you. With the Sun Fire weapon, they shouldn't be too much of a threat, but don't let more than eight of them come towards you at any one time. If you have a faerie or two, you can position them in front of you and let them remove the monsters. When the rock monsters are cleared, continue shooting the guard at the end of the chamber until it is destroyed.
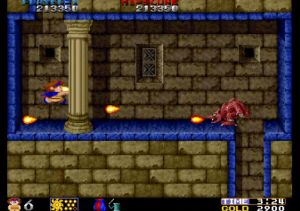
- Fire beast
- In the third chamber, you will encounter the same beast you may have met in the previous stage. This is the red dragon that breathes fire high and low. The strategy to defeat it is the same; hold the joystick down to squat continuously, and jump whenever a low fireball is approaching. Meanwhile, shoot fire at it whenever you have the opportunity. Of all the chambers, this one should be the easiest to overcome.
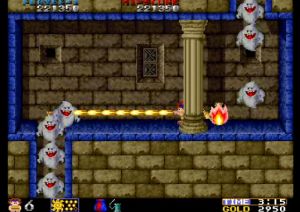
- Ghost army
- The fourth chamber contains what may be the most difficult challenge. After you land, an army of ghosts will appear from both openings in the chamber. One group will file up from below while another group fly down from above. If left alone, they will meet in the middle and kill you. If you don't have any faeries, you're going to have to fire as quickly as you possibly can in order to have any hope of surviving this attack. If you do have a faerie, you'll be very grateful for her help. Simply position her behind you and she will destroy all of the ghosts that fly down from above, allowing you to focus on clearing away the ghosts that appear ahead of you. Note that in some cases, the Sun Fire weapon can actually hurt you here since it's very difficult to fire in one direction and immediately turn around to fire in the other. (Note that in the FDS version, the faerie can't kill every ghost that appears. However, fewer ghosts appear in this version, and they are slower, so you shouldn't need to rely on the faerie as much.)
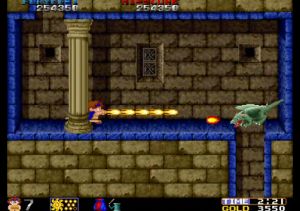
After you clear these four chambers, they actually repeat themselves once more in the same exact order; Sphinx heads, Rock guard, Fire beast, Ghost army. If you were lucky enough to survive these traps once, you should be able to do it again. Once you clear the chambers a second time, you must clear one more chamber, containing the usual dragon boss that you've encountered several times before. This one is identical to the dragons found in Stages 3 and 4, with the ability to breath fire on the ground and in the air. After getting through the other four chambers twice, this dragon should be the least of your troubles. Once you defeat it, drop down the right side, and you will find a staircase that you must descend to reach the left side. Below this drop is where Wardner awaits.
Wardner[edit]
Phase 1[edit]
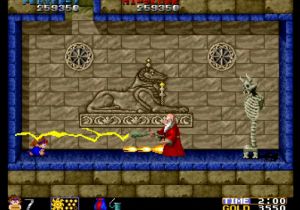
When you first arrive in Wardner's chamber, he will congratulate you on reaching him, and inform you that you won't beat him. While he is talking, take the time to get into position in the left corner of the room, and squat down. Remain squatting as that will protect you against the head-level lightning that he sends in your direction. Fire continuously, and watch out for the flashing orbs that he throws at you. Jump if necessary. Wardner won't be able to withstand much damage in this form, and it won't be long until he shows you his true form.
Phase 2[edit]
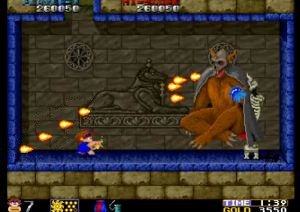
Wardner's true form is that of a giant demon. He will remain on the right side of the room spewing an endless stream of fire at you. While his attack may seem unavoidable, there's actually a pattern that the fireballs follow. Four of the fireballs that land closest to him fall from right to left. The four fireballs that land farthest away from him fall left to right. This actually gives you an opportunity to move back and forth in the center the room to avoid all of the fire. Unfortunately, it really doesn't give you a good opportunity to fight back and attack him. In order to do that, you'll have to jump in the air in order to fire at him, while still being able to move and avoid his flames. Doing so will put you at risk for getting hit in the head, so you'll have to time your jumps very carefully. As you continue to hit him, his face will show signs of wear until he finally turns gray and dissolves. The crystal ball in his hand will fall and shatter, and your girlfriend will be rescued. If you are finding the strategy of dodging his fire too difficult to pull off, read the spoiler below for a much easier method of defeating him.
Walking up to Wardner and touching him will obviously hurt you. However, if you can inch just close enough to him so that you don't touch him, there's actually just enough space between his foot and the rightmost fireball where you can stand and shoot him until he dies without any need to worry about getting hurt. Note that this technique will not work on the FDS version.
