Horror Manor is the first level in Spooktastic World, focusing heavily on a "haunted mansion" aesthetic with skeletons and zombies. The level is split into three main parts: Outside the manor, inside the manor, and the industrial basement. Much like the stages before, there are five Spritelings, eight Gold Statue Parts, eight Red Diamonds, and eight treasures to collect. Starting in this stage, a minimum of four red diamonds are necessary to remove the Stone Doohickey and fight the boss.
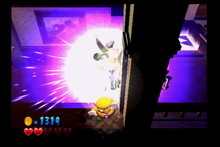
Several new enemies appear only in this stage. The first of these are called Door Spirits, and come in two colors. Brass Door Spirits require six punches to defeat, and occasionally fire projectiles at Wario. Silver Door Spirits require nine hits, and on top of the projectiles that the brass variants fire, silver Door Spirits will also fire large lasers every third damage taken.
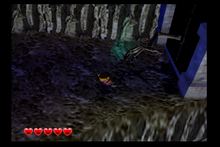
The second is called Big Bone-Fist. These mini-bosses are—as the name would imply—giant skeleton hands that are attached to doors. They have three attacks: The first is to swipe and attempt to grab Wario, and will grip him to deal damage. Rapidly shake the control stick to escape. The second is making a finger gun and firing homing projectiles rapidly. The more damaged the Skeletal Hand, the more projectiles fired. The third attack is slamming onto the ground, revealing a glowing blue spot. By ground pounding on the blue spot, damage will be dealt. This is the only way to hurt Big Bone-Fists, and three hits will defeat the mini-boss.
Spriteling 1[edit]
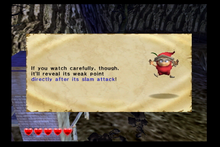
This Spriteling is near-impossible to miss. It's directly in front of Wario as soon as the level begins. It will explain how to defeat Big Bone-Fists.
Treasure: Red[edit]
Immediately after the Big Bone-Fist, the red button will be sticking out of a wall. Immediately on the ledge above it is the treasure. After collecting this treasure, continue heading left. A glue globe will float up to take you to a higher ledge containing Trapdoor 1 and the yellow treasure button.
Trapdoor 1[edit]
This trapdoor features a mining cave aesthetic. There is a cube of blocks floating in the center, with a path carved out in the middle. This maze intends to use the C-stick to see movements made. After hopping in the hole on the right, move as far in to the center, then jump to the left, and follow the path around to the hole on the top of the cube. This trapdoor contains the first Gold Statue Part and the first Red Diamond.
Continue heading right. There will be an optional Crystal Entity ahead, which can be bypassed if Wario jumps behind the white fencing after the narrow walkway.
Gold Statue Part 2, Treasure: Yellow, and Trapdoor 2[edit]
The Gold Statue Part is immediately after the Crystal Entity. Using an enemy nearby or a Pillar, perform a Wild Swing-Ding on top of the strange Swirly Slab in the direction of the swirl to raise the platform up to get to the part. Alternatively, use the white fence to get on top of the opposite pillar and carefully jump across the gap.
The yellow treasure is in the graveyard after Gold Statue Part 2. The button is found near the first Trapdoor.
The second trapdoor has a switch next to a floating block with another switch on it. By punching the first switch, it will cause the floating block to rise, so it must be quickly jumped onto. The process must be repeated again for the second switch/block after this. The trapdoor features a Spriteling explaining Swirly Slabs, and another Red Diamond.
Gold Statue Part 3[edit]
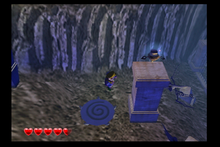
Immediately after the second Big Bone-Fist, there is another Swirly Slab to use to get onto a pillar for the Gold Statue Part. Alternatively, just Corkscrew Conk on top of it.
Trapdoor 3[edit]
This steel trapdoor requires an enemy, and the nearby Swordfish will do the job. The trapdoor is a big ring of moving blocks in a counter-clockwise direction. Either way can be taken though following the flow of blocks moves towards spiked balls that must be jumped over. This Trapdoor only importantly has a Red Diamond, and an optional Wooden Chest in the center.
Trapdoor 4 and Treasure: Chartreuse[edit]
The fourth Trapdoor is to the left of the concrete spire, and requires using the floating glue globes to reach. Upon entering, a series of blocks is rotating in between ledges. The first should be dashed across. This takes Wario to the Gold Statue Part. Run, but don't dash on the second set: The blocks move too quickly, and the staircase must be utilized to obtain the Red Diamond.
The chartreuse treasure is just below the fourth trapdoor. The button is to the left of the two blocked off areas. If you didn't press the button before, it may be possible to throw a skeletal bird at the button from the pad.
Spriteling 3[edit]
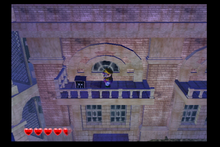
Using the second level of the concrete spire, jump to the Spriteling on the balcony. This Spriteling explains Hyper Suction using the L button.
Treasure: Light Blue[edit]
The button for this treasure is at the top of the concrete spire. Normally, this will summon a Crystal Entity to fight, though it can be bypassed by hugging the wall along the top. The treasure is just inside the manor itself on the balcony. While here, jump across to hit the green button. Don't worry about hitting the chandelier, Wario passes right through it.
Spriteling 4[edit]
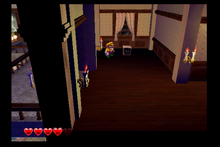
Immediately after the brass Door Spirit, there's the Spriteling out in the open. This guy discusses Autospin after starting a Wild Swing-Ding.
Trapdoor 5[edit]
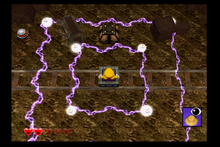
This trapdoor moves quick. Jump over the electrical fences, get the Red Diamond, then get out of there! There is an optional Wooden Chest that can be broken, but it could be considered risky because it is close to the electrical fencing.
Gold Statue Part 5[edit]
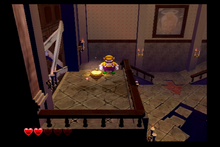
This part is to the left of the giant hole past the second silver Door Spirit, up on the higher ledge.
Falling down the giant hole[edit]
This is considered to be your "point of no return". By now, you will want to have pressed both the green and dark blue buttons, and wrapped up any other collectibles before you enter. Otherwise, it will take a second playthrough in order to collect more goodies.
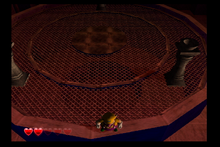
At the bottom of the hole is a Battle Ring. Not interested in fighting? Hold down and run along the bottom of the area to skip by it. There will be a Garlic Dispenser nearby if you get injured.
Treasure: Green[edit]
After hitting the button inside the manor near the light blue treasure, the green chest will be in the basement immediately after the Battle Ring. Use the Swirly Slab at the end of the small watery area, wait for the electricity gates to turn off, and get the treasure.
Trapdoor 6[edit]
Continuing upward from where the green treasure was, head left, dodging the giant spike crushers. Corkscrew Conk off the ledge to get to this trapdoor. While it may look difficult with its spinning blocks, almost the entire puzzle can be skipped by merely jumping from the second rotating block to the end platform. Collect the Red Diamond, then head to the right for a Gold Statue Part. Piece of cake!
Trapdoor 7[edit]
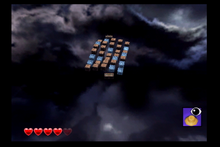
Immediately to the right of the green treasure, go ahead and drop down to the watery area and use a Swordfish to enter the seventh Trapdoor. The fish cannot go over the Trapdoor, so it should provide some safety to fight the enemies. This trapdoor features a large spinning arrangement of blocks—some of them being covered in ice! The big square of blocks does not rotate all the way around, so Wario will need to navigate through the blocks to the other end for the Red Diamond and Gold Statue Part. The ice only makes traversal more difficult, so it can be avoided if desired, but utilized for a faster route.
Treasure: Dark Blue and Treasure: Purple[edit]
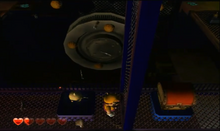
Ascend the large gear after the seventh Trapdoor and go above the next set of large gears. The purple button will be here. Go back over top the first large gear where the seventh Trapdoor was, and head down, passing the two electrical gates. The purple treasure is yours!
With the button on the manor's interior by Trapdoor 5, the treasure's location is directly next to the purple treasure's, only it must be acquired by using the walkway between the two sets of gears. After collecting this treasure, head right and grab a skeletal bird—this will make entry into the last Trapdoor easier.
Trapdoor 8 and Treasure: Pink[edit]
Using one of the skeletal birds from the dark blue treasure area, jump down directly below the walkway between the two gears. There is another walkway with an Ankiron and the final steel Trapdoor. This one features a path of extremely tiny blocks leading to the Red Diamond and final Gold Statue Part. The easiest way to cross is to move in a perfectly straight line, grabbing the edges of blocks if you need to. They are perfectly spaced in a way that Wario should not have to change direction to get across.
After Trapdoor 8, jump down to the right under the two large gear platforms. The pink button will be in the top right corner. Afterwards, use the Swirly Slab to escape. Cross the gears, and after saving the final Spriteling, head underneath to the large electrical gate and pass through for the final treasure.
Spriteling 5[edit]
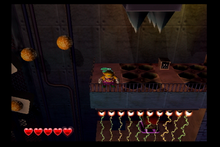
In between the two spiky crushers, the final Spriteling informs you of the upcoming boss Brawl Doll.
Boss: Brawl Doll[edit]
This creepy guy is the boss of Horror Manor. In terms of attacks, Brawl Doll doesn't actually do that much: It will try to smack Wario with its wings or will charge right at him in short bursts of speed. It can be stunned with enough punches, or using one of the flaming pillars. These are the only flaming pillars in the game. Once the three have been used, after enough time, they will respawn in a random position. Simply use the pillars to stun the boss, then use a Mad Move to inflict damage. After damage is dealt, Brawl Doll will float to the top of the arena and fire white lasers. These tend to move through the center more than the sides, and will force Wario to drop any pillars he is carrying. After dealing five skulls of damage to Brawl Doll, it will be defeated and access to Wonky Circus will open.
Completion of this stage will unlock Wonky Circus.


