The final level of the game pits Wario against a plethora of dangerous enemies, tricky puzzles, and the toughest platforming challenges yet. Having a maxed out health bar (7.5 hearts) is encouraged to help traverse to the top of the pyramid. Don't be afraid to use Garlic Dispensers and take breaks while navigating Trapdoors to re-evaluate strategy.
The first part of the guide will go slightly out of order of the map for player convenience. From the levels' start, traverse downwards instead and jump on the bottom border wall. Use it to hop onto the thin pillar to the left, and work your way up. Pass this Trapdoor for now—Wario will pass by here later. Once on the sandy area, progress to the rightmost corner.
Trapdoor 2[edit]

This Trapdoor looks complicated, but it is actually quite simple. Navigate to the bottom of the room with the single Punch Block, and send it careening forward. A chain reaction will begin, and create a staircase system for Wario to climb and save the yellow Spriteling and get the first Red Diamond. Alternatively, if no controls are pressed once entered, a single dash attack forward will also trigger the reaction.
Trapdoor 1[edit]

Return to the pillars where Wario started the level. Two enemies will be here to use to enter the steel Trapdoor, a Scorpion and a Flying Spade. Because the Scorpion is smaller, it is advised to use one of those instead to enter the Trapdoor.
Once inside, press all of the switches to raise upwards, then while standing on the center block, press the final switch to be sent to a high-up platform with the Red Diamond. Do not leave the level yet! Hop back down onto the pyramid below and fall through the center hole where the rising block once was, and it will lead to a very tiny platform with the red Spriteling.
Red Button and Treasure[edit]
The red button is next to Trapdoor 1, and the chest is found by progressing through the beginning of the stage normally. This is the path Wario should take now.
Eventually, Wario is presented with a split path, a ramp upwards or a sandy route downwards. Take the bottom and defeat an orange Crystal Entity. Use the Crystal Entity to hit the chartreuse button located in between the gaps in the topmost wall next to the ramp.


Chartreuse Button and Treasure[edit]
After pressing the chartreuse button on the curved incline, progress up the ramp. The treasure is just to the right of the wind-blowing grate. There's no need to stay on this ledge, so jump off down to the right. Break the Wooden Chest if desired, then progress downward.


Yellow Button and Treasure[edit]
The yellow button is in the bottom right corner of the sandy area. Return to the big ramp with wind grates and progress leftward. The yellow treasure is located at the end of the third wind grate. It may be helpful to break the chest, jump left for safety, then return to grab the treasure when the wind subsides.
There is a blue Crystal Entity fight after this treasure, but it can be avoided by walking close to the center of the pyramid. Cross the Glue Globes on the sandfall. Do not worry about the lower area—Wario was here earlier.


Mini-Boss: Sandworm[edit]

This arena looks familiar...it's Sandworm from Greenhorn Ruins! This mini-boss is completely optional, and doesn't have any new attacks or patterns. Feel free to destroy it again, or just run past to keep progressing. The next place to go is the very bottom of the arena.
Trapdoor 3[edit]
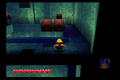
This Trapdoor is notorious for being extremely vague in how to solve it. There are two methods to complete the puzzle, one intended and one not—both are relatively complicated. The Gold Statue Part here is easy, just walk into it on the balcony.
The faster way to complete this stage is to position two Punch Blocks directly over each other—put one against the wall, then ground pound, before punching the other above it. Once this is done, face the Red Diamond in the center as best as Wario can, ground pound, and as the Punch Block is rising, perform a Corkscrew Conk to the center. This is trickier than it looks!


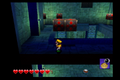
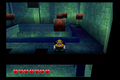
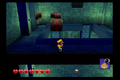
The second method requires a bit of thinking. Climb the ladder to the right and orient the camera to look towards the single Punch Block. From the pair, punch the rightmost Punch Block so that it flies into the solo block. Head to the other side, and do the same with the leftmost block, so that it hits the stationary one. Repeat the process by heading to the opposite side and conclude when all blocks have been moved to the corner. From here, jump on the furthest protruding block, then jump to get the Red Diamond.
-
Step 1
-
Step 2
-
Step 3
-
Step 4
-
Step 5


Gold Statue Part 2[edit]

Leave Trapdoor 3 and walk upwards to the left. Use the weathervane to launch upwards onto the platform with the Mummy Clubbosaur. Climb up right to the wind grate and run to the end for the prize. Once collected, return to the platform with the Mummy Clubbosaur.
Trapdoor 4[edit]

Climb up the Glue Globes for this Trapdoor. Ground Pound the Punch Blocks, and jump to the upper ledge quickly—riding too long crushes Wario into a spiked ball. From there carefully dodge the massive spiked balls by hiding along the sides of the room to cross and collect the Red Diamond. Below is the green Spriteling.
Trapdoor 5[edit]


Head downward to the sandy area, and progress to the leftmost wall, then move downward. Use a statue or a Laser Jigglefish to enter this steel Trapdoor. This is a series of five rotating platforms, with a hole in the center, a light side and a dark side, and two spike balls moving back and forth on the ends. This is a very difficult challenge, so do not be afraid to slow down and approach critically. The first platform rotates in segments to the left. The second platform also does so, but faster. The third platform is constantly rotating to the right, and the fourth platform bounces between being sideways to the left and sideways to the right (it does not fully rotate). The fifth platform is not only rotating, but moving back and forth towards the Red Diamond and Gold Statue Part—it will remain flat, then rotate once very quickly. Given that there are spike balls on the outside of the platforms, passing through the center is the safest method to cross. A suggested pattern to follow would be: Wait on the first platform until the dark side is exposed, wait on the second platform until the light side is exposed, quickly run across the left side of the third platform, jump onto the edge of the fourth platform, also dodging the spike ball, and waiting by jumping back and forth between the center peg and the main platform to wait for the final platform. Repeat the back-and-forth jumping for the fifth platform.
Green Button and Treasure[edit]
The green button is next to the sandfall with Glue Globes near Trapdoors 4 and 5, and the treasure is below the first weathervane to the left edge of Sandworm's arena.


Light Blue Button and Treasure[edit]
The button is located above Trapdoor 5, and the treasure is immediately after the Stone-Cold Statue. It is possible to skip this mini-boss by carefully jumping from the Glue Globe to the ledge.


Mini-Boss: Stone-Cold Statue[edit]

The Stone-Cold Statue blocks your path. It has a series of panels that rotate around and eventually stop on a fixed position. Punch the green spots to deliver damage to a segment, and eventually destroy it. Other segments have a nose (which sucks Wario in), a mouth (that breathes fire) and a pair of eyes (that shoot projectiles). If there is a mouth, its best to avoid attacking for that rotation. Once all segments are destroyed, the Stone-Cold Statue is defeated.
Gold Statue Part 4 and Battle Ring[edit]
The Gold Statue Part is located in the middle of the slide. Unlike Shivering Mountains, it is possible to jump around and reposition to collect this part easier.
This Battle Ring is super easy to bypass—just hold right and up to only walk on the stone flooring and Wario should be able to have skipped it. Should Wario not skip the arena, prepare for a duel against Magons, Mummy Clubbosaurs, Scorpions, and Laser Jigglefish.


Spriteling 4[edit]
The blue Spriteling can be found by climbing up a pillar above the Battle Ring to a higher set of platforms. It gives some tips about beating the boss Ironsider.
Trapdoor 6[edit]
Use a nearby Scorpion to enter the Trapdoor at the bottom left of the blue-sanded area. The first segment of the challenge has spike balls and drop blocks. Wario is actually able to jump directly over the first safe platform to the second, so ignore the challenge by doing so. For the second, grab onto the edge of the first drop block, tap A to let go and immediately re-grab the edge, and repeat this process 3-4 times. Do the same for the second drop block. Now the Red Diamond is yours! There are some spinning moving platforms next, with a trail of Marshmallow Blocks leading to the Gold Statue Part.


Dark Blue Button and Treasure[edit]
The button is located next to Trapdoor 6. Climb the ladder, then head left and down to be on top of the wall where Trapdoor 6 was. The treasure will be at the end. Once collected, carefully navigate back to the section with the Magons.


Trapdoor 7[edit]

Head left over the pillars for the seventh Trapdoor. For it, Wario must quickly perform a Corkscrew Conk off a Marshmallow Block to hit a lever to raise the spike balls on the ladders. Manipulating the camera for a side view may help complete this a little easier for when to jump. Wario must jump onto the Marshmallow Block, so position carefully. Once the lever is pressed, the spike balls do move up...for a moment. They will move back down again, so move quickly. The Gold Statue Part is located here at the top. There will be Rock Blocks floating in the air to crush Wario, but use the first one on either side and Corkscrew Conk facing directly at the corner of the Rock Block once it has risen again to skip the rest of the obstacles and collect the Red Diamond.
Purple Button and Treasure, Gold Statue Part 7[edit]
The purple button is on the sandy area above Trapdoor 7. The chest is located on one of the big statue heads at the very top of the pyramid.
Instead of climbing up the stairs after the purple button, move slightly downward underneath it to find a hidden alcove with the Gold Statue Part. Continue climbing the stairs as normal.


Trapdoor 8[edit]
Carefully take a flying enemy nearby and use it to enter the final Trapdoor—The Great Maze. There is a lot going on, but not all of it will actually be used. From the starting platform, do not follow the main path but jump off to the path on the left, passing by the spiked balls spinning around the path. Cross over two Drop Blocks and two Marshmallow Blocks in the back left before using a Corkscrew Conk over the large gap to another Spike Ball Section. This should lead to a question mark shaped set of platforms. After a set of stairs, the path will split: Take the stairs to the right further to get to the vertical portion. Feel out the tall part of the maze and use the Drop Block to get to the large block at the end of the path. There will be a Wooden Chest here. Halfway done! After the moving block, take the path to the right and jump down a small distance. Follow this path directly to the final Spriteling. This one hints about the ending of the game being determined about how many Spritelings were rescued. From here, turn around and jump down to collect the final Red Diamond.


Pink Button and Treasure[edit]
The pink button is below the Laser Jigglefish before the sandfall with Glue Globes. The chest is located on one of the big statue heads at the very top of the pyramid.


Gold Statue Part 8[edit]
The final Gold Statue Part is anti-climatically in the middle of the final sandfall with Glue Globes. If all parts have been collected, this will take Wario to eight hearts of health. After this section is a large wall that needs Flying Spades Mega Tossed into them to ascend. It may be easier to stun a few before throwing them so the projectiles they fire do not get in the way.
Wario is intended to fight another Stone-Cold Statue, but it can be easily skipped by jumping on top of either stone column or the ByeBye Balloons and then onto the platform. The Stone-Cold Statue won't attack if Wario stands on the Stone Doohickey.


Boss: Ironsider[edit]

Compared to prior bosses, Ironsider runs on the easier side. It will summon several stone hand monsters that will attempt to grab and crush Wario. These stone hands can be punched, stunned, and then used to attack Ironsider. While the hands can be thrown regularly or Mega Tossed, oftentimes other hands will get in the way, and Ironsider doesn't take damage. Use a Piledrive instead! Ironsider's main attack is jumping up and slamming down on a nearby tile, causing a shockwave that needs jumped over. Sometimes, it will jump several times in quick succession. Ironsider's only other attack is to spin around and breathe fire, which does break the stone hand monsters, but also does a full heart of damage to Wario! This can be avoided by ground pounding into the sand. This fight can be very quick by just overwhelming Ironsider with hands before it really has a chance to move very far.
Congrats on completing the final level of the game! The end is just in sight.


