Brr...Shivering Mountains is one chilly environment full of ice and snow enemies trying to stop Wario. If ever frozen, rapidly rotate the control stick to keep on keepin' on. Otherwise, be careful around the slippery slopes—Wario might be able to go down, but not come back up.
Start the stage by moving upwards to the Bunny Spring, and get to the top of the cabin to hit the red button. When moving towards the first large ice slide, stay towards the top. It is difficult to recover if not done.
Trapdoor 1[edit]
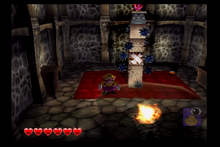
It's possible to cannonball straight into the first Trapdoor on the roof here! This puzzle has spiked balls circling a pillar of Rock Blocks, and Wario must break them to lower the Red Diamond. Only three blocks need to be broken to jump up to the Diamond.
After this, jump to the left cabin and up to the wooden platforms around the festive trees.
Gold Statue Part 1[edit]
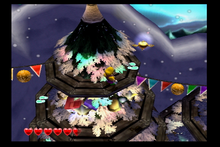
Navigate to the top left wood platform on the tree. The Gold Statue Part is at the top here.
From this point, drop straight down to the lowest section, and press the yellow button to the left of the cabin.
Red Button and Treasure[edit]
The button is at the start of the stage on the cabin at the top of the slide, and the Treasure is located next to the yellow button below the cabin at the bottom of slide.
Spriteling 1[edit]
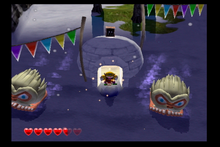
Progressing to the right of the cabin, the first Spriteling can be found on a small igloo in between some sledding Yetis. They cannot hurt Wario, but they can get in the way. The Spriteling informs Wario about the upcoming mini-boss fight.
Mini-boss: Angler Mangler[edit]
The Angler Mangler may look scary, but it actually doesn't have means to harm Wario. It will fire a couple of icicles that can freeze Wario, but they don't do any harm. Instead, the Barrel Buster enemies it summons will try to hit Wario once he is frozen. These enemies can be used to Wario's advantage! Stun a Barrel Buster, and line up a Piledrive directly below the shadow of the Angler Mangler's lure. The head of the Barrel Buster will shoot upwards, smacking into the lure and dealing damage. The Angler Mangler cannot be damaged while spewing ice, so wait patiently to deliver damage.
Gold Statue Part 2[edit]
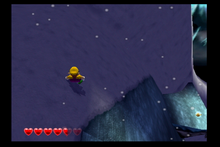
This part is extremely difficult to obtain. It's located towards the top part of the ice slide, but changing Wario's position is difficult once he starts sliding. Try to move the camera to the right and raise it with the C-Stick, and aim to pick it up. If it's missed, Wario must use the Bye-Bye Balloons to replay the stage and collect it.
Regardless if the part is collected or not, quickly orient to be in the middle of the slide. There's an upper ledge that can only be reached through this ice slide, and if it is missed it cannot be accessed again unless the stage is replayed or a ByeBye Balloon is used.
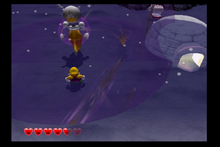
Most likely, Wario will land directly into a battle with an orange Crystal Entity, as well as a Snow Clubbosaur—be prepared to duel. After this battle, head right to the second igloo and smack the dark blue button.
Yellow Button and Treasure and Gold Statue Part 3[edit]
The button is at the cabin on the bottom of the first ice slide, near the red Treasure. The Treasure is located under the far right tree near the dark blue button, for the upper ledge.
At the very top of the far left tree floats the Gold Statue Part. Be careful of the Freeze Cannons on the way up—they can be disabled by Ground Pounding them.
After collecting the part, stay on top of the trees and navigate right.
Trapdoor 2[edit]
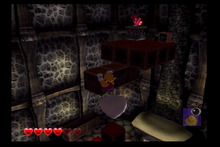
From the sides, Wario should hop up the pillar of blocks by holding on to the edge. The Marshmallow block may seem intimidating, but it just means Wario has to move quickly. There is a Red Diamond and the second Spriteling, who talks about using Icicle Mites to reach high-up ledges.
The Red Diamond, Spriteling, Gold Statue Part, dark blue button, and yellow Treasure are all the collectibles here. Once they are all collected, navigate next to the dark blue button and break the Rock Block to fall into the Battle Ring below.
Battle Ring 1[edit]
This Battle Ring is just about the same as the others. It summons no new enemies, though it has a tendency to have a lot of Ankiron enemies in later waves. Either fight for the money reward, or chill out on top of a pillar.
Dark Blue Button and Treasure[edit]
This is a minor sequence break for the level, and it does not work for Japanese versions of the game—it just prevents a small amount of backtracking. Wario can actually grab the ledge to the left of the dark blue Treasure for a brief period, and immediately jump again to get over the wall where the chest is. The button was in the area above.
Trapdoor 3 and Trapdoor 4[edit]
This steel Trapdoor is conveniently placed next to an Enemy Generator, or an Icicle Mite can be used. There are five blocks and five switches. The rightmost switch just needs punched once to move into place. Then, move to the far left switch and align the last block to be roughly where the end platform is. Do the same for the switch in the bottom left and the fourth block. Then, punch the middle switch and leave the block moving in order to cross the gap. There's a Red Diamond and a Wooden Chest here.
After completing the Trapdoor, use the poles at the top to cross over to the platform with two Ankirons. The purple button is located here. After it is pressed, fall straight down to land on a Wooden Chest—continue rightward afterwards. A large ice chunk blocks the way...and it's moving! It can be destroyed with a standard dash attack, revealing a turtle.
After the second Turtle, use it (or the nearby Statue head) to enter the steel Trapdoor. For the first rotating platform, jump on when it is horizontal and then wait for it to flip to vertical before going to the halfway point. No need to rush—it will orient itself properly. The second platform is trickier, and Wario must do a dash into a Corkscrew Conk to get off the platform in time to get to the end platform. As is the case with many Trapdoors, the coins serve as a distraction and in this case may lead to failure in completing the stage if Wario goes after them. Pass them by and focus on the Red Diamond and Spriteling—the latter of which explains Fattington enemies.
The path splits many ways after this point. The easiest route to follow would be heading down from Trapdoor 4 and moving left, over a few platforms to the fifth Trapdoor.
Trapdoor 5[edit]
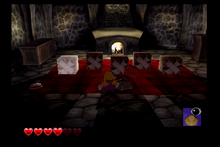
This Trapdoor has a switch that does a memory game with Rock Blocks. If they're hit in the correct order, the Red Diamond and Gold Statue Part appear. If not, Wario must leave and re-enter to try again.
After completing this Trapdoor, head right to reach an area with Icicle Mites. Utilize the first by Piledriving it next to the Enemy Generator to press the green button.
Spriteling 4, Green Button and Treasure[edit]
After pressing the green button, use the other Icicle Mite to reach the ledge with the Spriteling on it. It makes a comment about collecting treasure, which shouldn't be a worry if you follow this guide!
After pressing the green Button with the Icicle Mites, return left to where Trapdoor 4 was, and continue on the leftmost path with two more Turtles. The green Treasure is located in a small alcove at the top.
Chartreuse Button and Treasure[edit]
After collecting the green treasure, use the Statue head or a Turtle to throw at the button against the back wall. Return to the Icicle Mites ledges, and the Treasure is after the Icicle Mites and the first Fattington.
Press the nearby light blue button as well by throwing an enemy at it. Afterwards, take the top path back left, carefully dodging Fattingtons on the way. They can't be dashed through, but they can be jumped over. Eventually, Wario will reach a Bunny Spring to lead to a ladder upwards.
Light Blue Button and Treasure and Gold Statue Part 5[edit]
This ladder takes Wario to a small outdoor area above the cavern. There are a few collectibles here:
- Pink Button
- Gold Statue Part 5
- Light Blue Treasure
Once all of these are collected, return to the passages with the Fattingtons. Wario should remain towards the top to exit on the top path—there's an Ankiron guarding a Trapdoor here, indicating the right place.
Trapdoor 6[edit]
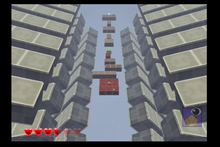
Use a cannonball from the Ankiron to enter. The Ankiron can be used, but Wario doesn't always fit by using it. The Trapdoor itself is very easy, only featuring a few moving platforms. It contains the sixth Gold Statue Part and another Red Diamond.
Trapdoor 7[edit]
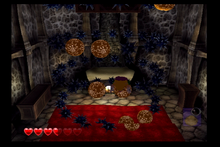
Rapidly dash up the snow path to dodge the falling Fattingtons. This section gets very annoying if they land, so don't give them the chance! They can be progressively stunned with enemies at the bottom if this is an issue. The trapdoor itself features multiple rings of rotating spiked balls with a few Glue Globes in between. Moving the camera to be a side-angle is most useful here. Hop on the first, wait to get a feel of when the next Glue Globes will intersect will be, and jump up. Trying to chain jump up these rings is pretty dangerous, and unlikely to do effectively—slow and steady will reward Wario with a Red Diamond and Gold Statue Part. Be careful on the way down as well!
Battle Ring 2[edit]
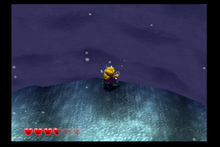
There is a second battle ring immediately after the seventh Trapdoor, but it can be skipped quite easily—hop above the ice barrier and stay firmly against the back wall. The Battle Ring will never trigger and Wario can proceed.
Mini-boss: Angler Mangler[edit]
The second Angler Mangler operates exactly the same as the first, though the arena is a little smaller. It will take four hits to defeat instead of three, but there are no new attacks or changes to the attack pattern.
Purple Button and Treasure[edit]
The purple button is early into the cave, near Trapdoor 3 and two Ankirons. The treasure is after the Angler Mangler on top of an ice platform, towards the top of the slope.
Gold Statue Part 8[edit]
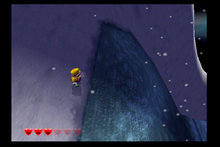
This Gold Statue Part is on the final ice slide for the level. Unlike the last one, it cannot be seen on camera prior to sliding as well as Wario being required to jump to collect it. This is an extremely difficult piece to collect—if it is missed on the first try, it will be better to finish the stage and replay it to try again, as there will be a ByeBye Balloon at the start of the level to help traverse back.
There is no definite place to align Wario in order to collect it every time, but a general area to line up is about one full Wario-width away from the shadow line that appears towards the bottom of the slide.
Pink Button and Treasure[edit]
The pink button is found in the outdoor area above the cave, and the treasure is at the very end of the level with the ByeBye Balloon and Garlic Dispenser. If Wario needs health, now is a great time to refill, as the boss is challenging and may drain Wario's hearts.
Trapdoor 8[edit]
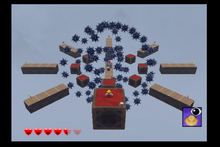
This Trapdoor may look challenging or intimidating, but simply hold forward and make two small jumps to skip any spiked balls. The final Red Diamond is here along with the final Spriteling.
Boss: Winter Windster[edit]
This creepy thing is the boss of Shivering Mountains. The arena is a platform surrounded by sharp spikes, and four pits of lava. Winter Windster spends most its time in the air, floating around and firing projectiles. Fortunately, Winter Windster is weak to almost every one of its own attacks. The first major attack is spewing ice breath, trying to freeze Wario. Wario should attempt to get frozen here—after breaking free by rapidly moving the control stick left and right, Wario is free to punch Winter Windster a few times to stun it. Be careful, as the boss is also trying to punch back! When damaging Winter Windster, ONLY use the Piledrive mad move, as sometimes a Wild Swing-Ding or Mega Toss will fail to deliver damage if it hits the spikes. The next attack is dropping several cannonballs randomly to attempt to crush Wario. If they get thrown into a lava pool, it will create a massive fire plume that will knock down Winter Windster, allowing Wario to punch it to stun the boss. There is a delay on throwing in a cannonball to the fire plume going off—generally, if Winter Windster is over one lava pool, a cannonball thrown into the direct next pool will go off just in time to knock down the creepy figure.
The next attack is generally rare, but if not prepared can do massive damage. The camera will shift, and Winter Windster will have glowing red eyes. Do not look at the boss, have Wario face the camera when this happens! If not, the boss will turn into wind and enter Wario, ballooning him over the spikes on the side of the stage.
More attacks include firing blue projectiles in rapid succession of three, and the final is turning yellow and jumping into a lava pool. Winter Windster is immune to punches (and lava damage) when yellow, and will spin around to create shockwaves that must be jumped over. To stop this phase and instantly stun the boss, Mega Toss a cannonball at the icy foe.
There are no real phases to the fight, just a lot of difficult attacks. After five skulls of damage have been delivered, Shivering Mountains is complete.


