Defensive line
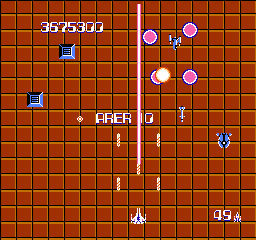
Although there are still two more stages beyond the tenth Area, this stage presents itself as the last defensive live of the System. Once you reach the next Area, you will be taking the fight directly to the system itself. This simply decorated stage contains four fortresses, with two very long stretches where the primary enemy that you face are squadrons of Degids. Therefore, special weapons 0 or 3, especially when upgraded to maximum, are very viable options.
1st Fortress
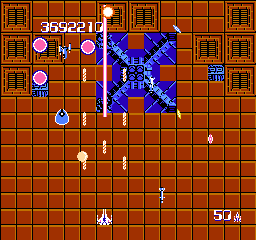
- Core compostion: 1 Panel Core
- Time limit: 60 seconds
- Bonus: 20,000 points
Although this fortress resembles the single Panel Core fortress that you encountered in Area 3, the intensity of this fortress' attack is much greater. The Turret 4s at each corner should not pose too much of a direct threat, so you can focus your attack on the only core, while watching out for any enemy crafts that arrive to remove you.
Be aware that often you can't shoot the Icons for more points but enemy erasers come very handy in the following section.
Degid attacks
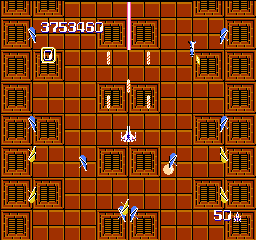
For the next stretch of the stage, you will have to move continuously in order to dodge the Degids which arrive in huge numbers from both sides of the screen. If you can lure a series high enough to swing back down, you can let them all merge and destroy them in one fell swoop while you fire up from beneath. Just be sure to keep your eye on either side of your ship for even more Degids that will arrive while you are setting up your strike on the existing Degids. This section will be easier with special weapon 0 or 3, but Degids are supported by other enemies whose type depends on your aggression level which can make surviving this section quite a challenge.
The ability for Erasers to end a wave of predefined enemies prematurely may come very handy here if you managed to release both of them from Icons situated next to first fortress. In this section, there are 2 waves of blue Degids and 2 waves of Yellow degids. When you see both types of Degids to appear onscreen, use the eraser. This will provide a section free of them for a half of this section after that they return which is a good time to use the other Eraser.
If you're not confident enough and don't have any enemy erasers onscreen, you can also retreat to the extreme left or right side of the screen. That way Degids pose no threat and you only have to worry about the other attacks. Beware that there's a chance that blue Teruzas or other enemies may (depends on your aggression level) join in and can destroy your ship without warning. If lots of enemies which won't threaten you in that position (like purple Umbers) appear, stop shooting since this makes sure that same enemies appear for extended periods of time, increasing your chance of survival.
2nd Fortress
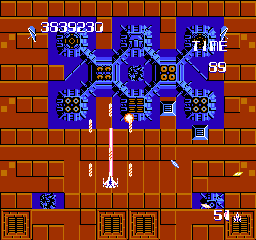
- Core compostion: 1 Big Core, 2 Round Cores, 2 Combo Cores, 1 Panel Core, 2 Slit Cores
- Time limit: 90 seconds
- Bonus: 30,000 points
Unlike other area mid-stage fortresses, this fortress composition is quite new and quite deadly. Unless you have Super Guns and a maxed out Special Weapon 5 or 7, you should employ a special strategy to fight this fortress. First, you should attempt to remove the three front cores, leaving all remaining five cores exposed. Then you should try to strike each of the remaining cores evenly, moving back and forth, attempting to strike each other a little at a time. Eventually, they should all weaken so that by the time you end up destroying one of the remaining cores, you are close to destroying all of them. This way, you won't be subject to the increased aggression of any one remaining core for a very long time.
Hidden fairy
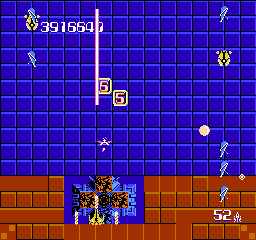
After you leave the area of the second fortress, you may notice what appears to be a false fortress. If you concentrate your fire on the single Round Core as it scrolls past the screen, you are likely to discover a fairy after shooting at the hidden Terrier tile located beneath the core. It is very wise to leave the fairy on the screen, and wait until the end of the area to collect it. It will help you slip past one of the two final fortresses with ease.
More Degids
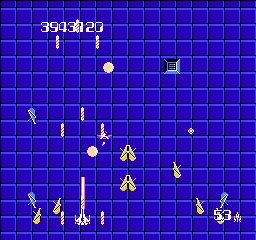
As before, you will face a long stretch between fortresses, and the Degids will return to attack en masse. Most notable section is just when area of blue tiles appear which causes a dense wave of yellow Degids appear. More often than not, you will have to focus on positioning your Zanac for survival instead of focusing on scoring opportunities. If you are truly desperate, you can grab the fairy to clear the screen of enemies, but you will no longer have the choice to use the fairy for the final fortress. Meanwhile, many Special Weapon tiles can be uncovered and collected at this point if you are unsatisfied with your current arsenal.
3rd Fortress
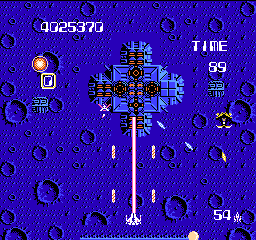
- Core compostion: 4 Round Cores, 4 Panel Core, 1 Combo Core
- Time limit: 90 seconds
- Bonus: 30,000 points
The third fortress, which is identical to first fortress in area 4, is almost (but not quite) as powerful offensively as the final fortress. However, the cores are arranged much more closely together, making it easier to take out more than one core at a time. Therefore, between the two last fortresses, it might be better to save the fairy for the final fortress. If you attack this fortress, focus your attack down the central column of cores to do the most damage, and deal with the Panel Cores on the sides last.
Of most interest in this battle are the two Icon statues on either side. If you can, do not strike either of them until you defeat the fortress. Then, when the battle is concluded, release the two Enemy Erasers from either Icon. If you still have the Fairy, then you can gradually collect each eraser and the fairy to clear the screen of enemies and reduce the enemy aggression level three times before reaching the final fortress.
Final Fortress
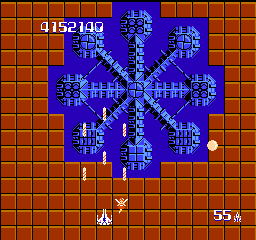
- Core compostion: 3 Round Cores, 3 Combo Cores, 2 Slit Cores, 1 Panel Core
- Time limit: 90 seconds
- Bonus: 40,000 points
While this fortress seems arranged quite similarly to the final fortress at the end of Area 4, the core composition of this fortress is much more difficult, and should be attacked very carefully. If you managed to hold on to the fairy throughout the entire stage, you will be grateful for its immediate fortress defeating ability. If not, you will have to carefully attack each of the cores. You can use the tried and true strategy of commencing your attack from one side and crossing over to the other. If you have a powerful weapon, this should suffice. If not, you will have to do a better job positioning the Zanac in the most advantageous place to destroy each core while avoiding bullets and other enemies.