Outer compound
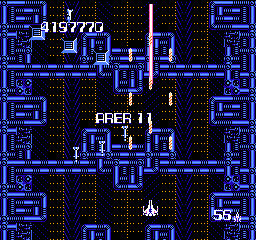
Now that the Zanac has slipped past the Systems defenses, the eleventh area occurs in the outer compound of the System. In order to finish the game, you'll have to cross this section to reach the inner compound where the System resides. The background here seems to repeat endlessly, but the colors progress from blue to red, indicating how close you are to completion. In addition, screen scrolls very slowly here, giving more time for enemy Cores to fire at you. If you have managed to hold on to the fully powered up Special Weapon 5 laser beam, you should have no trouble with this area at all except the first sections. If not, you'll want to power yourself up as much as possible before you face off with the Somasu Capital Ship.
Enemy aggression in the first section is very high. In addition, there's a deadly combination of predefined enemies. T-Cells which make a return in this section have a nasty tendency to block away your shots. In addition, Type-1 E-Fains also return so proceed with caution if you're moving near the middle part of the screen. To add to the chaos, purple Lusters and both types of Degids will show up frequently here.
Eye Eye
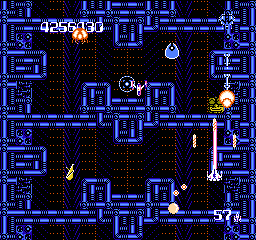
In order to help you out, the game pitches one Eye Eye statue your way at a rather slow pace. If you're quick enough, or can anticipate its arrival, you can power up your weapons to maximum. If you had an opportunity to collect a Tile 5 or Tile 1 before this occurs, grab it so that you can be boosted to the laser that is capable of blasting through Capital Ships. Unlike other Special Weapons, the laser cannot be reflected, allowing you to do substantial damage to the ships with each shot. Also, if you power up Tile 1 to the max, special weapon 1 maxed out cannot be reflected by capital ships. Don't forget about the T-Cells that are floating about in an attempt to block your shots. Try to prevent them from crowding the screen by ramming into them in an effort to remove them before the Eye Eye appears.
Single Cores
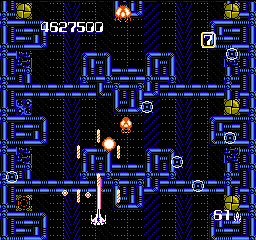
Before the Somasu arrives, you travel through a corridor that is populated with cores on other side of the screen. Twice as many appear on the right as on the left, so you should hang out on the right side if you have enough fire power and destroy them. If you're low on fire power, you may want to stick with the left side in order to ensure that you have enough time to fire on each core and destroy them. It is more important to survive this journey past the cores than to destroy as many of them as you can, so judge the situation accordingly, and back off if you are about to get hit by a bullet. Be aware that purple Lusters are still present and won't stop appearing until Somasu makes a return.
Somasu battle
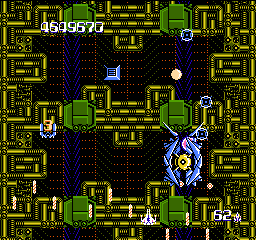
The Somasu is big and threatening, and it attacks with three different types of weapons. You may find it daunting the first time that you encounter it, but if you have a strong Special Weapon, especially one that is capable of defeating Leads, then you actually have very little to fear. The more challenging factor from offensive power is its endurance which is 100 hits before being destroyed. You should employ a strategy very similar to those that you have used against many of the slow moving Capital Ships that you faced earlier. Stay beneath it as long as you can to attack it, until you are to forced to move out from under it. Then relocate to a position at the top of the screen, and lure it back to the top so that you can slide back under and resume your attack. Between the different attacks that it uses, the small Leads are the most dangerous, as the other two, Besuos and Mios, are relatively slow and easy to defeat, even with Standard Guns. When Somasu isn't defeated quickly enough (which is likely with your default weapons), it will stop chasing you, flying off the screen.
With fully upgraded weapon 5, Somasu can be defeated very quickly, making this section very empty where, like in area 6 and 7 capital ship fights, only Sart or Cargo appear.
Two Maserus
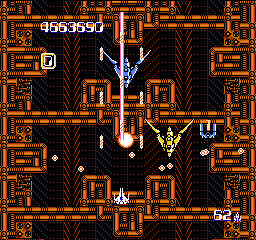
Once the Somasu battle concludes, you will be faced with not one, but two Maseru ships, the first Capital Ship that you ever encountered. By now, their stationary attack pattern should prove to be rather easy to deal with compared to the more persistent Capital Ships. However, the presence of two of them might require that you tweak your strategy somewhat. The second one will appear just a few seconds after the first, around the time that the first one becomes solid and vulnerable to your attack. Continue to focus on the first Maseru until it is defeated, before moving on to the second one. However, when the second Maseru materializes, be sure to track the motion of the Leads that it spreads across the screen, and get out of the way if one is headed for you. Once the first Maseru is defeated, you can focus all of your effort on the second.
Mortar attacks
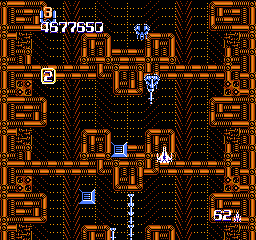
Whether you have defeated both, one, or none of the Maserus, the enemy forces will resume their attack after a while, and they will lead off with Sig missile firing Mortars (or Takuwashis). While they are not a tremendous threat by themselves, if you are still dealing with one or both of the Maserus, they can pose quite an obstacle, as their Sigs can interfere with your attack. For this reason, it is vital that you clear out the Maserus before the Mortars begin to appear in large numbers. Once the Maserus are taken care of, the Mortars are a lot easier to dispose of, and will pose far less of a threat.
Second core alley
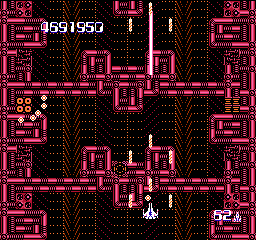
On your way down the final stretch of the Outer Compound, you will pass through a corridor loaded with more Cores. The screen scrolling slows to crawl here, giving more chances for each core to fire its ammunition at you (each core stays onscreen for more than 8 seconds!). Unlike the earlier section of Cores, some of the Cores occupy the middle of the route. Combo Cores are on the left, Round and Big Cores at the middle and Panel Cores on the right. Once again, the priority is on survival and not the massive destruction of the Cores. However, any Core that you can remove from the screen will increase your chances of getting through the area. With three areas to choose from (right, center, and left), you'll have to choose a route and stick with it. Weaving back and forth between sections will only increase the odds that a Core will fire a bullet that will catch you off guard. Move as much and as little as you have to to avoid the shots and stay alive. Note that this core alley is also much longer than the previous one.
When the cores stop appearing, you're close to the fortress and only the normal aerial enemies appear until then.
Final Fortress
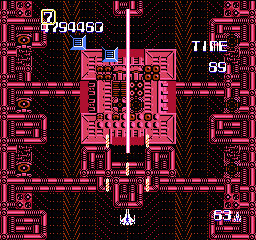
- Core composition: 5 Big Cores, 5 Round Cores, 2 Combo Cores, 1 Panel Core, 1 Slit Core, 4 Mono Cores
- Time limit: 90 seconds
- Bonus: 70,000 points
To call this fortress difficult is an understatement. Not only are you concerned with the group of 12 cores situated in the center cluster of the screen, you must also concern yourself with the six outlying cores sitting on the sides of the screen. 3 Big Cores and 3 Round Cores occupy the edges, and must also be removed before the fortress is considered crushed. You should try to take them out before going after the center cluster of cores so that the only major offense that you need to worry about is coming from one location. Once the sides are taken care of, you are free to annihilate the central cores in any fashion. When moving about the screen, don't forget that moving up close to the cores is a good strategy as well. You can dodge attacks that are flying beneath you, and you increase the rate of fire to a single core when you get closer to it. Just watch out for shots that can pass through your own weaponry, such as Leads if your Special Weapon cannot destroy them.
Be aware that if you cannot destroy this fortress in the provided time limit (90 seconds), you will not advance to the next Area. Instead, you will be forced to repeat this area.