Green Zone
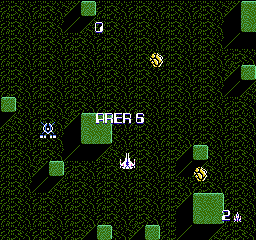
The sixth area seems to take place over a green zone populated by some kind of architectural ruin. The pace of the scrolling does not get quite as high as it does in other areas, nor does the intensity of the enemy attacks. Compared to the previous area, this area will seem somewhat tame, but it will still keep you on your toes.
Near the beginning, all 3 types of umbers start to appear. It's advised to stay near the center to pick them off as soon as possible.
False Fortress
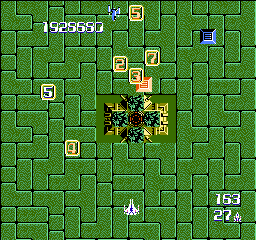
Not long after the start, you will encounter what you might believe to be the first fortress. It is reminiscent of the second fortress of the first area; a single Round Core surrounded by four random Special Weapon providing tanks. However, the stage will not stop scrolling as you approach this supposed fortress, and you will simply fly by. It is possible to destroy the Round Core if you concentrate enough fire on it, but it is not necessary. If anything, this should be seen as an opportunity to upgrade your Special Weapon.
Girebu battle
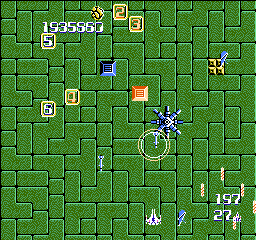
Shortly after flying over the false fortress, a new capital ship, the Giberu will appear. The Giberu isn't extraordinarily different than the Hume ship that you faced in the previous area. It will very slowly track the position of your ship, and close the distance between you. The big difference is the Giberu's ability to fire Leads in 16 different directions, which it will do at regular intervals. Once again, you must position yourself beneath the Girebu and fire at it as much as you possibly can before you are forced to move out of its way. Then lure it to the top of the screen until it is high enough to sneak back under and continue firing at until it is destroyed. In first moments of Giberu battle, it's supported by Umbers, especially yellow ones but they'll soon stop appearing. When you happen to die when positioned near the side of the screen, Girebu might fly away away altogether. If that happens or Girebu is destroyed quickly, this section until the first fortress will get very quiet and devoid of enemies altogether, aside from occasional Sart or Cargo.
Hidden fairy
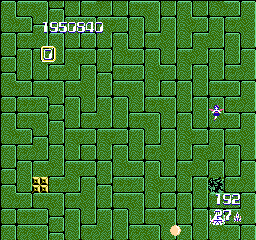
Not long after the Girebu appears, you will notice Grocks, inert square ground targets, populate the sides of the stage at regular intervals. If you continue to attack the Grocks on the right side, you will eventually dislodge Rio the fairy from a Terrier hidden beneath one of the Grocks. If possible, save this fairy for after the first fortress, as it will come in handy later on.
1st Fortress
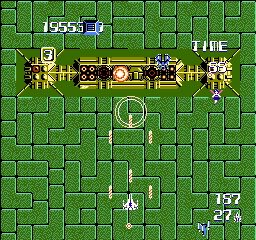
- Core composition: 2 Big Cores, 2 Round Cores, 2 Slit Cores, 2 Mono Cores
- Time limit: 90 seconds
- Bonus: 30,000 points
This fortress contains eight cores, all arranged in a straight horizontal line. This allows you to attack a couple of cores at once, but certainly not all of them. As to where you should attack first, the two Big Cores and two Round Cores in the center are the biggest threat. However, if you destroy them first, you must then attack one side and return to the other. Another strategy is to work from one end to the other in a straight line, as this will not make the Big and Round Cores fire at their most aggressive rates since a Mono Core will still be left for last.
Lander potential
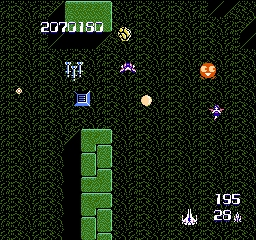
With a huge number of Sarts and Cargos arriving on the screen after the first fortress, it is somewhat likely that the right conditions will arise where you can make a Blue Lander appear. It's extraordinarily difficult to make this happen intentionally, but the frequency of the Sart and Cargo appearances makes it possible. Be sure to keep an eye out for any Blue Landers that you create, and remember to shoot at them until they become Red Landers to gain the fire rate improvement. Even if your fire rate is at maximum, Red Landers drop to the bottom of the screen, making them a little easier to collect.
Giza flood
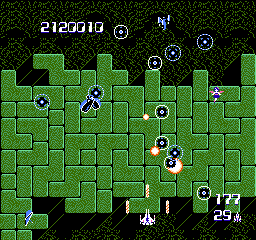
On the way to the final fortress, you will encounter a large number of Gizas dropping from the top of the screen. These tough enemies require a large number of shots to destroy, and they can easily overwhelm the Zanac if your firepower is not strong enough. If you have managed to hang on to the fairy up until this point, this would be an excellent occasion to collect her now. Wait until Gizas occupy roughly the top half of the screen, and then touch the fairy. Not only will she erase the Gizas, she will also reduce the enemy aggression level, potentially ending the Giza flood altogether.
Hidden Eraser
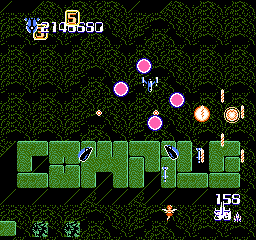
After the Giza flood starts, you will notice a particular arrangement of blocks that seems to spell out the word Compile, which is the name of Zanac's developer. It just so happens that an Enemy Eraser is hidden in the "E" at the end of the word. If you fire at the "E" long enough, the Eraser will appear, which you can use to clear the screen and reduce the enemy aggression level.
Alternately, you can wait for the eraser to turn hollow, and then collect it; this will warp you to level 8.
Final Fortress
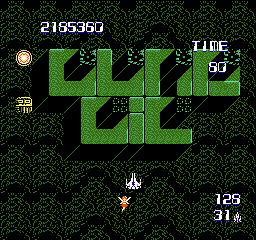
- Core composition: 1 Big Core, 3 Round Cores, 2 Combo Cores
- Time limit: 80 seconds
- Bonus: 40,000 points
If you followed this walkthrough to the letter, and collected the fairy when the Giza flood began, then the fairy will simply obliterate this fortress for you and you will proceed immediately the Area 7. If you do not possess the fairy when you reach this fortress, you'll need to deal with the six cores which are spread out across the fortress. The Big Core on the right should be taken out first, followed by the three Round Cores. It can be difficult to hit the two middle Round Cores without striking the Combo Cores in the front, but try to get a clean shot at them. An Icon on the left side of the screen can be shot to obtain an Enemy Eraser, which you can use to clear the clutter of bullets from the screen.