Maps[edit]

Walkthrough[edit]
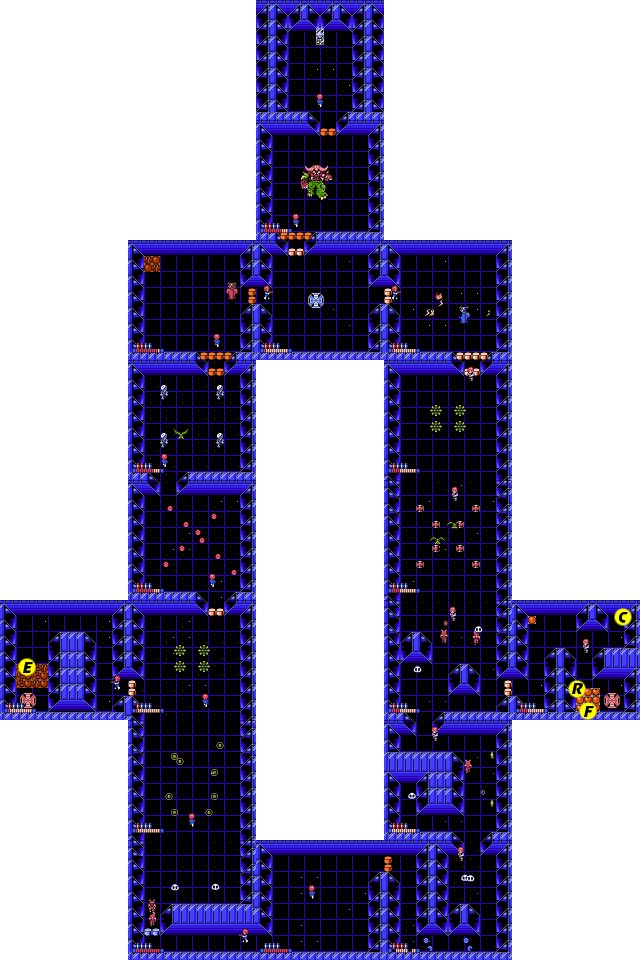
You've worked hard to make it to the seventh and final level. As a result, you won't have to work too hard to complete this one. It is essentially a big "O" with a two supply rooms located on either side. There are no gaps to fall into, so there is no underground, and there are no stairs so there is no dungeon.
First Crystal[edit]
You start in the center of the bottom of the stage. Which direction you choose to explore first is arbitrary, but the left side offers better health increase opportunities, so head to the left first. You'll encounter two Skele Spectres and two Wus, attacking you from behind a barrier. You can destroy this barrier, so create an opening, and deal with the enemies as you see fit. Continue to the screen above, and you will encounter eight Myu Rings. They shouldn't pose a big threat, so advance to the screen above.
Here you will be locked in the room with four Hotchkiss cannons. You must destroy them to remove the barriers to the room to the left, and the room above. Do so, and explore the room to the left first. This room will provide you with a lot of tiles, most of which will help improve your health, including the extra Energy Tank that you will easily find out in the open. Collect them, and then destroy the Crystal Diamond Guard dome to collect the crystal. Return to the previous room, and destroy the cannons again to gain access to the room above.
Second Crystal[edit]
Dodge the red flash bombs that patrol this room and keep going to the screen above. You will have to face four Zombies and a Falcon in order to remove the barrier that blocks your path to the room above. Take them out from a safe distance, and go north.
You will encounter one of the stage bosses here, the Red Mutant. Mutants phase into one location, shoot a lot of lightning bolts everywhere which erupt in fire, and phase out before reappearing somewhere else (or sometimes in the same location). You can only attack them when they are completely phased in, and they don't stick around long, so it's difficult to get more than two shots off on them. Be sure not to stand where they are appearing. When this one is defeated, collect the flashing apple (and the items in the corner) and head to the right. You will find another Crystal Diamond Guard dome to destroy. Collect the crystal. You will note that a barrier exists to the path heading up. This barrier will not be removed until you have collected all three crystals. Only one more to go,
Third Crystal[edit]
Now, if you have plenty of health, you should continue to the right, but if you don't, you should attempt to get more by fighting the cannons in the room below the first mutant and trying to earn enough points to summon Konamiman. When you are ready, head to the right, and prepare to fight the second of the two Mutant bosses. Other than being blue, and having slightly fewer hit points, this one attacks the same way as the other. Get into a good shooting position while it is phasing in. Defeat it and collect the apple it drops, and continue south.
You can ignore the four cannons for now and continue on to the room below. There are two Falcons flying among eight land mines here. Your best strategy is to ignore them all and zip down to the next screen. Here you will have to fight with two Skele Spectres and two Wus. Defeat them in order to lower the barrier to the room on the right. Head inside, and you will see a room similar to the one where you found the first crystal. There are many more items to collect, including a free Range Increase and Fire Rate Up enhancement. If you still need to collect a second Cannon Shot enhancement, there is one hidden in the upper right corer of the room. Destroy the Crystal Diamond Guard dome and collect the crystal.
Rescue Stella[edit]
With all three crystals in hand, it's time to face the final boss of the game and rescue your girlfriend. Head out of the third crystal's room and start heading back to the north. You will have to destroy all four Hotchkiss cannons in order to lower the barrier to the second Mutant's room. Fortunately, it will stay defeated, so all you need to do is return to the center room to the left. When you arrive there, the barrier will be lowered. If you feel that you are ready, and have enough health (as close to full as possible), head through the path to the room above.
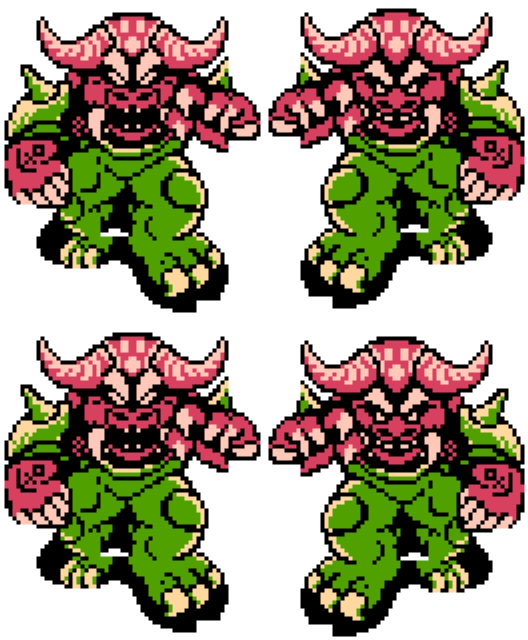
Your ultimate nemesis, the Satan Cow, the mastermind behind the kidnapping of your girlfriend, and the entity who wants your interdimensional transport technology all for himself, will appear before you. He has two ways of attacking you: by touching you, and by breathing flames on you. His touch is extremely deadly, so you should avoid getting hit by him physically at all costs. It only takes a few hits to wipe you out, even at full health.
He begins in the middle of the room. You always want to try to attack him just off-center. After he gets tired of shooting flames at you, he will start to rampage around the room, trying to get close enough to hit you. This is when you must begin running to the far corners of the room, first to the nearest corner in the south, then cross over to the same corner in the north, and then over to the other side, and so on. The idea is to lure the Satan Cow to the far edges of the screen so that you have the most amount of space available to run away from him when he begins to charge again.
Once he is positioned against a wall, you can begin firing at him from across the room. When he starts to move, lure him to one side of the room, then quickly run in the opposite direction, so that you wind up across the room from him when he stops moving. Continue this strategy of firing across the room and luring him away from the direction you intend to run until he is defeated. When he is beaten, the barrier to the room above will be lowered, and there you will find your kidnapped girlfriend, Stella, who will run into your arms. Congratulations.


