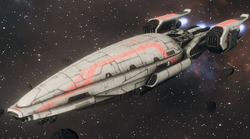
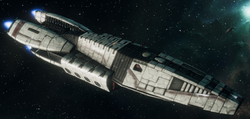
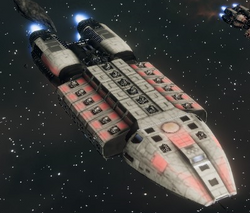
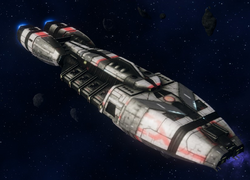
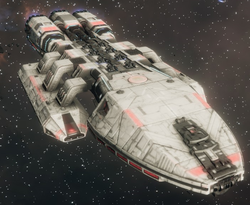
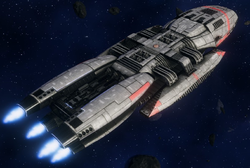
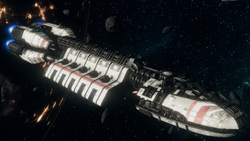
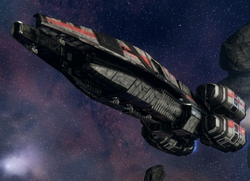
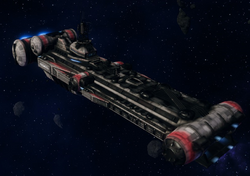
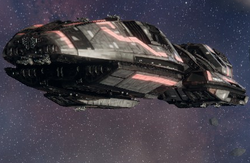
Colonial vessels are straightforward, crude, and uncompromising. What they lack in speed and finesse, they make up for with heavy armour and very powerful weapons.
There is a statistic unlisted in this section of the guide: Marine Armour, which improves the survivability of Marines when fighting off enemy boarding actions. All Colonial ships have a Marine Armour value of 40 by default, which is improved by taking a defensive posture and reduced with an offensive posture. As all Colonial vessels share this statistic, it is unlisted in the section below.
Postures[edit]
Colonial vessels can operate from one of two stances, or postures. An Offensive Posture will redirect strength away from the Armoury, Hangar, Engineering, and towards Fire Control. A Defensive Posture will redirect strength away from Navigation and Fire Control and towards Hangar, Engineering, Tech Bay, and Armoury.
The power of these postures is dependent on the rank and skills of an attached CIC officer. Without an officer (and by extension, in Skirmish and Multiplayer), your ships can go to +4 Offensive to +4 Defensive. Adding a CIC officer will allow your ships to adopt more extreme stances, going as high as +9 or +10 to either offensive or defensive stances, making ships extremely powerful.
Offensive stances are powerful once your ships are in position, but the reduction in diving abilities (especially important as most Colonial ships have their guns aimed upwards) makes adopting offensive stances risky in multiplayer. A neutral stance provides the best manoeuvrability in turns, and the best vertical mobility necessary in multiplayer. Adopt a defensive stance when:
- Your ship is under heavy attack; a defensive posture increases the power of the Engineering subsystem, which provides a damage reduction.
- The ship is using flak to damage enemy fighters or missiles: flak effectiveness is determined by the Armoury subsystem.
- To fight off boarding parties: the Armoury subsystem increases the number of Marines on your ship, as well as their Armour stat.
- To increase scanning range: although a ship in a defensive posture will not move as quickly, a defensive posture will improve scanning range; allowing you to see the enemy before they see you.
- To resist and counter Cylon hacking attacks: the Tech Bay subsystem determines the strength of your ship's Firewall, which Cylons must reduce to zero before hacking your subsystems.
- To repair damaged subsystems: as with hacking, if at any point you need a crucial subsystem (like Navigation or Fire Control) repaired, adopt a defensive stance to get it repaired quickly.
Finally, there is also a Boost Thrusters option. Turning this on will reduce the effectiveness of all subsystems, but sharply increase your ship's speed. Thruster boosting reduces your ship's mobility, scanning range, and firepower, so use it only outside of battle.
Base Game[edit]
Manticore Class[edit]
The Manticore Class is a swift corvette, with a strong emphasis on speed and its DRADIS range. This makes it the most effective Colonial scout ship. As guided weapons like missiles cannot be fired until targets have been identified, this makes the Manticore pair well with missile-oriented ships.
Compared to the Cylon Nemesis, the Manticore easily outguns its Cylon counterpart. However, the Cylon Nemesis is a far superior scout; by redirecting power to its tech bay, the Cylon Nemesis can have a DRADIS range in excess of 10 km. The Nemesis is also much faster than the Manticore.
Campaign: As mentioned above, the Manticore is more than a match for the Cylon Nemeses you'll find early game. They will begin having problems against the Talon, which is more heavily armoured. Manticores quickly retire from the front lines to the support role, replaced by Adamants, Berzerks, and finally Battlestars.
Multiplayer: Most Colonial fleets, if they have enough points room, will employ at least one Manticore to quickly scout the enemy fleet and make them visible for missile attacks. The nose gun on the Manticore can also be used to chase off lighter enemies like Talons and Nemeses.
Official Description: Predominantly used for hit-and-run tactics and scouting missions, the Manticore also serves well in larger strike groups as a flanking element. Long range compatible missile tubes and an uncommon aft-facing turret configuration makes this a versatile fighter.
| Engineering | |||||||||||
|---|---|---|---|---|---|---|---|---|---|---|---|
| Hull | Damage Reduction | ||||||||||
| 60 | 20% | ||||||||||
| Front | Left | Right | Rear | Top | Bottom | ||||||
| Fire Ctrl | 45 | Arm. | 30 | Arm. | 30 | Nav. | 30 | Tech Bay | 45 | Engr. | 30 |
| Fire Control | |||||||||||
| Munitions Slots: 1 | 100% salvo size | 4 turn reload | |||||||||
| Corvette Gun | Nose mounted, arcs down | ||||||||||
| Light Turret x2 | Rear mounted, arcs up | ||||||||||
Adamant Class[edit]
The Adamant class is a heavily armoured escort frigate, equipped for broadside engagements.
Essentially a mini-Battlestar, the Adamant provides exceptional durability for its cost. Its multitude of light weapons are effective at supporting friendly Vipers against enemy fighters, and at engaging smaller enemy escorts like the Nemesis class and the Cerastes class.
The Adamant's firepower is exceptional for its size, due to achieving nearly 100% hit chance against most Capital ships. All of the Adamant's weapons are mounted to the side with firing angles facing upwards, making them unable to respond to attacks from the front, rear, or below. Keep your Adamants below enemy vessels to maximize their effectiveness. When an Adamant needs to come about under fire to show an undamaged side to the enemy, it is safer to turn backwards instead of forwards, as the ship's Rear armor is much thicker than its Front armor.
Campaign: Adamants will remain at the forefront until you unlock the Artemis class Battlestar, which will often be used as a command ship with the Adamants backing it up. Despite their small size, they remain quite durable even into the late game. They remain a good counter to smaller, nimbler ships like the Cerastes which Battlestar Artillery will have problems hitting. Adamants also serve as excellent support for Carrier fleets due to their Squadron slot and ability to kill enemy fighters.
The Adamant class blueprint becomes available after Mission 3.
Multiplayer: Adamants are often relegated to a support role on multiplayer matches. If you have a few points left over and are unsure what to bring, bring an Adamant. It's an excellent jack of all trades ship that can tank a few shots as part of a gun fleet, shoot missiles as a missile boat, and operate as a light carrier with its average fighter bay. An excellent multirole ship to fill out your fleet's weaknesses, no matter what they are.
Official Description: Designed by Sinon Quade a decade before the start of the Cylon War, the Adamant carrier and cruiser combo has become the cornerstone of many Colonial Fleet groups. This economic frigate provides constant presence and firepower on the battlefield.
| Engineering | |||||||||||
|---|---|---|---|---|---|---|---|---|---|---|---|
| Hull | Damage Reduction | ||||||||||
| 60 | 20% | ||||||||||
| Front | Left | Right | Rear | Top | Bottom | ||||||
| Hangar | 30 | Engr. | 60 | Engr. | 60 | Nav. | 60 | Fire Ctrl | 60 | Tech Bay | 45 |
| Fire Control | |||||||||||
| Munitions Slots: 1 | 100%% salvo size | 4 turn reload | |||||||||
| Light Turret x4 | Left side, arcs up | ||||||||||
| Light Turretx4 | Right side, arcs up | ||||||||||
Minotaur Class[edit]
The Minotaur Class is a gunship that fulfills the role of a gun cruiser. An Aerilon design, it is highly effective against both smaller ships like the Cerastes, Nemesis and enemy squadrons, as well as larger ships that it can train its guns on. It has the same standard guns that a lot of other ships have, just more of them. Its medium turrets are effective at dealing light damage to fighter brawls, and can contribute alongside its heavier guns to larger targets.
It is reasonably durable, while also being able to keep pace with your battlestars. It is also notable for being one of the few Colonial ships with ventral guns, giving it a fighting chance against ships below it. Being above its target, however, does limit the ship's broadside. At great distances, the Minotaur can get its dorsal, ventral, and port or starboard guns all firing at a single target.
The primary weakness of the Minotaur is that guns are all it brings. With no Vipers and no point defence ability, lone Minotaurs will find themselves chipped away by long range missile barrages and enemy fighters. Use Minotaurs to support battlestars, carriers, as a deterrent to opponents that dare to close the distance.
The Minotaur Class becomes available after Mission 7.
Campaign: By the time this ship is unlocked, players will have access to the Artemis class Battlestar, which one or two Minotaurs can support with their additional gunfire. They make poor centerpieces for fleets, given their aforementioned weaknesses. While the ship is poorly suited to the kiting tactics players typically use against an AI with superior forces, a well-ranked Minotaur can both destroy enemy fighters and tank aggressively, due to its ability to spin rapidly and present fresh armor facings before retreat-jumping out.
Multiplayer: An excellent medium speed gun-oriented ship, the Minotaur's primary weakness in multiplayer is its relatively short range compared to missiles and strike craft. Its guns do have a longer range than usual, compensating for its main weakness. Have it behave like a Berzerk without the fighter bay; while it can eat a few shots, it cannot withstand concentrated fire, and falls quickly to heavy guns because of its large size. Its medium guns can contribute to both capital ship damage and to fighter brawls.
Official Description: The Minotaur warship is a testament to the pragmatic nature of the Aerilan people; you build a ship, give it plenty of armour, and fit every other spare inch with guns. It is a cost-effective fixture for fleet groups looking to bulk up their firepower.
| Engineering | |||||||||||
|---|---|---|---|---|---|---|---|---|---|---|---|
| Hull | Damage Reduction | ||||||||||
| 105 | 20 | ||||||||||
| Front | Left | Right | Rear | Top | Bottom | ||||||
| Tech Bay | 60 | Arm. | 75 | Arm. | 75 | Nav. | 45 | Fire Ctrl | 60 | Engr. | 75 |
| Fire Control | |||||||||||
| Medium Turret x6 | Left side, arcs up | ||||||||||
| Medium Turret x6 | Right side, arcs up | ||||||||||
| Heavy Turret x2 | Front mount, arcs up | ||||||||||
| Heavy Turret x6 | Top, arcs up | ||||||||||
| Heavy Turret x6 | Bottom, arcs down | ||||||||||
Atlas Class[edit]
The Atlas class is a dedicated carrier with a better than average Squad Evasion stat. Its Squad Evade stat is the second best in the fleet, beaten only by the Berzerk. Its Squad Repair rate is top of the line, allowing damaged squadrons to return to the fray faster. The Atlas' support squadron slot can only be filled with Raptors, Assault Raptors, or Sweepers.
While it is far from helpless, the Atlas' weapons are not as strong as a Battlestar's, limiting its damage output without its squadrons.
The Atlas becomes available after Mission 9.
Campaign: Using Atlases in the campaign is not too different from using the Minotaur: it is a question of taste. Bringing along multiple squadrons with only one capital ship is helpful, but some players prefer the firepower, mobility, and squadron survivability of Berzerks. Atlases are survivable enough in the campaign to serve as command ships for officers, though most players will prefer the Artemis as their command ship for its extra firepower.
Multiplayer: Most players will either have the Atlas perform on the front lines and have it absorb damage, or in the rear with its squadrons. Carrier-oriented fleets will have at least one, and its slow speed compliments the Jupiter class well. Whether its fighters are tying up enemy fighters or behaving on their own accord, the Atlas is an excellent carrier with a superior repair rate for its squadrons, letting them get back into the fight quickly. The support slot is most commonly filled with an Assault Raptor squadron, but both Sweepers and default Raptors can be effective as well.
Official Description: The Atlas is an iconic remnant of Virgon's imperialist history. Slow and densely armoured, the Atlas carrier now provides powerful fighter support for modern Colonial fleet groups.
| Engineering | |||||||||||
|---|---|---|---|---|---|---|---|---|---|---|---|
| Hull | Damage Reduction | ||||||||||
| 135 | 20 | ||||||||||
| Front | Left | Right | Rear | Top | Bottom | ||||||
| Hangar | 80 | Tech Bay | 120 | Fire Ctrl | 120 | Nav. | 80 | Arm. | 140 | Engr. | 120 |
| Fire Control | |||||||||||
| Heavy Turret x3 | Left side, arcs up | ||||||||||
| Heavy Turret x3 | Right side, arcs up | ||||||||||
| Medium Turret x2 | Top, arcs up | ||||||||||
| Medium Turret x2 | Bottom, arcs down | ||||||||||
Ranger Class[edit]
The Ranger is a missile cruiser, equipped with a pair of rapid-firing munitions slots. If ship experience is enabled, this salvo can become even larger. It is a bit on the flimsy side, so keep it protected.
Unlike most Colonial ships, the Ranger can perform well against targets below it, thanks to the downward arc of its pair of heavy guns and the omnidirectional nature of missiles. Rangers can function above your fleet, raining torpedoes down on Cylon vessels from above.
The Ranger becomes available after Mission 5.
Campaign: Unlocked alongside the Artemis, the Ranger is best used as a support ship. Keep it above targets and use guided missiles against smaller, faster targets like Nemeses and Cerastes, or unload constant streams of torpedoes against enemy Basestars.
Multiplayer: The Ranger is a very fragile ship that requires finesse to use. A support ship through and through, and one of the two cornerstones of Colonial missile fleets (the other being the Janus). The Ranger does have a few medium guns on its belly that can fire to the side, so despite its fragility it can be used to assist your Vipers in fighter brawls. Keep an eye on your Ranger's ammunition stores; rapid firing missiles can quickly run dry.
Official Description: Originally a Picon specialist design, the Ranger class cruiser has more recently become morepopular throughout the Twelve Colonies. Its combination of long range dominance and skirmish-range turret configuration makes it a highly effective all-rounder in any strike group.
| Engineering | |||||||||||
|---|---|---|---|---|---|---|---|---|---|---|---|
| Hull | Damage Reduction | ||||||||||
| 90 | 20 | ||||||||||
| Front | Left | Right | Rear | Top | Bottom | ||||||
| Fire Ctrl | 60 | Arm. | 45 | Arm. | 45 | Nav. | 45 | Engr. | 60 | Tech Bay | 45 |
| Fire Control | |||||||||||
| Munitions Slots: 2 | 100% salvo size | 2 turn reload | |||||||||
| Medium Turret x4 | Left side, arcs up | ||||||||||
| Medium Turret x4 | Right side, arcs up | ||||||||||
| Heavy Turret x2 | Front, arcs down | ||||||||||
| Medium Turret x2 | Bottom, arcs down | ||||||||||
Artemis Class[edit]
The Artemis Class Battlestar replaces the Adamant as the centerpiece of your fleets in the midgame. An excellent blend of mobility, armour, and firepower, the Artemis class can be relied upon to both dish out and take damage for your fleet. The acquisition of the Artemis marks the beginning of the mid-game, and can serve well enough as the centerpiece of your fleet until the finale.
Its primary weakness is its lack of ventral weapon coverage. While the Battlestar Artillery is excellent at dealing with large enemy ships and the point defence guns are excellent against smaller, weaker ships like Manticores, Talons, and Nemeses, it only has two Battlestar Artillery turrets covering its belly. Getting below an Artemis will render it almost helpless, especially against light ships.
Battlestars like the Artemis have access to the Flak special ability. When used, this creates a bubble of explosive shells to either the left or right of the ship, critically damaging any squadrons entering its field of effect and intercepting missiles and torpedoes. However, careless use of Flak not only damages your own craft, but also will shoot down your own missiles. Do not be the Artemis Captain who loads a nuke onto an Artemis and fires it into their own flak.
The effectiveness of flak is determined by the Armoury subsystem, and cannot be used if the Armoury is offline. Flak also deals extremely light damage to capital ships that enter its range. While battlestars should not use flak as a primary weapon to damage enemies, keep the light damage in mind if you try to retreat a critically damaged friendly vessel into a flak screen to scrape fighters off of it.
Campaign: The strong survivability of this battlestar makes it the ideal command ship to stick an officer in. Ensure it remains protected, especially against Cylon torpedo spam. Flak can help against torpedoes and, to a lesser extent, Raiders.
Multiplayer: The Artemis fulfills a similar role in multiplayer as it does in single player. It remains a well balanced ship with armour second only to the Jupiter. Remember that its effectiveness against targets above or below is limited, so do not carelessly dive with the Artemis and leave its dorsal or ventral armour vulnerable to torpedo salvoes. Similar to the Adamant class, the Artemis can either close the distance against missile or carrier oriented opponents, or flee from fights it cannot win and attempt to whittle down the enemy fleet with attrition.
Official Description: The Artemis Class Battlestar is the most commonly deployed command ship by Colonial Fleet. Moderate speed, high armour ratings, and aggressive turret battery placements make this battlestar a dominating force on the battlefield.
| Engineering | |||||||||||
|---|---|---|---|---|---|---|---|---|---|---|---|
| Hull | Damage Reduction | ||||||||||
| 120 | 25 | ||||||||||
| Front | Left | Right | Rear | Top | Bottom | ||||||
| Arm. | 80 | Hangar | 80 | Hangar | 80 | Nav. | 60 | Fire Ctrl | 70 | Engr | 70 |
| Fire Control | |||||||||||
| Munitions Slots: 1 | 100% salvo size | 3 turn reload | |||||||||
| Point Defence Turret x8 | Left side, arcs up/down | ||||||||||
| Point Defence Turret x8 | Right Side, arcs up/down | ||||||||||
| Heavy Turret x2 | Forward, arcs down | ||||||||||
| Heavy Turret x2 | Bottom, arcs down | ||||||||||
| Battlestar Artillery x8 | Top, arcs up | ||||||||||
Jupiter Class[edit]
The Battlestar Galactica herself is of this class. With a huge array of heavy guns, the Jupiter Class is as strong as it gets in terms of Battlestars. As with other battlestars, the Jupiter sports heavy guns in the form of Battlestar Artillery to bring against larger ships, and point defence turrets to deal with escorts like Manticores, Adamants, Talons, and Nemeses.
Notably, unlike the other Colonial ships, Jupiters do have access to six Battlestar Artillery turrets on its belly, allowing it to perform reasonably well against all targets regardless of where they are.
Battlestars like the Jupiter have access to the Flak special ability. When used, this creates a bubble of explosive shells to either the left or right of the ship, damaging any squadrons entering its field of effect and intercepting missiles and torpedoes. However, careless use of Flak not only damages your own craft, but also will shoot down your own missiles. The Jupiter can create the largest flak bubble out of the battlestars, making it adept at protecting other ships behind and around it.
The effectiveness of flak is determined by the Armoury subsystem, and cannot be used if the Armoury is offline. Flak also deals extremely light damage to capital ships that enter its range. While battlestars should not use flak as a primary weapon to damage enemies, keep the light damage in mind if you try to retreat a critically damaged friendly vessel into a flak screen to scrape fighters off of it.
Campaign: At over 2,000 points, the Jupiter class is not advised for junior officers with a small fleet point limit. Taking a Jupiter into combat leaves little room for anything else. With higher ranked officers, however, the Jupiter can replace or support the Artemis against larger ships. Other players will continue to rely on the Artemis itself.
Multiplayer: The slow-moving Battlestars are often targets for things like EMP mines and utility craft like Assault Raptors, Raptors, Heavy Raiders, and Wardrivers. Similar to the Artemis, the Jupiter will perform its best up close due to its reliance on battlestar artillery to deal damage. Unlike the Artemis, the Jupiter has a few defences on its belly, so a target below the Jupiter is not a problem. The Jupiter still prefers having targets above it, however.
Official Description: Designed by Sinon Quade as a direct response to the rise in Cylon aggression, the Jupiter class is the pinnacle of Colonial battlestar design. A fine balance of size, armour, and artillery make it the most powerful warship currently flying for Colonial fleet. Production of the Jupiter class is limited by the Articles of Colonization, with only one to be built for each of the Twelve Colonies.
| Engineering | |||||||||||
|---|---|---|---|---|---|---|---|---|---|---|---|
| Hull | Damage Reduction | ||||||||||
| 165 | 25 | ||||||||||
| Front | Left | Right | Rear | Top | Bottom | ||||||
| Armoury | 120 | Hangar | 120 | Hangar | 120 | Nav. | 60 | Fire Ctrl | 90 | Engr. | 90 |
| Fire Control | |||||||||||
| Munitions Slots: 1 | 100% salvo size | 3 turn reload | |||||||||
| Point Defence Turret x8 | Left side, arcs up/down | ||||||||||
| Point Defence Turret x8 | Right side, arcs up/down | ||||||||||
| Battlestar Artillery x2 | Forward, arcs down | ||||||||||
| Battlestar Artillery x8 | Top, arcs up | ||||||||||
| Battlestar Artillery x6 | Bottom, arcs down | ||||||||||
Reinforcement DLC[edit]
Berzerk Class[edit]
The Berzerk Class is a light escort carrier. What it lacks in protection, it makes up for with excellent firepower, low cost, and the most effective Colonial hangar system.
If you have the Reinforcements DLC, this ship is unlocked at the start of the game.
Campaign: Early game fleets will usually consist of the Adamant class supported by this vessel. The Berzerk does more damage but cannot take the beating the Adamant can. These two ships will compliment each other well until you unlock the Artemis class Battlestar. After unlocking the Artemis, the Berzerk remains notable for its highly effective hangar system. 50 points of Squad Evasion can stack with both a CAG officer and veterancy bonuses (if enabled) to get in excess of 77 Squad Evasion. Equip this Berzerk with Mark 2 Vipers and they will be nearly impossible to kill.
Multiplayer: One of the centerpieces of carrier-oriented fleets, the Berzerk is a fast escort carrier with sharp teeth. Its fragility means it will often be focused down by gun fleets, so it should generally use its speed to stay safe, or use its medium guns to help win fighter duels. Thanks to its cheap fleet point cost, it can be used to help round out any fleet.
Official Description: The Berzerk class carrier is a fast and effective force multiplier. The carrier is not designed to survive prolonged engagements by itself. However, when supporting a battlestar or strike group, it can provide powerful complementary firepower and squadron support.
| Engineering | |||||||||||
|---|---|---|---|---|---|---|---|---|---|---|---|
| Hull | Damage Reduction | ||||||||||
| 70 | 20 | ||||||||||
| Front | Left | Right | Rear | Top | Bottom | ||||||
| Engr. | 40 | Arm. | 30 | Tech Bay | 30 | Nav. | 35 | Fire Ctrl | 30 | Hangar | 30 |
| Fire Control | |||||||||||
| Medium Turret x5 | Left side, arcs up | ||||||||||
| Medium Turret x5 | Right side, arcs up | ||||||||||
Janus Class[edit]
The Janus Class is a powerful missile cruiser that performs similarly to the Ranger class. While the Ranger has rapid-reloading munitions slots, the Janus prefers to dump all its damage into a single spike. With a 120% munitions salvo size that only gets larger with veterancy bonuses and a large amount of ventral weapons, the Janus will fly above its targets and rain torpedoes and missiles below.
The Janus does not gain any bonus from nukes, so avoid equipping the Janus with a single-shot weapon.
Campaign: The Janus is a powerful missile cruiser that can also absorb a fair amount of damage on its own. Equip it with torpedoes and unload them against stationary targets like Basestars. Ensure a Celestra is on hand to resupply the Janus and keep it in the fight.
Multiplayer: Unlike most Colonial vessels, the Janus is highly effective against targets below it. The Janus is also notable for its total lack of broadside or dorsal guns, making it helpless against targets above it. With its strong emphasis on heavy guns and only a few slower-firing medium guns, and only 135 Marines on board, the Janus is also extremely vulnerable to Heavy Raiders.
Official Description: The Janus heavy cruiser is an old Gemenese ship, made popular during the later stages of the imperial wars between Virgon and Leonis. Heavy armour plating provides it with enough staying power to remain relevant in modern warfare, although its older fire control systems are considered outdated compared to more modern cruisers.
| Engineering | |||||||||||
|---|---|---|---|---|---|---|---|---|---|---|---|
| Hull | Damage Reduction | ||||||||||
| 95 | 20 | ||||||||||
| Front | Left | Right | Rear | Top | Bottom | ||||||
| Arm. | 95 | Tech Bay | 95 | Tech Bay | 95 | Nav. | 80 | Fire Ctrl | 80 | Engr. | 80 |
| Fire Control | |||||||||||
| Munitions Slots: 3 | 120% salvo size | 4 turn reload | |||||||||
| Medium Turret x2 | Forward, arcs down | ||||||||||
| Heavy Turret x3 | Bottom, arcs down | ||||||||||
Broken Alliance DLC[edit]
Celestra Class[edit]
The Celestra support vessel carries no weapons, but instead offers remote drones to apply up to 20 extra points of armour to any vessel for a given facing. It also has access to resupply Raptors to resupply friendly vessels with additional munitions - even nukes.
When given the order to apply armour, the Celestra grants 30 units of armour to its drones, which will apply 20 units of armour to the target. The drones will stay on station and apply the remaining 10 points to the armour facing as it takes damage before returning to the Celestra to take another 30 units.
The applied armour does not expire or deteriorate outside of enemy attack, so you can have your Celestra apply additional armour to other ships or to a different facing. Multiple Celestras can apply armour faster, but they cannot apply more than 20 additional armour to any facing. As it does not cost anything to apply the armour, keep the drones working at all times.
Celestras also have two munitions slots that can be swapped with other ships using resupply raptors. The supply raptors will take the munitions slot on the Celestra and swap it with the munitions slot on another vessel. When the resupply Raptors return to the Celestra, it will take the capital ship's original munitions slot and apply it to the Celestra. The Celestra can also be used to "top off" various ships in the fleet, if you have partially used a slot of missiles or torpedoes, for example. Celestras can also be used to switch weapons mid-fight, particularly if you intend to use single-shot nukes. After firing the nuke, have a Celestra present to resupply the now-empty slot with guided missiles to continue fighting.
Campaign: During the campaign, the addition of a Celestra class vessel does not consume any fleet points, making the Celestra an easy addition to any fleet. The AI will often focus the Celestra down, especially with missiles, so ensure the Celestra remains behind your battlestar fleet where missile attacks will be intercepted. When protecting a Celestra, remember that the Minerva has a smaller flak bubble than the Jupiter and the Artemis.
Multiplayer: Multiplayer fleets do not have a support slot. Consuming 550 fleet points for a ship that does not contribute to damage is not a good idea. Using the Celestra in multiplayer usually involves improving all your ships' armour. A Manticore for 50 points less than a Celestra will scout enemies and provide a mobile missile platform.
Official Description: The Celestra class support was originally a self-sustaining civilian research ship that was coopted by Colonial Fleet. This support uses remote drones to apply adaptive armour plating. A resupply depot has been retrofitted into the hangar, allowing Raptor crews to make supply runs mid-mission to fleet cruisers and battlestars.
| Engineering | |||||||||||
|---|---|---|---|---|---|---|---|---|---|---|---|
| Hull | Damage Reduction | ||||||||||
| 60 | 20 | ||||||||||
| Front | Left | Right | Rear | Top | Bottom | ||||||
| Hangar | 20 | Arm. | 20 | Arm. | 20 | Nav. | 20 | Tech Bay | 20 | Engr. | 20 |
Minerva Class[edit]
The Minerva is to the Artemis as the Berzerk is to the Adamant: a glass cannon with lots of guns. The Minerva should remain in a supporting role due to its fragility, supporting the sturdier Artemis class. It has slightly longer ranged guns than other Colonial vessels, allowing it to keep its distance while shelling targets, and alongside two missile slots, cements its position as a backline fighter.
The biggest problem with the Minerva, aside from its fragility, is its relatively small flak field, making it ill equipped at protecting other ships in the fleet, and its less than impressive hangar stat. Keep its fighter wing close, and don't be too aggressive with them.
Battlestars like the Artemis have access to the Flak special ability. When used, this creates a bubble of explosive shells to either the left or right of the ship, damaging any squadrons entering its field of effect and intercepting missiles and torpedoes. However, careless use of Flak not only damages your own craft, but also will shoot down your own missiles. Do not be the Artemis Captain who loads a nuke onto an Artemis and fires it into their own flak.
The effectiveness of flak is determined by the Armoury subsystem, and cannot be used if the Armoury is offline. Flak also deals extremely light damage to capital ships that enter its range. While battlestars should not use flak as a primary weapon to damage enemies, keep the light damage in mind if you try to retreat a critically damaged friendly vessel into a flak screen to scrape fighters off of it.
The flak protection bubble the Minerva is smaller than that of the Jupiter and the Artemis, so the Minerva is not as effective at protecting ships other than itself with flak.
Campaign: An Artemis supported by a Minerva will be able to cut through most Cylon fleets, including the intimidating Basestars. Ensure the Minerva is kept behind the lines with enough side clearance to launch missiles cleanly.
Multiplayer: A difficult ship to use in multiplayer due to its fragility. As with in the campaign, use the Minerva as a second-line Battlestar, supporting your front line in spite of its official description touting its heavy long range guns. With 11 point defence guns per side, it can contribute meaningfully to fighter brawls, but ensure its own fighter group remains secure due to the lower defence.
Official Description: The Minerva, a predecessor to the post-war Mercury, highlights a marked shift in battlestar design, moving the focus from stability and defence to raw firepower. Despite being smaller than the Jupiter, the battlestar's aggressive turret placements on every sector has given the Minerva a reputation as an effective capital destroyer.
| Engineering | |||||||||||
|---|---|---|---|---|---|---|---|---|---|---|---|
| Hull | Damage Reduction | ||||||||||
| 22 | |||||||||||
| Front | Left | Right | Rear | Top | Bottom | ||||||
| Arm. | 60 | Hangar | 60 | Hangar | 60 | Nav. | 45 | Engr. | 45 | Fire Ctrl | 60 |
| Fire Control | |||||||||||
| Munitions Slots: 2 | 100% salvo size | 3 turn reload | |||||||||
| Point Defence Turret x11 | Left side, arcs up/down | ||||||||||
| Point Defence Turret x11 | Right side, arcs up/down | ||||||||||
| Battlestar Artillery x2 | Forward, arcs up/down | ||||||||||
| Battlestar Artillery x8 | Top, arcs up | ||||||||||
| Heavy Turret x5 | Bottom, arcs down | ||||||||||
| Medium Turret x4 | Rear, arcs up/down | ||||||||||
Sin & Sacrifice DLC[edit]
Heracles Class[edit]
| File:BSG-HeraclesClass.png | |
| Strategic | |
|---|---|
| Fleet Points | 1250 |
| Build Cost | 450 (1250 rushed) |
| Build Time | 4 turns |
| FTL Cooldown | 4 turns |
| Navigation | |
| Speed | 115 m/s |
| Turn Rate | 48°/turn |
| Size Class | 4 |
| Tech Bay/Armoury | |
| Marine Strength | 200 |
| DRADIS Range | 4 km |
| Firewall Regen | 4.8/sec |
| Veterancy | |
| Experienced | +3% Damage Reduction |
| Veteran | +6% Damage Reduction +5% Accuracy |
| Elite | +9% Damage Reduction +10% Accuracy |
| Engineering | |||||||||||
|---|---|---|---|---|---|---|---|---|---|---|---|
| Hull | Damage Reduction | ||||||||||
| 120 | 25% | ||||||||||
| Front | Left | Right | Rear | Top | Bottom | ||||||
| Tech Bay | 120 | Arm. | 60 | Arm. | 60 | Nav. | 80 | Fire Ctrl | 100 | Engr. | 100 |
| Fire Control | |||||||||||
| Point Defence Turret x10 | Left side, arcs up/down | ||||||||||
| Point Defence Turret x10 | Right side, arcs up/down | ||||||||||
| Heavy Turret x3 | Forward, arcs down | ||||||||||
| Heavy Turret x8 | Top, arcs up | ||||||||||
| Heavy Turret x8 | Bottom, arcs down | ||||||||||
Resurrection DLC[edit]
Jupiter Class Mk 2[edit]
| File:BSG-Jupiter2Class.png | |
| Strategic | |
|---|---|
| Fleet Points | 2700 |
| Build Cost | XXXX (XXXX rushed) |
| Build Time | XXXX turns |
| FTL Cooldown | 4 turns |
| Navigation | |
| Speed | XXXX m/s |
| Turn Rate | 42°/turn |
| Size Class | 4 |
| Hangar | |
| Hangar Slots | 2 normal 2 support |
| Squad Evasion | 20 |
| Squad Repair | 100 |
| Tech Bay/Armoury | |
| Marine Strength | 200 |
| DRADIS Range | 4 km |
| Firewall Regen | 7.7/sec |
| Veterancy | |
| Experienced | +10 Firewall Strength +3% Damage Reduction |
| Veteran | +20 Firewall Strength +6% Damage Reduction +10% Flak Damage |
| Elite | +40 Firewall Strength +10% Damage Reduction +20% Flak Damage |
| Engineering | |||||||||||
|---|---|---|---|---|---|---|---|---|---|---|---|
| Hull | Damage Reduction | ||||||||||
| 180 | 25% | ||||||||||
| Front | Left | Right | Rear | Top | Bottom | ||||||
| Arm. | 140 | Hangar | 140 | Hangar | 140 | Nav. | 80 | Fire Ctrl | 100 | Angr | 100 |
| Fire Control | |||||||||||
| Munitions Slots: 1 | 100% salvo size | 3 turn reload | |||||||||
| Point Defence Turret x8 | Left side, arcs up/down | ||||||||||
| Point Defence Turret x8 | Right side, arcs up/down | ||||||||||
| Battlestar Artillery x6 | Forward, arcs down | ||||||||||
| Battlestar Artillery x8 | Top, arcs up | ||||||||||
| Battlestar Artillery x6 | Bottom, arcs down | ||||||||||
Ghost Fleet DLC[edit]
Defender Class[edit]
| File:BSG-DefenderClass.png | |
| Strategic | |
|---|---|
| Fleet Points | XXXX |
| Build Cost | XXXX (XXXX rushed) |
| Build Time | XXXX turns |
| FTL Cooldown | XXXX turns |
| Navigation | |
| Speed | XXXX m/s |
| Turn Rate | XXXX°/turn |
| Size Class | XXXX |
| Hangar | |
| Hangar Slots | 1 |
| Squad Evasion | XXXX |
| Squad Repair | XXXX |
| Tech Bay/Armoury | |
| Marine Strength | XXXX |
| DRADIS Range | XXXX km |
| Firewall Regen | XXXX/sec |
| Veterancy | |
| Experienced | XXXX |
| Veteran | XXXX |
| Elite | XXXX |
The Orion Class will be released along with the Ghost Fleet DLC. This page will be updated when the DLC releases. It is known that the Orion will have at least one fighter slot and at least one munition slot.
Unique to the Orion will be its Stealth Mode. While it can still be shot at and physically seen, missiles cannot be launched at it while under stealth, nor can the ship be the target of focused fire.
Campaign: Unreleased content.
Multiplayer: Unreleased content.
Official Description: Unreleased content.
| Engineering | |||||||||||
|---|---|---|---|---|---|---|---|---|---|---|---|
| Hull | Damage Reduction | ||||||||||
| XXXX | XXXX | ||||||||||
| Front | Left | Right | Rear | Top | Bottom | ||||||
| XXXX | XXXX | XXXX | XXXX | XXXX | XXXX | XXXX | XXXX | XXXX | XXXX | XXXX | XXXX |
| Fire Control | |||||||||||
| Munitions Slots: XXXX | XXXX% salvo size | XXXX turn reload | |||||||||
| XXXX | XXXX | ||||||||||
Orion Class[edit]
| File:BSG-DefenderClass.png | |
| Strategic | |
|---|---|
| Fleet Points | XXXX |
| Build Cost | XXXX (XXXX rushed) |
| Build Time | XXXX turns |
| FTL Cooldown | XXXX turns |
| Navigation | |
| Speed | XXXX m/s |
| Turn Rate | XXXX°/turn |
| Size Class | XXXX |
| Hangar | |
| Hangar Slots | XXXX |
| Squad Evasion | XXXX |
| Squad Repair | XXXX |
| Tech Bay/Armoury | |
| Marine Strength | XXXX |
| DRADIS Range | XXXX km |
| Firewall Regen | XXXX/sec |
| Veterancy | |
| Experienced | XXXX |
| Veteran | XXXX |
| Elite | XXXX |
The Defender Class will be released along with the Ghost Fleet DLC. This page will be updated when the DLC releases.
Similar to the Cylon Gorgon, the Defender Class is a support vessel, being an alternative to the Celestra. The Defender has an underslung hangar with an extremely fast repair rate, and damaged squadrons can either return to their home base or land at the Defender for faster repair.
The Defender also features a Technical Support Raptor that improves allied ship's subsystems.
Defenders also sport a special contingent of Marines that can be deployed to friendly ships and have them fight off enemy boarders.
Campaign: Unreleased content.
Multiplayer: Unreleased content.
Official Description: Unreleased content.
| Engineering | |||||||||||
|---|---|---|---|---|---|---|---|---|---|---|---|
| Hull | Damage Reduction | ||||||||||
| XXXX | XXXX | ||||||||||
| Front | Left | Right | Rear | Top | Bottom | ||||||
| XXXX | XXXX | XXXX | XXXX | XXXX | XXXX | XXXX | XXXX | XXXX | XXXX | XXXX | XXXX |
| Fire Control | |||||||||||
| Munitions Slots: 1 | XXXX% salvo size | XXXX turn reload | |||||||||
| XXXX | XXXX | ||||||||||
