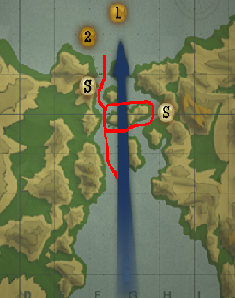
This mission can be hard if you're new at the game - the trick is to work quickly. The longer you stay in the passage, the more fortresses you'll encounter, and the lower your health will be for later.
Primary Objectives
- Reach the other side of the strait
- Sink the Hatsushimo
- USS Kane must survive
Secondary Objectives
- Destroy the seaplane hangar
- Destroy the PT boat base
Hidden Objectives
- Beat the level within 17 minutes
- Sink all cargo ships
Right off the bat, enter the repair screen and set all personnel to water repair. Your main threat for the mission will be the multitude of Gyoraiteis and their masses of torpedoes. Whenever you see a Gyoraitei, engage it with your machine guns. It may look like you're not causing a lot of damage to it, but your weapons are surprisingly effective against them. Use artillery if there's nothing else to shoot at, but especially if this is your first time playing, you may not be accurate enough to hit the Gyoraiteis. Don't stop for them though - they aren't your objective.
Two threats appear in short order as well - a fortress over on your right, and a Mavis coming in from the front. Your AA crew can handle the Mavis and, if you assigned your crew to water damage, its torpedoes can either be avoided or taken without much consequence. Most of the time though, the Mavis will be shot down before it can do anything.
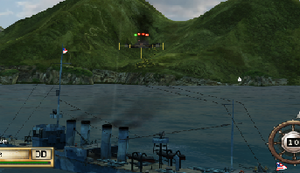
The fortress, on the other hand, is a different matter entirely. Armed with a lot of cannons, it can put down a lot of feather and seriously hurt you. Fortunately, it doesn't move, so just lie your targeting cursor on top of it and open fire. Since it doesn't move, you don't have to lead it at all. Whatever you do, keep moving.
The fortress should blow up in short order. Continue on into the strait. Two sets of targets appear next - two cargo ships, or three LSTs. The LSTs aren't moving, but the cargo ships are - pull up to broadside with the cargo ships and lodge two torpedoes in their hulls to send them to the bottom. Once they're done, do battle with the LSTs, but don't worry if they don't go down - they're not mission critical targets, and they don't move - so if you want you can come back for them later.
Once you're past the cargo ships' carcasses, turn right towards the enemy submarine pen. In some other games, submarines are worth a lot of points - they aren't here, so focus instead on the fortress overlooking the next cargo ship area on the far right of the map. You should be sailing right towards one of the secondary objectives.
Cargo Ships and the Seaplane Hangar[edit]
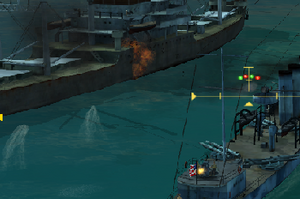
The secret and hidden objectives are right next to each other, so go ahead and shell all the cargo ships and the seaplane hangar while you're at it.
You should deal with the fortresses first though, since they are the major threat. The longer they're operational, the more shells they'll put down on you.
Once the fortresses done, shell all the cargo ships (torpedoes make the job much easier, especially if you can sail in between two cargo ships and smack them with both the port and starboard torpedoes) as well as the Seaplane Hangar at your leisure. If you intend to sink the ships by cannonade, you can get in close and land shells on their decks. Doing so will start a fire, and is the ship equivalent of machine-gunning a cargo ship's deck...only with artillery shells.
At this point, you can either continue south then west to end up at the LSTs again, or you can do a three-point turn and head the way you came for the final secondary objective. If you opt for the former, look out for two fortresses near the other southern entrance of the strait - they can take pot-shots at you, but don't bother with them - keep moving. Give either torpedoes or cannonade to the LSTs if you wish, and continue on.
PT Boats and LSTs[edit]
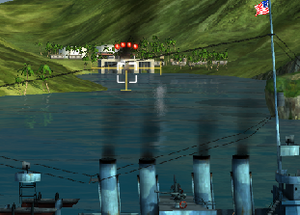
Whether you did the three-point turn or went past the LSTs, you should be now either where the first set of cargo ships spawned, or a little south of there. Continue north towards the PT boat base, sheltered in a small inlet. Don't enter the inlet - you'll have a hard time getting out. Instead, simply plop yourself broadside with the base and shell it until the PT boat base is done.
After that, head out of the strait to encounter the Hatsushimo. The PT Boat base itself doesn't spawn any warships, but still beware of any torpedo boats coming in from behind you. They should fire off some warning shots with their artillery first, but be careful particularly of torpedoes. You're almost out of the strait - don't lose valuable health now!
The Hatsushimo[edit]
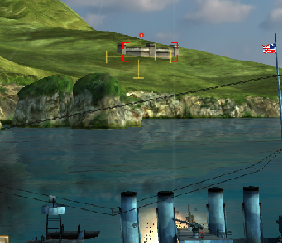
Before sailing off to engage the Hatsushimo though, deal with the mission's final fortress coming up on your left. Be careful, since you're close to it and it can cause some damage if you're not prepared for it. Sometime during or right after the fight with the fortress, your crew spots a Minekaze-class destroyer coming up. It's your first ship-to-ship battle, and you can't afford to lose!
The first thing the Hatsushimo will do is fire off a spread of torpedoes your way. With you coming head-on with them, evading them shouldn't be difficult. Do your best and shell the living daylights out of the Japanese warship.
For new players though, the Hatsushimo can prove to be a daunting task: on one hand, your Clemson is somewhat tougher than the Hatsushimo, and plus you have a brain, whereas the Hatsushimo is guided by AI. On the other hand, however, your ship is probably hurting from the rest of the strait, while the Hatsushimo is at full health. There are two main ways of sinking the Hatsushimo.
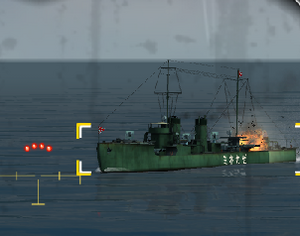
The first is by cannonade. It takes a lot longer to do, but it is definitely easier in the long run and you should take less damage doing so. Always lead your target by a little, and you'll know if you hit the sweet spot by hitting her aft section (as shown right). The first few strikes here won't do much. Later strikes will start a fire, which you can help along with more cannonade. Once you've laid enough feather down here, her fuel tank will go up, and the Hatsushimo will be no more.
The other way is using torpedoes. It is considerably tougher than using cannonade, but if you can land two torpedo hits on Hatsushimo, you can sail off into the distance, guaranteed. The manoeuvre, though easy theoretically, is hard practically. All you have to do is run your ship directly broadside to the Hatsushimo and lodge two torpedoes in her hull - just like the cargo ship. Given how Hatsushimo manoeuvres though, this can prove more difficult.
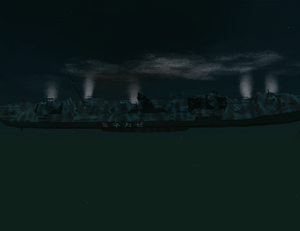
Either through cannonade or by torpedoes, the Hatsushimo shouldn't be a hard opponent at all, even given your condition. Just make use of the repair screen and use one of the above mentioned strategies - cannons or torpedoes. Once you hear that your crew tell you "She's going down!", you'll know the Hatsushimo is no more, and your task at Palawan is done.
For future reference, by now you should have played through all the navy-related Naval Academy missions, particularly regarding the repair screen, the Tactical map (for spotting torpedoes - Gyoraiteis in particular, as well as the Hatsushimo - use these liberally) as well as all the ship related ones - piloting a ship, manning the guns, and piloting a plane. The two aviation ones - piloting a plane and aerial ordnance - are a necessity for the next mission. The next mission is dedicated to all those who are aviators and wannabe pilots, so get those joysticks out and get ready!
