Primary Objectives
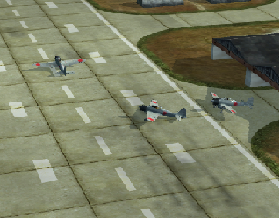
- The Airfield must survive
- The destroyers Kikuzuki and Yuzuki must survive
- The shipyard must survive
- Neutralize the landing fleet
There are no secondary or hidden objectives for this mission.
If you've beaten Shortage of Reinforcements without any problems, you're in for a nasty surprise for this level. Your airfield is armed with nothing but Zeroes - but since most enemies come at you from the skies anyway, that's not much of an issue.
Airfield[edit]
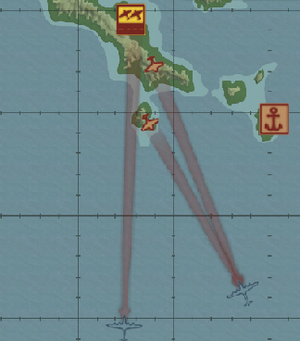
Your first objective is to defend the airfield. Launch every last fighter you can and fly them all south. The bombers won't appear immediately, but they'll appear soon enough.
Don't waste ANY time at all directing the Zeroes to the southwest and to the south, where the bombers spawn. Down all the B-17s that appear as quickly as possible. They don't have any escorts, but as flying fortresses, they have a LOT of guns.
Don't let any of the B-17s through - all it takes are three or less to end your game right off the bat. Fortunately B-17s are really slow and easy targets, so fire away at their engines to put all the Flying Fortresses out of commission.
The trick is to never stop dogfighting. When one squad is finished with a squadron, open the map and switch to another squadron. There should never be a moment where you are not fighting.
The B-17s are easy enough. You should defend the airfield with little or no difficulties. Even if you lose here, you can always restart. Since it's the first objective, it's the easiest to reach after a restart.
The Kikuzuki and the Yuzuki[edit]
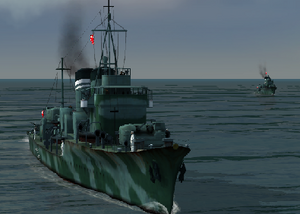
So, you've survived the first attack wave. Next you have to defend a pair of destroyers. Why they are mission critical, no one knows - all that matters to you is that they must survive.
Change of targets this time - torpedo and dive bombers come in on attack runs from the western border. Have all your planes rush the border and take as many down as possible head-on. When aircraft drop to only one member, send them back home to replenish the air wing and take off again.
Again, as with the B-17s, there should be no lulls in the fighting at all. When one squad is done with an enemy formation, switch to another one.
Both dive and torpedo bombers are priority targets, but if you have to chase one and leave the other alone, go for the dive bombers. Dive bombers cause less damage, but destroyers don't have a lot of health - and they're very accurate. Torpedo bombers cause even more damage, but if you've been keeping up with all the other torpedo bombers, the destroyers shouldn't have much of a problem evading torpedoes. The destroyers are still far from invincible, although only one has to survive to proceed to the next phase.
Keep track of how many enemies there are left. When there is only one or two squadrons of enemies left, have all your Zeroes fly east, in the direction of the shipyard. Leave one squadron to mop up the remaining squadrons. You'll see why in a moment.
Shipyard[edit]
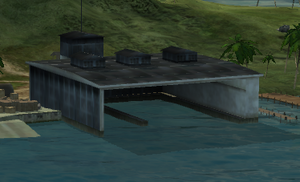
NOW is the hard part. Whether you win or lose depends on how you react after you've saved the destroyers. If, when there are three or two squadrons of enemies left attacking the destroyers, you send every last Zero off to the east, on the direction of the shipyard - you have a chance of winning. If you don't, chances are you'll lose.
This is due to the fact that the destroyers are on the other side of the island, and it takes your fighters several seconds to run from one side of the island to the other. Sending all your planes to the other side early negates this advantage the bombers have over you, giving you a significantly bigger chance of winning.
Since the shipyard is immune to torpedo attack, the enemy deploys massive waves of SBDs at you. As soon as one squad is down, another rises to replace it - further complicating your issues in defending the hangar. Chances are you'll have to perform this section of the challenge many, many times - each time, you'll have to confront the B-17s and the previous destroyer-attacking SBDs and TBF/Ds, making this challenge mission one of the most annoying to complete.
Don't set up a CAP around the shipyard - your Zeroes will engage at too short a range. Put them as close to the SBD spawn point as possible, and don't let any bombers get through. The shipyard can take two or three hits at most.
If you have to pursue a bomber that's on its way to the hangar, switch to the closest squadron. You can easily forget that you have the ability to switch planes - use this to switch to the plane closest to the enemy you want downed.
If you can survive the 15 squadrons of SBDs (45 SBDs total), you're ready for anything. Pause the game and take a breather - the final part of the mission is hard, but nowhere near that of protecting the shipyard.
The Invasion of Tulagi[edit]
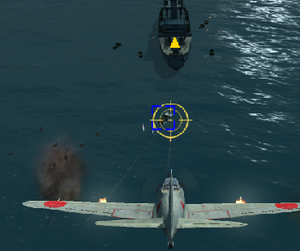
The Allied invasion of Tulagi is on. Congratulations on surviving the relentless SBD attack from before. You've passed the hardest part in the mission - the rest is just easy interception stuff and is much easier than defending helpless targets (especially those shipyards) against bomber attack. It seems strange - the final objective is relatively easy.
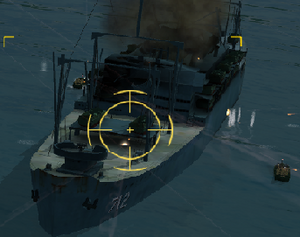
Your objective now is similar to that of Defence of the Phillipines: destroy the invasion fleet. It consists of merely two transport ships and a TON of Higgins boats. The Higgins boats are your first priority - they're twice as fast as the Daihatsus from the campaign, giving them a chance at landing. Don't let this happen, and always strafe down the Higgins boats first before proceeding onto the troop transports.
Additionally, unlike the Daihatsus, the Higgins boats are more than content to attack you with their machine guns. While they don't do a lot of damage singly, they can seriously hurt a plane in large groups.
As with before, target the transport's decks to set them ablaze. The transports will spawn Higgins boats for you to deal with, so when you've downed the first wave of Higgins boats, go for the transports. Alternatively you can send two of your four squadrons on a transport ship while you deal with the Higgins boats.
Once all the transport ships are down and the Higgins boats are no more, the mission is a success!
