Primary Objectives
- Fusō must survive
- Get to the evacuation point
Secondary Objectives
- Yamashiro must survive
Hidden Objectives
- Sink all enemy vessels
This is likely the first time you'll be in command of a battleship if you haven't played Multiplayer yet. The first thing you'll notice is how marvelous her guns are - while the Houston from the campaign had quite a few guns, this ship seems to be practically made of guns. You'll also notice how you seem next to invincible, especially from destroyers. Most importantly, you'll learn that battleships, despite all this, remain far from invincible, and are merely the second strongest unit in the game.
The Fusō is caught in the Java Sea, and your objective its to simply get the hell out. Unfortunately, this is made complicated by a seemingly endless stream of American and British ships. It seems endless, but it isn't. As a battleship, you can't outrun the enemy, so chances are you'll end up sinking all enemy vessels while you're getting to the rendezvous.
It Begins[edit]

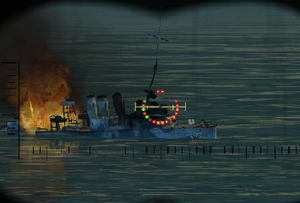
The first thing you'll spot are three Clemson-class destroyers coming in from your left. You've already crossed the T with them, and their tiny pea-shooters of a gun can't even penetrate your armoured hull. Despite this, you'll find yourself possibly taking a lot of damage here.
This is due to the fact that they torpedo spam you. Torpedoes are one of the biggest threats to battleships, so avoid them at all costs, and immediately enter the repair screen and set all personnel to water repair duty. The worst thing you can do is maintain course when under a torpedo onslaught. You have to balance your time between shelling the destroyers and evading their torpedoes. Fortunately torpedoes take a long time to reload, so if you work quickly, you'll sink them before they can launch a second volley.
You can easily obliterate a Clemson-class with three well-placed shells, so sink them and move onto the next wave, which consists of Fletcher-class destroyers. These guys are, as you experienced from the campaign, are much stronger than Clemsons, but still nowhere near as powerful as your battleship. Like the Clemsons though, expect a lot of torpedoes. Do your best and evade the torpedoes. You'll need all the health you can muster later.
As with the Clemsons, a well-placed volley can annihilate the Fletchers, so fire away at them and be sure to adjust for your shots.
A somewhat safer alternative (albeit much more time consuming) strategy is to run away from the short ranged destroyers (either at an angle or directly away from them) and thus maximize the amount of time your long range cannons can bombard the puny destroyers unopposed. Also, you’ll have less torpedos to dodge. However, remember the enemies will continue to spawn closer to you, so don’t go too away from the objective (in this mission the evac zone is west from your spawn) or else you might not be able to meet up with the Yamashiro before the tougher enemies appear… still, you’ll be a lot less banged up this way if you balance buying time and getting good salvos in.
Heavy Cruisers[edit]

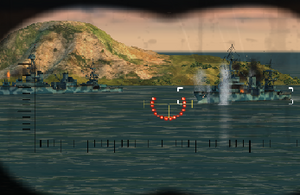
That's right, the next opponent for you are Northampton-class heavy cruisers. These guys are bigger than Fletchers, making them easier to hit, but their shells are of big enough calibre to cause damage if you're not careful. As always, cross the T with them as soon as possible to reduce their firepower and enhance yours. You're going to need all the health you can get later, so sink these guys quickly.
Around this time the Yamashiro shows up to give you a hand. Unfortunately you can't command her, and the best you can do is resort to the Formations screen to move her position relative to yours (and even then since you both move at the same speed, chances are she will never really get into position). The Yamashiro is another Fusō class, essentially earning you a second battleship. You're going to want to use her as a meat shield later, since you're probably hurting considerably now.
Once the Heavy Cruisers are disposed of, be careful of additional Fletchers coming in. They can torpedo spam, and this will often cause Yamashiro to stop to evade the torpedoes. This can either be a good thing or a bad thing - it's good since the Yamashiro has more health. The bad news is that the Yamashiro breaks formation and may ultimately stop protecting you from what's to come.
The Final Barrier[edit]

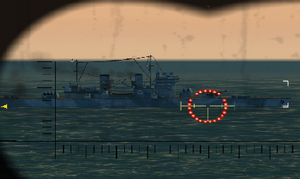
The last three barriers are not two but three battleships - the New York, the Repulse, and the ultimate Allied battleship (prior to the Iowa Mission Pack), the Prince of Wales.
Of the three, the Repulse is perhaps the easiest. There's no secret to dueling these battleships - just keeping the Yamashiro close to you so she can take most of the cannon fire, while both you and her shell the enemy battleships. If you're lucky, you'll be able to land multiple volleys on the enemy warships and let Yamashiro take most of the brunt.
Once you've sunk the New York and the Repulse, it's time for the Prince of Wales. By now your ultimate shiny new battleship is probably reduced almost to a smoldering ruin. The final obstacle is in your way though - sink the Prince of Wales and you're done!
If you're lucky, the Yamashiro can shoot off the Prince of Wales primary fore cannon, disabling four guns in one stroke. If you can do this, you have a considerably higher chance of winning. The Prince of Wales is still a tough customer, and only good seamanship and unerring accuracy will defeat her. Once the Prince of Wales is under though, the mission is complete!
