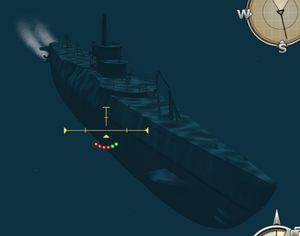
Operating submarines requires extreme patience, because while devastating since they can launch a spread of four torpedoes in front of them, they are also one of the slowest units in the game.
For those who are attempting to sink a submarine, don't use torpedoes. Torpedoes are too shallow to strike at a submerged submarine. Only depth charges are effective against them.
Destroyer-launched depth charges are effective against submerged subs, but air-dropped depth charges can in fact hit surfaced subs too. Dropping them like a bomb on a surfaced sub causes, in fact, more damage than any kind of bomb or torpedo. A single pair of air-dropped charges is more than enough to sink a completely healthy sub.
Most kinds of bombers can equip depth charges (most notable dive and torpedo bombers) but are the deadliest when equipped on recon planes like the PBY Catalina. Their innate sonar allows them to detect submarines on their own and strike without fear of counter-attack, while dive and torpedo bombers rely on another ship's sonar to identify the target.
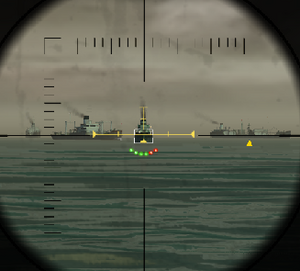
Subs also have another small element attached to them — their periscope. Activate it the same way you would your binoculars. The only difference is that it can't look up. Additionally, if you're at depth level 2 and a ship passes over you, your periscope could be "smashed off". There's nothing you can do about it at this point (not even the repair screen) but don't worry — the periscope will magically reappear after a short while.
Note that subs require a lot of micromanagement. In the event you're playing a map like Coral Sea, it's best to give your other units away and focus on the submarine until it goes down, then ask for your units back.
It's also a good idea to have a fighter patrol the skies above you. Not only will this protect you from Depth Charge Judies, but they will also allow you to see them come in. As a submarine you will not see any planes on radar unless you surface.
Depth Levels[edit]

There are four depth levels which submarines can operate at. The dive and surface controls toggle which of the four depths you will go to.
- Surface: The sub is extremely vulnerable on the surface. Anything can strike it, and will cause a lot of damage. Air-dropped depth charges can easily fry a surfaced sub, as can torpedoes and cannon fire. To assist a little, the Narwhal and Type B submarines have a cannon that allows them to take pot-shots at other ships while surfaced. They also have a small machine gun to ward off planes, and additionally they can use their torpedoes. Air is replenished at this depth level. Additionally, the sub travels 5mph faster, making this an ideal level to use going long, uneventful distances.
- Attack Depth: Also known as periscope depth, this is where you should be when you're readying for an attack. You can raise your periscope at this depth and use it to observe your surroundings and track enemy targets. It's basically a submarine version of the binoculars. Enemies can spot periscopes in the water, but they are often very small and difficult to see. Torpedoes can be launched at this depth, but if the target is very close, torpedoes can fly under them. The minimum torpedo range is approximately 0.2 nautical miles. Beware also of depth charges — they cause a lot of damage at this depth.
- Manoeuvring Depth: The third depth level is where you should be spending most of your time. Depth charges cause considerable damage at near misses, but the damage is reduced significantly than from Attack Depth. This is where you should be spending most of your time. If you are not moving at this depth, you will disappear from enemy sonar, however, a player can still see you with the depth charge launcher, so you are not invulnerable.
- Crush Depth: The final depth level is as deep as you can possibly go. Here is where you re-enact the scene in every submarine movie ever made: "The hull canna take the pressure, captain!" Water pressure begins harming your hull, and you'll take tiny but consistent damage until you rise. The advantage to being at crush depth is that you are so deep enemy sonar cannot spot you, and you are invincible to depth charges. You can wait the enemy out here, but ultimately you'll be forced to get to depth level 3. How long you can stay here depends on how much health you have: being at this depth slowly leeches your submarine's health, so as long as you have a lot of health you should be fine.
Oxygen[edit]
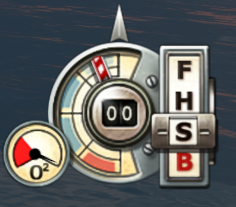
Although submarines today have an almost limitless supply of oxygen due to advanced electrolysis techniques, subs of WW2 didn't have that luxury, and therefore had to surface periodically for air.
You won't die if you run out of oxygen, but you will be forced to the surface, where you'll be vulnerable to pretty much everything. You'll also give away your position, thus negating the stealth you need as a submarine which allows you to evade destroyers and whatnot. You'll also be unable to dive again until your oxygen bar is past the red part of the gauge, so you'll want to avoid running out of oxygen at all costs.
Fortunately subs can stay under for quite a long time (several minutes), and it only takes about four or five seconds to completely refill. These five seconds, however, mean you're at the surface, where you're most vulnerable.
Torpedoes[edit]
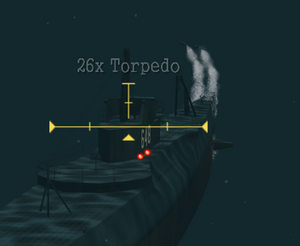
Torpedoes are your primary weapon as a submarine, but there are several problems with them. A submarine's most glaring weakness is that it can't hit anything in the sky. Only by surfacing can you fire at air targets, and even then your single machine gun may as well be a pea-shooter.

Another weakness of the torpedo is how difficult they are to use. Unlike every other type of ship weapon, you have a fixed number of torpedoes and no way to replenish them (actually, you can replenish torpedoes by approaching a shipyard, but most maps lack one). You must, therefore, make each torpedo count.
Torpedoes are also very slow, and when firing at ranges beyond 0.5 nautical miles, chances are the enemy warships will evade your attacks.
When launched at depth 2, the torpedoes will take about 2 seconds to rise to the surface. Until then they simply swim under anything, so firing a torpedo at point-blank range will, most often than not, actually result in your torpedoes being too deep to strike the enemy hull, unless you are on the surface. It is possible to rise partway to the surface to make a pointblank shot and then submerging. Doing so also makes all AI controlled destroyers and PT boats turn to engage you laterally, buying you time to make a crash dive.
Like ship-launched torpedoes, submarine torpedoes can steer themselves to a small degree. You can fire torpedoes approximately 30 degrees to the left or right of the bow or stern. When launched, the torpedoes will travel straight until they clear the sub, at which they will turn towards the crosshair, rising to the surface at the same time.
The advantage to torpedoes is their sheer power. Two torpedoes can sink a destroyer (assuming its crew isn't at water repair) or a cargo ship. Four can sink a heavy cruiser. You have over 30 torpedoes. Be happy, submariners.
A skilled submarine can attempt to torpedo enemy submarines at attack level, doing so is incredibly difficult and must require almost direct contact with the other submarine, but it can be done.
The Head-On Attack[edit]

Most destroyers, once they spot you, will make a beeline straight for you, obviously intending to get on top of you and sink you with depth charges. You can turn this against them by performing a head-on attack. A head-on attack is difficult to do, but a master of the manoeuvre can sink enemy destroyers with a submarine, inverting the typical role between subs and destroyers.
The head-on attack is just what it sounds like — going head-to-head with a destroyer. If the enemy is in a straight line for you, you can't miss since the enemy warship isn't moving laterally. Once you're almost right on top of each other – at 0.3 nautical miles or less (but not so close your torpedoes don't rise to the surface in time — that's what makes the move tricky) – unleash two or more torpedoes (more if captained by another player).
If all goes well, your torpedoes should hit the bow of the enemy warship, which registers as a hit. Dive to crush depth or turn (or do both) to avoid a counter-attack (and to prevent your periscope from being smashed off — fortunately this goes away after a while). If two or more torpedoes connected, the enemy destroyer should be heading for the bottom.
