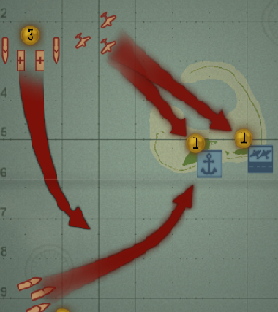
Primary Objectives
- Repel the air raid
- Sink the enemy landing fleet
- Sink the Akagi and the Kaga
- USS Yorktown must survive
Hidden Objectives
- Prevent the deployment of all Daihatsus
This mission involves a lot of flying, again. The Battle of Midway will be won or lost in the skies, and under your command are two airbases, one on top of the other - and a shipyard. The first airbase is, while not a mission-critical building, the source of your entire fighter and bomber operation. If it gets destroyed, there is little to no chance of victory.
The second airbase, however, has three wings of B-17s. While extremely powerful, they are also extremely slow. Losing this airbase isn't as bad as losing your first, since B-17s is all it has. The final unit under your command is the shipyard, which has Elcos and a pair of PBY Catalinas. The Elcos and the Catalinas do wonders on enemy shipping later on, but more often than not you'll use one and not the other.
The mission starts with a cutscene involving a PBY Catalina spotting many planes headed Midway. Get all your fighters airborne immediately - it's an air raid!!
Repel the Air Raid[edit]
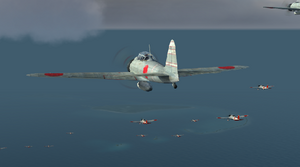
Start with the obvious - air raid means bombers, and fighters can fry bombers, so start launching every last Buffalo squadron you have. Unfortunately Buffalos are all you have; the sexy, powerful, and agile P-40 Warhawk isn't used here.
In the event you don't have much faith in your dogfighting skills, you can have your second airfield launch B-17s. Sure they won't be dogfighters, but their many machine guns can dish out damage to the enemy bombers, especially since they're all preoccupied with your bases in the first place. Position the squadrons one after the other on the path the Japanese bombers will take towards Midway.
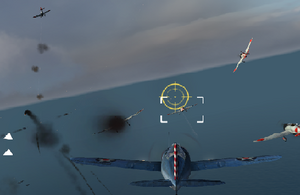
While waiting for all planes to scramble, take control of fighters already in the air, stop them climbing and set them on a levelled course towards the incoming bombers. If you do not do so, they will fly significantly slower and will intercept the bombers ony closer to the islands, leaving less time to shoot them down. Pull up only the moment before you get in shooting range. Climbing up to the bombers will slow you down, and when you reach the pack you can put yourself on their back and finish them off. Instead of time consuming turns, try reducing throttle and pointing your nose up, in order to let trailing bombers fly by your plane, then hit their tails mercilessly. Repelling the air raid shouldn't be too hard. Just mix it up and prevent any bombers from getting through. Keep it up - the enemy only has so many planes here.
Last but not least, to prepare for the time after the air raid, launch two Catalinas from the shipyard and send them south-south-west of the western island.
Unlike other missions, where you can have fun and sink some of the allied ships of no use (in particular the Motorboat, which does not appear in any future stage; it's also amusing to hear a motorboat crew shout "Launch the lifeboats, we're going down!"), you should not waste any time at all taking down the useless allied ships. Focus exclusively on the bombers - you can have fun with the allied ships later.
The first two waves are the most important, as they target your airfields. The third wave hits your shipyard, but while it's possible to win without a shipyard, it becomes next to impossible without an airfield (especially since one of them has only bombers - if the one launching fighters gets destroyed, don't bother going any further and just restart).
There a few defending fighters, but they're there to distract you from the bombers, so hurry up and deal with the bombers first.
The Landing Fleet[edit]
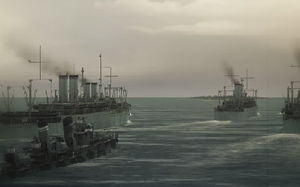
The enemy transport fleet is large, but lacks a lot of defences. This mission's sole hidden objective involves destroying these ships before they can deploy any Daihatsus.
If you survived the previous air raid, this should be quite easy for you. Just fling all your remaining fighters at the enemy landing ships and strafe the living daylights out of them until they go under. It shouldn't take too long, and the destroyers, while problematic, are nothing to be worried about. Since you have been so smart to already deploy two Catalinas in the area, you can use them to sink the destroyer with two torpedoes each. Fly low and full speed to survive the run, then drop the load when you are so close that the ships can't evade anymore. Don't bother to save the Catalinas after they hit the destroyers, you ain't gonna need them anymore. If you want that shiny gold medal, you'll want the troop transports at the bottom as soon as you can.
Counterattack[edit]
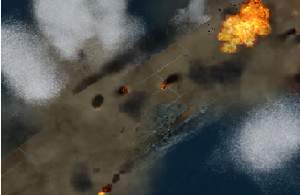
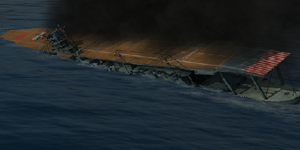
The final enemy attack wave consists of a carrier battle group, consisting of the legendary Akagi, the Kaga, and multiple escorts.
This is what you've been saving your B-17s for. Fly all three wings right over either the Akagi or the Kaga, carpet bombing them from bow to stern to maximize the number of bomb hits. If all nine B-17s made it to their target, the enemy should be down a carrier, which seriously evens the odds for you. Now you have one airfield versus one carrier (the other airfield is a no-factor since it only sports bombers), and the tide will further turn your way soon. If you want to shortcut here, you can try and sink both carriers with the first B-17 strike. Put each group of bombers on a course exactly along the bowline of any of the carriers. Take care to leave enough distance between the squadrons so that you can directly control each of their attacks. Take control of the first group, select a carrier as target and order your wingmen to attack. With your own plane, point the nose down to enter a steep dive, accelerating to 450 or so speed. Repeatedly adjust course to line up with the length of the carrier, and level out in time to avoid hitting the sea. Activate bomb sights and release the payload in the correct moment. You might want to throttle down in order to send every single bomb onto the ship's runway. Switch to the next group and back again. If you have been quick enough, you are now in control of the second plane and can aim from carpet bombing position (the others ain't gonna follow you in your dive bombing). Make sure that the majority of bombs accurately hit the target. Again, try to jump into the pilot seat of the third plane by switching forth and back. Then, take control of the next group and perform exactly the same procedure on any carrier still afloat. If done correctly, both carriers will be annihilated before any of their attack wave even reaches Midway. Of course, you will miss the last part of the mission this way:
Around the time your first attack wave makes it back to base, a cutscene will kick in quite suddenly. Don't worry, it's a good one. Seems everyone's favourite ship - the Yorktown - is in the area, and they want in on the battle.
Essentially earning you a third airfield, the Yorktown arriving can tip the tide of battle in your favour, especially if it isn't going well to begin with. Although you now have to defend two "airfields" instead of just one, it forces the Japanese to divide their air force - especially if you already sunk one of the enemy carriers already.
With the enemy outnumbered and out-manoeuvred in the air, it's now only a matter of time before the other enemy carrier heads for the bottom as well. To make things easier, land your Buffalos and use Wildcats for air defence. Your airfield should be the one making bombing runs on the enemy, and have Yorktown play the defender. With your airfield-launched Avengers and B-17s, merely throw everything you have at the final carrier to end the mission.
