- Required items: Communicator δ (Yellow)
Part 1[edit]

The action starts as soon as you arrive. When you approach location A, you will see a platform moving back and forth over the flames. The purpose of this platform is not to transport you further into the area, but rather back to the start if you fail at the real goal: swinging all the way across the ceiling. From A, where you are able to reach the ceiling and start swinging with your grappling hook, you must swing along several lengths of the ceiling in order to stay above the flames. If you miss the ceiling and happen to fall down too soon, you will have to use the floating platforms to get back to the beginning in order to try again.
As you swing along the ceiling, by the time you begin to see a platform below your feet, it is safe for you to drop down on to it (although you can continue to swing along the ceiling for as long as you like.) Once you reach the platform near location B, you will see a new enemy, a rather obese soldier who patrols back and forth and tries to clobber you if you get too close.
Just beyond B, an item box will parachute down. Collect its contents only if it's safe to do so. Below this platform are a series of other platforms that contain springs. You can easily use these springs to boost you up to higher levels. Many of these short platforms are patrolled by small robotic cars. Ultimately, you need to continue making your way to the right, until you reach the long platform with three springs in it, below C. Use the springs to bounce under the platform above, and then launch your grappling hook to grab the ledge and pull yourself up.
Part 2[edit]

After climbing your way up past another obese soldier, run to the right to reach the communication room behind door D:
- Communicate: Hal will confirm that he has the bazooka, and is waiting in Area 12, but he needs you to blow up this area and Area 10 first.
- Wiretapping: One soldier confirms that Hal has the bazooka while a commander insists that they get it back.
When you're finished, head back to the left. Approach location E, but don't grapple up to this point. Like the first section, you're going to have to swing your way above a large set of flames. The barrel in the hallway will prevent you from swinging from the most advantageous location, so take a few steps back and start swinging farther to the right, so that you can eventually connect to the corner of the ceiling before ultimately swinging out as far as you can and connecting to the columns above. Remember that the longer your grappling hook is when you swing, the farther you will travel when you let go, and the easier it will be to reconnect with the ceiling.
If you miss the columns, or otherwise make a mistake, you will fall down below, possibly into the fire. If you land safely, you will have to drop down the pits to the first area below and retrace your steps in order to continue. The only exception is if you land on the platform to the right of location F. If you do, and you have a significant amount of health (more than 4 bars), you may opt to jump into the flame and use it as a shortcut to the platform on the left, at the expense of some health.
Finally, run to the left along the left platform, and hit the springs to boost into the air. Fire your grappling hook up at location G to begin the first of two swings that you must successfully make in order to reach the door to the boss at location H. Failure will result in landing in flames, and most likely dying.
Boss[edit]

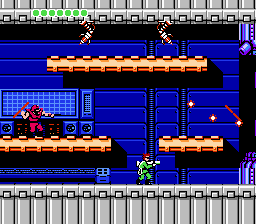
The boss of this area, oddly enough, is a single commander along with three ceiling mounted laser cannons. You can practically ignore just about all of them and focus your attack on the core. The only time that you'll be in danger is when the lasers are in just the right position to hit you, or when the turret above the core fires. Beyond that, you should be able to destroy the core with minimal interference.
Reward: You will earn ten bullets and the bullet proof vest. An improvement over the battle helmet, and a vast improvement over the pendant, this vest will protect you from every other projectile that strike you. This will often save your life.
Famicom Differences[edit]
- A few more strong soldiers are in this stage. Two more on the way to room D, and one more on the right of location F.
