|
|
Section A[edit]

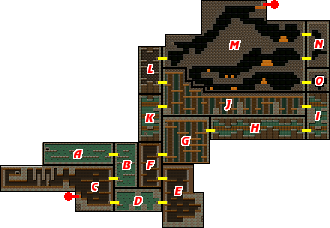
After arriving in Area 3, you must cross to the right. In this room are some robots who are triggered whenever SOPHIA gets close to them. When triggered, they release a set of explosives from their head, and then dash off. The run away from SOPHIA, but will bounce back if they hit a wall. It takes four shots to destroy them. The safest path through this room is along the floor.
Section B[edit]
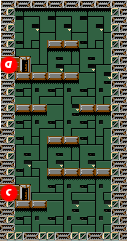
When you enter this room, two worms will be dropping down to the floor. Another robot will be just below the starting platform. Try removing the robot with the Thunder Break weapon. Then use homing missiles to clear away any worms that get in your way. More will appear as you make your way down to the bottom, and access that path to section C.
Section C[edit]
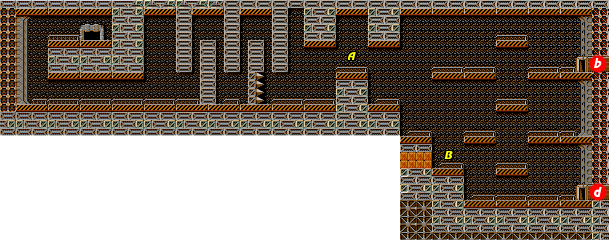
This section contains a couple of secrets, but you won't be able to access any of them on your first visit. For now, simply make your way down to the bottom of the room while watching out for the ceiling turrets, and the twisting enemies that fly across the screen. Head to the right to access section D.
- Noted locations
- A: Don't try to advance any further than this. The spikes on the wall to the left will make short work of SOPHIA. In order to safely advance beyond this point, you must collect the Wall 2 upgrade from Area 7. When you arrive in this section, don't drive to the left. Instead, jump up on top of the passage from section B and begin driving to the right in order to attach to the wall. Proceed this way as far as you can, and you will make it to the well protected warp that leads to Area 8.
- B: The blocks that lead to the right here actually connect with section M. In this way, they make a handy shortcut between the beginning and end of this area. However, with no ability to destroy blocks beneath you, the shortcut is only useful when coming from section M below.
Section D[edit]
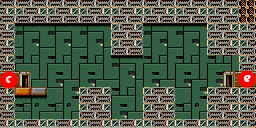
This hallway contains a number of worms along the floor. In addition to the worms, it also contains red pods attached to the ceiling. These pods release red worms whenever SOPHIA comes close to driving below them. Red worms are just like gray worms, except that they can jump higher and possibly pursue you where gray worms cannot.
Section E[edit]
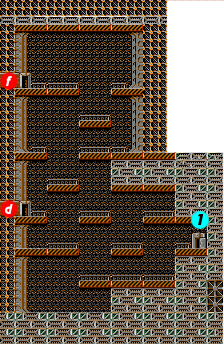
This room contains a new enemy that resembles an armadillo on wheels. They drive back and forth, falling down to lower platforms. When they approach SOPHIA, they stop, and launch explosives from their back before proceeding. It takes six shots to destroy them.

In the lower right corner of the room is an entrance to the first interior. It starts off with a vertical hallway followed by a horizontal hallway. The biggest payoff is in the back of the horizontal hallway, but in order to get there, you'll have to slip past a few enemies, including some laser motion sensors that slide back and forth and shoot Jason with a beam whenever he is in front of them. If you can destroy them, they sometimes offer a gun capsule. The easiest way to destroy them is move diagonally and use grenades. This will let you destroy them without ever being directly in front of them.
Your ultimate goal in this section is to reach the passage in the upper left corner. Climb up to proceed to section F.
Section F[edit]
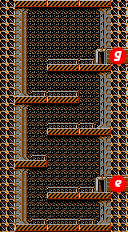
You must climb up this shaft to reach the next section. Unfortunately, as you jump to higher platforms, you are typically greeted with an explosive-dropping robot. Stand near the walls and jump up to begin shooting at the robot and trigger their reaction from a safe distance.
Section G[edit]
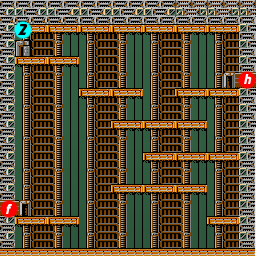
Similar to section E, you will find a lot of armadillo-like enemies roaming around here. Accompanying them are more explosive robots and twisting enemies that fly across the screen. Your goal is to reach the entrance to the next passage in the upper right corner.
There's an often over-looked entrance to an interior in the upper left corner of the room. The entire interior is contained in a single chamber, although it's very maze like. There's a good chance to stock up on more weapons for SOPHIA, as well as improve Jason's gun power, but only if you're good enough to slip past the laser motion sensors without getting hit.
Section H[edit]

This section is like an extended version of section D, containing many gray worms and red worm pods. The height between many platforms is actually low enough for the red worms to hop up and follow SOPHIA if you don't destroy them first. Heat seeking missiles can help clear the path ahead of you.
Section I[edit]
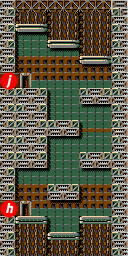
As you climb up this section, you'll encounter a new type of enemy. These orb-like enemies stay attached to the ceiling until SOPHIA gets close to them. Then they let go and swoop down in an arc, attempting to crash into SOPHIA. It's quite possible to fire up and destroy them before they become a threat if you know where they are. Pass through the passage at the top.
Section J[edit]

In this rather long horizontal section, you must cross from the left to the right. As you do, you'll notice a large number of red worm pods, among other enemies. It's a good idea to have a strategy planned out. You can take them out in advance from a safe distance, or be prepared to get close enough to trigger them, and shoot the red worm that appears before it can become a nuisance. Watch out for the flying enemies that zip through here as you cross.
- Noted locations
- C: When you reach the left side, you are actually given a choice. This is the only split in along the path of this entire area. If you take the bottom passage, you'll arrive in section K, which is a dead-end that leads to an interior. If you jump to the platforms above, you'll reach the passage to section L, which continues on to the end of the area.
Section K[edit]
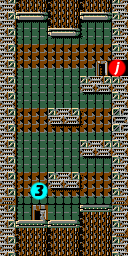

This section is entirely optional, and dead-ends. Watch out for the two ceiling-mounted turrets as you drop down. At the bottom, you'll find an entrance to a third interior.
This interior is challenging, but worthwhile if you are looking to maximize Jason's gun power. It contains no less than three flashing gun capsules in addition to a few other gun capsules that you can obtain for destroying the laser motion sensors. Remember to proceed cautiously once you obtain maximum power or you will lose the ability to shoot through walls. This can put Jason at a serious disadvantage and cause you to lose even more firepower if you're not careful.
Section L[edit]
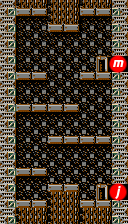
Like section F, this is a climb up a shaft containing a few explosives-releasing robots. Use the same strategy and attack from a safe location before jumping up and proceeding to the next platform.
Section M[edit]
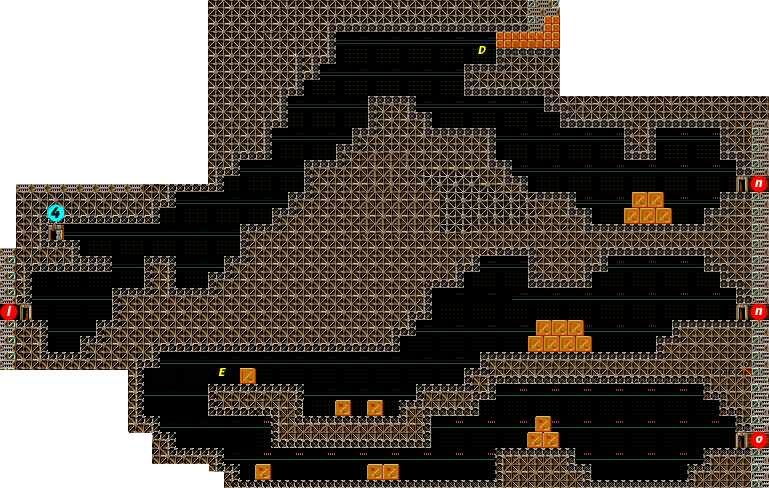

This section is by far the biggest, and it is split into two distinct tunnels, which are connected by section N on the right. As soon as you arrive, you'll have to deal with a ceiling turret to the right, followed by another one on the next platform above. To the right, you'll see an entrance to another interior. This one is a long horizontal stretch that offers very little by way of reward for making it all the way to the end, and is best left ignored.
Keep jumping up to higher and higher locations until you reach the peak. You will see some blocks up and to the right, but you won't be able to reach them yet. At this point, continue to the right and start making your way back down. More of the orb enemies that start attached to the ceiling will appear along the way. Make your way to section N, drop to the bottom, and continue on to the lower portion.
The lower portion of section M contains a wider array of enemies. There are more of the orbs that descend from the ceiling, as well as spinning orbs that home in on you when you get close. A number of twisting enemies will fly across the screen (which you will need to fight if you are low on Hover energy after destroying the area boss) and a few of the explosive-dropping robots occupy the floor. Once you drop down to the farthest location on the left, you must make your way back to the right in order to reach the passage that leads to section O.
- Noted locations
- D: You can see the blocks when you first drive through here, but no amount of jumping will help you reach them. You will first need to obtain the Hover engine by defeating the area boss in order to reach the blocks. Once you do, you will discover that they create a nice shortcut back to section C, which will help you get back to Area 2 quicker so that you can make your way back to Area 1, and on to Area 4.
- E: Be aware that the drop to the left of this location is a one-way trip. Once you drop down to the floor below, the only way to return back to the top is by using SOPHIA's Hover upgrade. You'll have to get it from the area boss in section O.
Section N[edit]
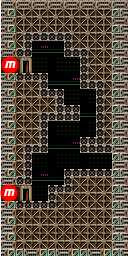
On your way down to the bottom, where you will find the passage that reconnects with the lower portion of section M, you'll encounter three red worm pods. If you have Multi-Warhead Missiles, you can use them to very quickly remove the pods before you proceed. Otherwise, you can rely on regular guns to clear them, but it will take a little longer.
Section O[edit]
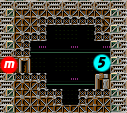
In this tiny room, you will find the entrance to the interior that serves as the home for the boss of Area 3.
Area 3 Boss: Z-88[edit]

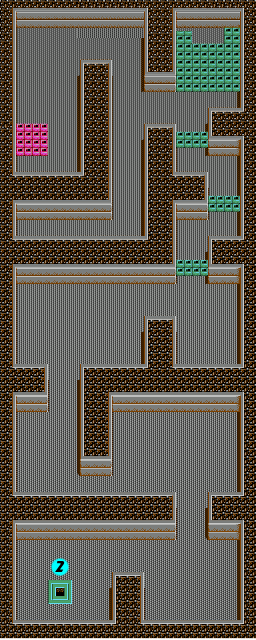
This interior starts off with a long vertical descent through a winding hallway. If your guns are already at maximum power, you should find that blasting enemies through the wall is the safest way to proceed through the hallway. You'll want to avoid getting shot, and hold on to the ability to shoot through walls for as long as possible. Otherwise, you'll have to step out into the open where you are a little more vulnerable to enemy fire.
Be careful when you reach the wider open areas where the floors contain spikes. You'll notice that the enemy robots will refuse to cross the spikes, but that won't stop them from shooting at you by firing across them. Clear an area of enemies before you attempt to walk safely around the spikes yourself.
When you reach the bottom and pass down to the next room, there's a very good chance you will get shot by one of the two robots who are advancing from the bottom to meet you. Try to quickly remove them with grenades as soon as you are able to move. Be mindful of the two enemies on either side that will cross paths when you walk down. Even if you do get hit and lose some gun power, don't worry. In the next room on the right, there are two laser motion sensors guarding the door. You can try to ram your way through, but it's best to go slow and avoid taking damage. You might even be able to get a gun capsule from one of the sensors.
After passing through the door to the room above, you will be at the bottom of a hallway that is broken up by alternating bands of blocks. It's a good idea to destroy all of the blocks, as well as destroy the enemies that are waiting on the other side of each band. There are four gun capsules that you can uncover, as well as a few SOPHIA ammunition caches. Avoid the spikes and make your way to the top. When you're ready, step through the door to encounter the boss.
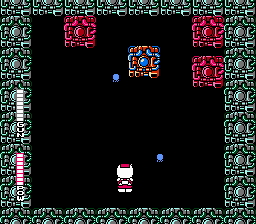
Z-88 (Z-88?) is a particularly interesting boss, because it's actually composed of several identical machines, but they don't all appear at one time. Instead, each one appears and does a particular action before coming to rest and waiting for the next one to appear. Each component is only vulnerable when it's active. Once they are at rest, you cannot damage them until they come to life again. Each component will do one of three things; either it will move in some direction without shooting at you, move in a direction while shooting a slow moving projectile at you, or stay motionless and fire a three-way laser at you. The boss is made of sixteen such components. Once the limit is reached, no new ones will appear. In order to defeat the boss, you must destroy all sixteen, even if you successfully remove one before others appear. To defeat them, you can either use grenades on them up close, or shoot them from a distance with a fully powered gun. Knowing where they will appear can be incredibly helpful. After the initial component, the first batch appear along the ceiling. The next batch alternate between the left and right walls, from the top to the bottom. Shooting from a distance is obviously safer since you will have more time to react to their actions, but you may find a new component appearing right next to you and damaging you. At that point, you should switch to grenades and try to remove the active components as quickly as possible. Once you defeat the boss, you will receive the Hover engine upgrade for SOPHIA. This will allow you to fly for limited distances, based on how much hover fuel you have. You'll need to return all the way back to Area 1 in order to discover how the new hover ability can help you reach Area 4.