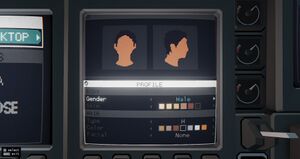
Upon starting the game for the first time, new players may want to take some time to customize their character's avatar. This does not directly affect gameplay, though it does affect how other players view you in multiplayer. If you intend to play the game in single player, your avatar is irrelevant.

Upon selecting New Game, you will awaken in zero gravity from what appears to be a cryostasis unit. Wait until the mask you are wearing flies off into space, and then try floating around.
The room you are in is small and cramped with only a single door leading to a T-junction. Head straight ahead to the cockpit. The cockpit is small and covered in various switches and screens you can interact with, but don't do anything.

Click on the Pilot's Seat and use the Transmission screen to play the first piece of game lore. Press ![]() or to leave the seat. The transmission will continue playing, but you won't be able to proceed to the next area until the transmission finishes. The full transmission is transcribed in the Transcripts section of the guide. The transmission can be later accessed by selecting Transmission A on the carrier itself.
or to leave the seat. The transmission will continue playing, but you won't be able to proceed to the next area until the transmission finishes. The full transmission is transcribed in the Transcripts section of the guide. The transmission can be later accessed by selecting Transmission A on the carrier itself.

After the introduction, head back towards the T-junction and make a left turn to enter the drop pod. Open the two doors to reach the shuttle, then use the shuttle seat. Afterwards, click on the small button beneath the screen to initiate the drop to planetside. Sit back and enjoy the fireworks as you crash through the atmosphere.
The Carrier[edit]

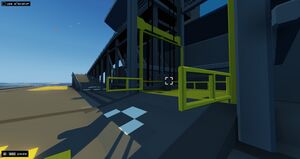
Upon landing, you will automatically get out of the pod and see your new home - the carrier - docked on a slipway. Make your way to the carrier's stern and activate the elevator. Ride the elevator up to the flight deck. Alternatively, take the scenic route by following the ramp that leads into the carrier's garage, then take the stairs or the elevator to reach the bridge.
Alternatively, you can skip this segment by opening the pause menu, going to the Game tab, and then pressing Return to Bridge.
Follow the on-screen indicators to flip the carrier's main power breaker. Optionally, also flip the master light switch behind you to turn on all the lights in the carrier. If you are lost at this point in the game, refer to the various articles in this guide about your carrier's systems.

Interact with any of the three navigation screens at the front of the bridge and then select DEPLOY CARRIER to launch your ship down the slipway and into the ocean.

You will encounter another transmission on the carrier itself. Interact with the communications screen and play Transmission B.
You should now take some time to explore the carrier, especially if this is your first time playing. Clear the slipway and use the Navigation screen to find the nearest island and set a course to it. Use the vehicle control screen to determine the island difficulty - the islands closer to the center are more challenging.
Your First Island[edit]
It will take several minutes to reach the island. To go faster, use the breakers and shut down power to weapons, or manually deactivate your ship's defences.

Once you reach the island, the game will tell you to interact with the viewscope. Press or ![]() twice to have the camera compensate for the rocking of the boat, and then start scanning enemy units on the island. Enemy units scanned once will have their type identified - a second scan will identify what kind of weapon they are carrying.
twice to have the camera compensate for the rocking of the boat, and then start scanning enemy units on the island. Enemy units scanned once will have their type identified - a second scan will identify what kind of weapon they are carrying.
The tutorial will then have you press or ![]() to switch to the carrier's deck gun. Aim at the targets and then fire the deck gun with
to switch to the carrier's deck gun. Aim at the targets and then fire the deck gun with ![]() or
or ![]() . Avoid firing too many volleys, as the deck gun's ammunition is very versatile and powerful, and you won't have a new source of them for a while.
. Avoid firing too many volleys, as the deck gun's ammunition is very versatile and powerful, and you won't have a new source of them for a while.

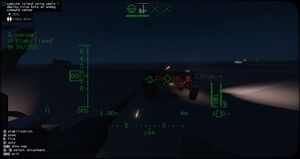
After bombarding the shore, you'll be tasked with deploying your seals to the island. Press the surface vehicle launch button, or use one of the three vehicle terminals on the bridge to deploy them. Take manual control an autocannon-equipped seal by clicking on a seal, then selecting the Camera option to switch to first person view. Press or ![]() once to get control of the vehicle, then use
once to get control of the vehicle, then use ![]() or the number keys to switch to the vehicle's gun and take manual control of that was well. Keep the vehicle's autocannon selected to see the enemy vehicles you've spotted.
or the number keys to switch to the vehicle's gun and take manual control of that was well. Keep the vehicle's autocannon selected to see the enemy vehicles you've spotted.
After destroying the enemy seals, you can bring a seal with a virus bot to the command center. Use the Virus bots in the same manner you used the autocannon.
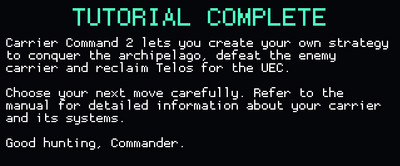
After capturing your first island, the game lets you truly run free to try to win the game. As each map is randomly generated, strategies for taking individual islands will vary. Use the rest of this guide to figure out the tools of the trade, and use them to achieve victory.
