This area will be in random weather, of either clear, rainy or foggy.
"I feel terrible. Please wait."A surprise.
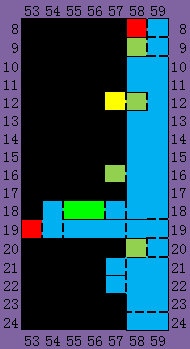
(59,20)
You will immediately face a crossroad, but first, grab a Zircon from the pot in front. After getting the goods from below, move up.
(59,21)
Beware of the Medusa Heads. There is an Armor Lord guarding at (58,21). Try to beat him or use Hellfire to slip in, and come out afterwards. Room (57,22) is blocked by a grate which can only be passed with Mist, but there is a second entrance (see below). You can choose to go to (58,24) to find a telescope which allows you to watch the ferryman once, but there is nothing else useful.
(57,21)
The odd room has two secrets. First, break the left wall for a Pot Roast. Second, stand in the gap you just made and crouch down. Then wait for about 30 seconds and you will suddenly sink into the ground, and enter (57,22) below via a hidden elevator. Doing so will allow you to collect Jewel Knuckles and Mirror Cuirass much earlier, but notice that you cannot leave from the right since there is the grate, instead, take the same elevator and you will return up.
(59,19)
The pot above contains Garnet, but you need Leap Stone to claim it, so return later. For now, go left.
(57,19)
A few blue Axe Knights are roaming around. Proceed left.
(54,19)
Use the save room on the left first, then move up to find another boss.
It is uncommon to find a boss in RPG with so many weaknesses.
Characteristics
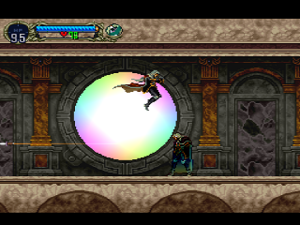
As the name implies, this enemy mimics Alucard, but with a few more skills than you have at the moment. Specifically, he wields a sword and throws daggers, but he also uses Wing Smash. He also jumps a lot.
Strategy
The bad news for him is, he is weak against so many bad statuses. Use a Stopwatch and he is merely a piece of cake, and it gets even worse if you curse him with Red Rust, hindering his sword attack.
Trivia
The warp gate he enters the room with is reused in Harmony of Dissonance, as an actual warp device available to the playable heroes.
Pick up the Gladius, your first standard sword, though you might have obtained Jewel Knuckles with superior attack. Move right.
(58,18)
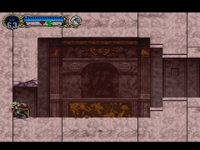
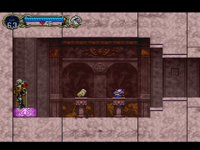
Before moving up, there is a jar containing a Life Vial on the right, time your jump well to grab it. Then move upwards. Ignore the idle elevator first. You will come across an exit to Long Library at (58,16), but only go inside later. Continue up and you will face a jumbo set of various enemies. At top of elevator you will find something shut inside. Continue up and you may want to activate (57,12) the warp room.
(59,11)
The upper area has a unique Sword Lord, which, unlike his brothers later, does not leave a Vandal Sword on death. Medusa Heads swarm the area. Your task shall be finding a switch at upper left corner and knocking it a few times until getting info of activating the elevator below. There is a Heart Container nearby.
Afterwards
You can choose to move up and save at (58,8), but it may be too dangerous to enter Clock Tower now. Instead, return below and get Soul of Wolf from the elevator, and move to Long Library.