Only one more mansion remains, and then the final showdown in Dracula's Castle. This is also the hardest part of the game. You will be far away from a town with a church, so be extra cautious. You will need to make sure you have no less than two Laurels for this trip. If you don't have enough, you should travel east to Town of Doina where you can buy Laurels and also rest up at a church.
Bodley Lake[edit]

|
Wicked Ditch → | |
| Uta Lower Road ← |
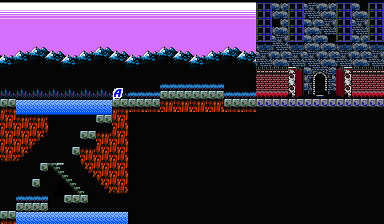
Bodley Mansion is situated next to a lake which you will find by walking left from the mansion entrance. Just as you did at Yuba Lake, if you equip the Red Crystal and kneel before the lake briefly, the water will drain and reveal a hidden path. Descend the stairs and walk left to reach the Uta Lower Road.
Uta Lower Road[edit]
| Devious Woods ← |

|
Bodley Lake → |
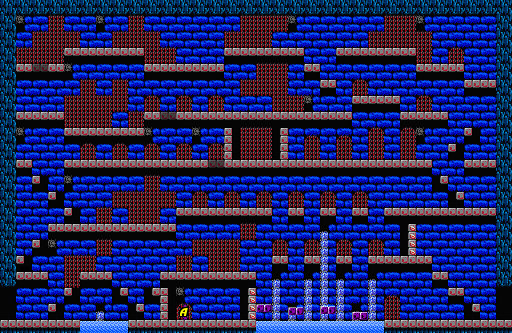
Most of this absolutely cavernous area can be ignored. The upper regions contain nothing but enemies and false floors for you to fall through and get hurt. It is best to stick to the lower section. When you first arrive, jump over the small platform and proceed along the floor until you reach the water. You will see several sets of hovering platforms. Although they are in groups of two, these blocks have the same jump altering properties as other do. Jump across the gaps while the blocks are rising. When you reach the wall to the left, use Holy Water or Dracula's Nail to open a path through the wall, and visit the man waiting inside. As long as you purchased the Morning Star, he'll endow your whip with magical properties and convert it to the Flame Whip ![]() , which is the strongest whip in the game. If you do not possess the Morning Star, he will tell you to return with more power.
, which is the strongest whip in the game. If you do not possess the Morning Star, he will tell you to return with more power.
Once your whip is upgraded, return across the water to the beginning of the cavern and jump along the platforms to reach the next level. Once again, break the wall down and head left across the cavern. When you see floating skulls headed in your direction, it is best to stop and remove them before you proceed. You will reach an exit on the far left side. There are no secrets to be found in the rest of the area.
Devious Woods[edit]
| Joma Marsh east ← |

|
Uta Lower Road → |
As soon as you arrive in the woods, you will be confronted by a Flameman and two skulls. Destroying the skulls should be your first priority, but watch out for the Flameman's fireballs which follow the terrain of the ground. Near the east end (point A) is a hidden Clue Book. Continue left until you encounter more hovering blocks over a lake. Once on the opposite side, continue to clear away enemies as they appear. Do not let them gang up on you or surround you. Proceed left to Joma Marsh.
| Book | Text | Meaning |
|---|---|---|
| A | "Dracula's evil knife blurs Camilla's vision." | The original Japanese text read "Death's golden knife". It's the best weapon to use against Carmilla. |
Joma Marsh east[edit]
| Joma Marsh west ← |

|
Devious Woods → |
Joma Marsh is the largest region of poison marsh in the land. You will need to cross it in order to reach the mansion. If you have three or more Laurels, you can cross is without sustaining any damage. If you only have two, you will still be able to make it, but you will lose a bit of health along the way. If you only have two, it is best to jump into the first portion of marsh, and cross it without using a Laurel until you reach the platform in the middle. The two Laurels you have will help you cross the remainder of the marsh. If you have less than two Laurels, it would be better to turn around and head for the Town of Doina to purchase Laurels, although it will eat away a considerable amount of time.
Joma Marsh west[edit]
| Carmilla Cemetery ← |

|
Joma Marsh east → |
Once you cross the eastern portion of the marsh, you will arrive in front of Laruba Mansion. While you can continue to the west, there is little to no reason to do so. The remainder of the marsh is an uninterrupted expanse of poison, and when you reach the other side, you will enter Carmilla Cemetery. If you proceed too far to the west side of the cemetery, you will be unable to return, and you will have to make your way all the way back to Deborah Cliff and utilize the red crystal in order to return to this portion of the map. Do not travel any further west unless you have an odd excuse to do so.
Laruba Mansion[edit]
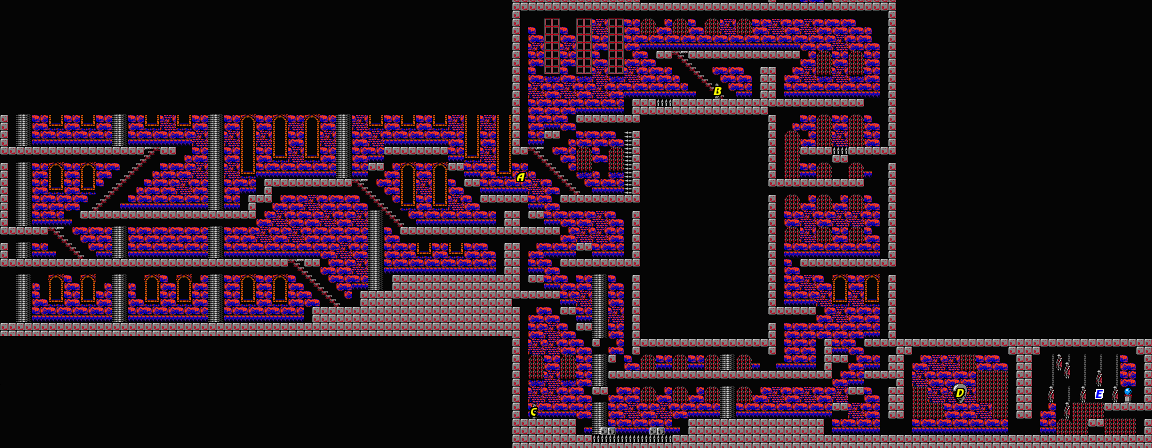
Laruba Mansion is large, but it does not contain many of the hidden passages and false dead-ends that you've encountered in previous mansions. Walk to the right, ascend the stairs, walk back to the left and up the second set of stairs. Ignore the third set of steps and continue right. Jump over the blocks to reach the platform that leads to location A.
From here, you have two choices. You can climb up to the top or drop to the bottom. You will need to purchase a stake, so it is best to head up the stairs and work your way to the top. You'll see the last mansion merchant selling an Oak Stake ![]() at location B. From this location, you can proceed to the bottom either along the left side that you just came from, or up and around the right side.
at location B. From this location, you can proceed to the bottom either along the left side that you just came from, or up and around the right side.
Either way, your goal is to return to the lower left hand corner of the mansion, at location C. You will find a man at the bottom who actually fills your supply of Laurels for no hearts at all. If you have the Silk Bag, this means you will have a full supply of eight Laurels. On top of that, there is no limit to the number of times that you can talk to this man and continue to get a full supply. From C, you must proceed to the right, across the spikes. If you're impatient, you can actually use a Laurel and simply walk safely across the spikes to reach the other side. Stay along the floor and proceed into the chamber marked as location D. It is here that you will meet the second boss, Carmilla.
Carmilla[edit]
Carmilla takes the form of a giant mask. Tears of blood fall from her one eye, and she occasionally circles around the room. The tears explode into multi-directional projectiles when they hit the ground, but these projectiles can be blocked by your shield. The most effective way of defeating her is to stand to one side of the room as she cries, and wait for her to circle. When she does, jump and throw a Gold Knife at her. Each time you hit, the knife will explode and do more damage. If you don't have the Gold Knife, you can defeat her, albeit more slowly, by simply whipping her when she comes within range. Once defeated, she drops the Magic Cross ![]() .
.
Like Death, she always returns but doesn't give you anything extra for defeating her repeatedly. Unlike Death, you have to defeat her because the Cross is required to access Dracula's Castle.
Afterwards[edit]
Collect the cross and then go into the next room. Use the oak stake on the crystal to grab the final part, Dracula's Ring ![]() . Return to the room before Carmilla and go back up a bit, and proceed left, past the Spiders. If you like, you may visit location C again to collect more Laurels, but if you have six or more in your possession, it's not necessary, and it will cause you to double back around. Ultimately, you need to climb up the left side of the mansion to return to location A.
. Return to the room before Carmilla and go back up a bit, and proceed left, past the Spiders. If you like, you may visit location C again to collect more Laurels, but if you have six or more in your possession, it's not necessary, and it will cause you to double back around. Ultimately, you need to climb up the left side of the mansion to return to location A.
From here, simply return to the bottom of the mansion along the staircases that you used originally. Before you leave, it is worth noting that if you are currently level 4, you can increase your level, not once, but twice to level 6, and this is the best place to build your level since the day/night time is stopped while you're in the mansion. However, most players will find that Simon is sufficiently powerful at level 4, and the time and patience required to reach level 5, let alone level 6, may be prohibitive.
