Stage[edit]
Compared to the last stage, fighting enemies outside of the labyrinth will be a bit easier. They are still strong enemies, but they won't ambush you, or block your attacks, so you'll have an easier time. Like the first stage, this stage is simply one long side scrolling town. The entrance to the labyrinth is in the middle, while the weapon and armor stores that you should visit before hand are just beyond to the right. There are a large quantity of doors in this town, but the majority of them are locked.
You begin to the left of town. As you walk right through a forest, you will encounter several Lizardmen. When you get through the forest and reach a bridge, you will be attacked by Flying Rocks. You should attack both of them from a safe distance by using your sword's ability to throw fire at them.
Beyond the bridge, you will reach the first door (A) where you will find the chief of town. He will only provide you with a philosophical musing about combining one's inner and outer self. More Flying Rocks and Lizardmen will appear as you pass two locked doors to reach the next open door (B) which contains a spell shop. Just as in stage 5, there is a secret to this shop that will be helpful to know about. Read the spoiler below if you wish to find out.
In order to defeat the first boss of the seventh labyrinth, Viser's daughter Lena Elfi, you will need to use a Blue Spell Book against her. The book contains the spell of Timestop. By using it, you will freeze her in place so that you can touch her and talk her out of the spell that has been cast on her, instead of risking her death by fighting her.
Beyond the Spell Book shop, Normal Armors will begin to appear. Once again, fight them from a safe distance before they can jump on you. The next available door (C) leads to an Inn. Stay if you are low on health, or wish to receive a password.
Beyond the Inn, you will begin to see Flying Snakes. Shortly after they appear, you will reach a section of water filled gaps. You must leap over them to the platforms beyond. The Flying Snakes will continue to appear. You can either rush through while the snakes are flying upward, or you can patiently wait to attack them or let them fly over you before proceeding. Falling in the water will kill you. Beyond the water, Flying Rocks will reappear.
You will pass a number of doors, and encounter a variety of enemies before you reach the next available open door. One Madman will appear just before you reach that door (D) which is home to a Medicine shop. You will pass a few more doors until you reach a building with a pointed roof. The door here (7) serves as the entrance to the labyrinth. Before you go in, continue to the right.
The last door (E) before the next bit of forest contains an armor shop where you can purchase the Dragon Shield for 600 metal. Your next destination is the weapon shop, but even if you were holding the maximum amount of metal (999), you will need to fight enemies to build your wallet back up. It just so happens that the woods between the two shops is an ideal place to wander back and forth to collect money. Walk back and forth fighting the Madmen that rise up from the ground. The item at the weapon shop costs 580 metal so you can stop when you reach this amount.
The weapon shop is the next open door (F) after the section of Madmen. As explained, you can pick up the Burning Sword for 580 metal here. After you have done so, there is no more reason to travel to the right until after you have collected the labyrinth treasure, so return to the left and visit the labyrinth now.
Labyrinth[edit]

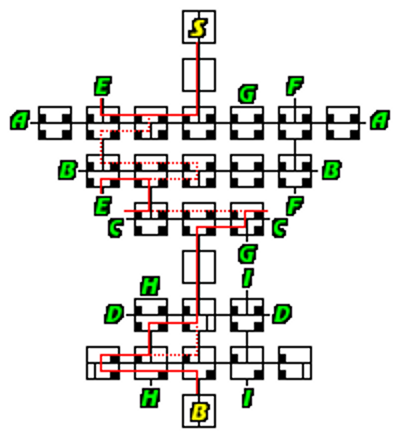
As you might expect, this labyrinth is fairly complex. While there is no one direct short path to the boss, there are actually quite a number of ways to get around the labyrinth and reach your destination. The solid red line shows the path detailed in this walkthrough, while the dotted red lines show proposed alternatives.
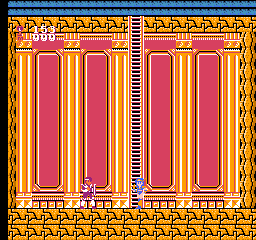
Head down the ladder, and do so again in the next room. When you reach the bottom, go left. You will arrive behind a Metal Armor. Remember to allow it to walk a short distance away from you before you attack, or it will leap backwards into you. Continue left, into a room with four EW2s, and climb up the ladder. This will actually warp you around to the room directly below you.
Watch out for the Metal Armor and Little Dragon, and go to the right. In the next room of four EW2s, avoid them and their projectiles and climb down the ladder. Avoid the Little Dragons, and return to the left (which warps you around to the right side.) Evading more EW2 attacks, climb down the ladder to the lower level, but do not continue climbing down (which leads to a one way trip back to the top).

Walk to the left and climb down the ladder. You will arrive in another long ladder room, so continue your descent. Fight the two EW2s and climb down to the lower level before walking left. (You can return to the EW2 room several times in an attempt to boost your health if you are low.) Kill the two Fire Demons before climbing down to the room below.
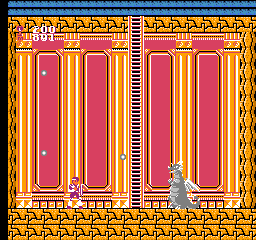
Defeat the Fire Demon that appears, and walk to the left. Carefully take out the Metal Armor that appears before you, and then climb down the ladder to fight the second Metal Armor and the Little Dragon. Return to the right through the lower door, which is one way. Fight the two Metal Armors, and continue to the right. Fight the Fire Demon and Metal Armor that you encounter. You are now directly over the boss room. When you are ready, climb down.

You may be surprised to see a blue female warrior appear as your boss. Like the White Dragon from Stage 5, any attempt to attack her will instantly result in death without warning. To learn the secret behind beating her, read the Spell Book Shop spoiler above. When you have used the right item, touch the warrior to awaken her from her spell. She will talk with you for a while and give you information and an item.
When you are through talking, the real boss of the labyrinth will appear, a Silver Dragon. This dragon is like many others that you have faced, so if your health is high enough, prepare to stand where it leaps, and stab up at its head until it is defeated. You will be rewarded with the Gulse Scepter which will grant you access to the final castle. Since you possess the Moil Candle, you will then immediately warp out of the labyrinth.
Proceed to Stage 8[edit]
Between Visor's daughter, and the note that was found with the Scepter, you learn that all is not as it seemed in the Gulse family, that Princess Karin is not of the true royal bloodline, but an adopted daughter of the king, and that the only true heir to the kingdom who was lost 15 years ago is in fact you, Kein. With this knowledge in hand, you are ready to proceed to the final stage.

Since the stage is one straight level, there is no special trick to reaching the end. Simply continue all the way to the right as far as you can. Once you are past the weapon shop, you will pass through a structure of columns (indicated on the stage map above.) On the other side, it will take some time before you arrive at the last remaining open door before the stage boss. Behind this door (G), a man informs you of how powerful the Golden Dragon is at Gulse Castle.
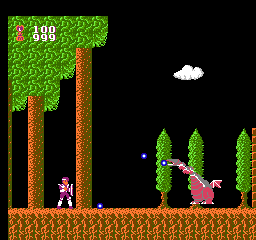
Continue to fight past all of the Normal Armors until you finally arrive at the boss for the stage, a red Karukyunomu beast. He is just like those that you fought in previous stages, and with the gauntlet, the fight is even easier. You can stay a small safe distance ahead of him while you attack upwards at his head. In this manner, you can beat it without even getting hurt.
Once the beast is defeated, continue on to the last door (H) to meet the man who can send you on your way to the final stage of the game.