Levels 121 (Flame Boy) through 140 (Keep Trying) will be discussed on this page.
Level 121: Flame Boy[edit]
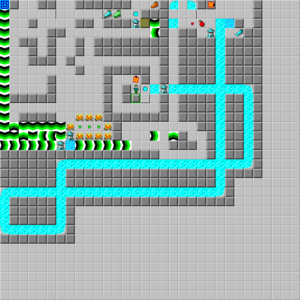
In Flame Boy, Chip can move the fireball through the level to access the further stages, which is instructive, but instead Flame Boy teaches about the value of the spring step.
Follow the fireball out, then move DLU and take the block all the way out to the top of the force floors. When you push the block onto the first force floor, perform a spring step LU. As Chip cannot push blocks in the direction they are already sliding, he runs into it as if it were a normal wall. Normally, this would not be enough, as Chip would have to wait an entire move before he is allowed to move U. Because of the spring step, though, Chip is only on [0, 1] for half a move, and therefore has enough time to step U into the exit!
FLAME OFF - 283 seconds.
Level 122: Warehouse II[edit]
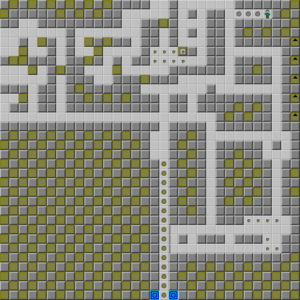
This level contains four major rooms: the north room with eight blocks and eight buttons in it, the west room with a bunch of blocks, the central room with a series of circular pathways, and the south room with a lot of buttons. Your goal is to complete the puzzle in the north room with the eight blocks, then move the seven blocks in the west room through the central room and into the south room to stay. However, the tricky part is that you can't complete the north room without blocking off a vital pathway through the central room. An already long puzzle with many turns is made much more difficult, causing Warehouse II to be one of the hardest levels in CCLP2. Blocks are counted by north room and then west room, only using reading order within each room. When the southeast room is reached, blocks are counted by the order they enter it.
Start by entering the north room and throwing block 5 4U, block 2 U 5R, and block 1 4D U 2R, and then block 2 2U, block 6 3U 5R, and block 2 out to button 3. In stage three, move block 7 L, block 6 2U, block 4 2R, and block 3 U 3R, then move the loose block 6 R off button 8 and run 2U, and out to block 8, wedged between the areas. This belongs U, and then move to the west room.
As Chip walks around to block 14, move block 11 2U, and on the way back over, move block 13 2L and block 15 R. When you can turn north from moving block 14, shove it L 3D 6U L; Chip will use this maneuver for all the remaining blocks in the west room. Start as such by circling around the top of the west room, moving block 13 D and using block 15. When you can turn north, move the block back L, then go back to the north room, pass the buttons, and shove block 8 3L, then do some more work here: Take block 3 2U, block 7 4U 3R under it, and drop block 3 onto button 6, then move to the center, throwing the block 4R. At this point, block 15 in the 4-way intersection will use a similar method to the L 3D 6U L: simply 3D 6U L, as the L has already been performed. After this, go back to the west room and take block 13 out, moving it L when you can. Next, carry block 14 4R D 5R 5D, then return to the north and move the loose block from button 6 to button 1, and perform more work: Shove block 4 L, drop block 7 onto button 6, and then return to the center, shove the block 4R, and again use 3D 6U L before returning to the west room.
Now, move through the straight passageway, carry block 11 out, move the northeast block 4R again, and only then knock block 11 back L. Enter the area where block 14 is jammed and sidle it 7L for use below, then carry the northeast block D 5R 5D to replace it. Walk straight through the north room, moving the block from button 6 to 5, and use 4R and 3D 6U L in the same way. Take the straight path to the top of the block room, drop block 10 L, block 9 U, and use block 10, ready to intercept block 9 on the next run. Again, use 4R and then L, then carry block 14 10D 6R for use in the second button room. Replace this block with the next one 7L, then that block with the northeast one, and walk straight through the north room and use 4R and 3D 6U L again.
Take the top fork to the west room, intercepting block 9 L 2D 2L, and use block 10, again performing 4R and then L. Now, move another block 10D, southeast block 1 2D 9L, and replace it with block 2, then replace the upper blocks, and run back through the north room to use 4R and 3D 6U L. Return to the west room for the final time, take the side path, and move block 9 down to use 4R and L. Again, move another block 10D, then southeast block 2 D and block 3 7R, and walk DRURUL and replace the blocks with 7L and D 5R 5D. However, after this, leave out the L from the next 4R and 3D 6U movement, as Chip has emptied out the west room and does not need to open the north intersection from the 4-way. Instead, move the northeast block 4R and go straight to the 10D move. When you enter from the east, move the block from button 3 to 1, the new block 6R, and then replace the upper two blocks and enter the north room to finish it.
Start with block 8 2L, then block 4 2U 3R, block 8 R 4U, and with no further need for the passage, move block 4 to button 6, and block 8 to button 2. Exit the room, move the block in the way 3R U 4R, then move a block 10D and enter to the east. Nick the loose block U, the new block 6R, then move URD2RUL, replace with 7L, and before replacing with D 5R 5D, enter the east of the north room and finish the puzzle. Return to the center, jam the one remaining block 10D, and then move a block from button 3 to button 2. Move the new block 7R, take the last block from above and jam it 7L and 10D, and then walk in to finish.
Of the movable blocks, run block 1 R, block 2 L, and block 6 5L, then block 2 RUL onto button 3, and with block 1 out of the way, Chip can circle around to the other three; move block 1 6R and around, then U onto button 4, and then blocks 6 and 5 onto buttons 7 and 6. This ends it - go to the center and exit to collect the 451 hours...oops, seconds. It took that long! :)
Level 123: BlockSlide[edit]
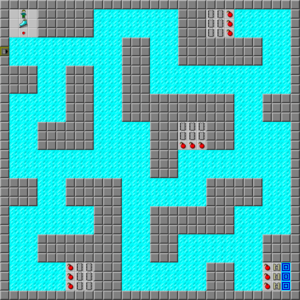
It's possible that this is not just in the tough area of CCLP2, but actually the toughest non-random bold in the entire set. You will not need superhuman boosting skills as in Follow the Glacier Brick Road, but instead you will need superhuman timing skills, as well as a computer, a CC copy, a week alone, and...well, maybe another week. Sorry!
BlockSlide's structure is very unconventional, as it requires Chip to actually catch blocks as they are sliding on ice, sort of like a soccer game. The trouble is when more than one block is used; slide delay will make the level painful in more ways than one! Even one block at a time can be extremely annoying, as Chip must get the timing exactly right on every turn to survive. Four blocks are necessary; this route will use five clones, as the unused block 1 will alter the slide delay in Chip's favor. For easier routes, simply take one block at a time, as this removes slide delay from the equation.
At the beginning, the cloning is as follows: D [1/2] DUDUDU [1 1/2] DU [1/2] 2D. From here, skate over 8R, and spring step [1/2] DU as blocks 4 and 5 suddenly return, keeping Chip out of danger from block 3. Continue R [1] DUR to knock out block 5, then move 2D as a spring step as block 3 comes through; block 2 can be caught directly with LU. Continue R 3U L, then L, and then move R to shove block 2 R, then drop back LD and move block 5 R as well, and then R again to catch block 3.
One space away from the wall, step 2D to catch block 5, then skate 2U R, catch block 2, and then move [1/2] DL (as a spring step) L 4D R (catches block 5) 2D and wait for block 2 to hit itself on the wall. To avoid being hit by block 3, Chip must use a spring step RL; he can then continue to follow 8R D, then [1/2] UR as another spring step, sending block 2 north and south. Slide delay is noticeably taking its toll on block 5; to catch it, move at 783.8. To free the chips, skate R 4U 2L [1/2] RU (spring step). When coming back out, block 3 can be seen sliding; catch it directly from column 3, then sprint over column 2, barely catching block 2 to the west. When it returns back to you, move it into the central bomb (this is as a spring step) for the best effect.
Run to the left side; at 769.0, block 4 is visible. Run it L, then skate U 4R and directly catch it D. To finish the chips, skate: L5D, then RU spring step, 3L [1/2] DL spring step, 5D, and then R as a normal move. Wend your way back through the level all the way to the strip on the extreme right of the level, and when the clock comes to the end of 752, block 3 can be seen coming down. This will be used to reach the exit: move it L off column 3, as moving it R will not allow Chip to throw it south in time, forcing him to wait longer, and then drop it U onto column 1 and skate 6D R [1/2] LU spring step, and L 2D [1/2] UL spring step, and 4D 4R naturally. This last move will drop Chip to the exit with 746 seconds.
Level 124: Paramecia[edit]
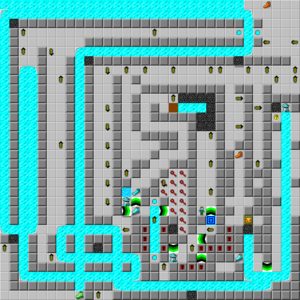
Each stage of Paramecia is a tussle with, well, paramecia. Some stages are ingenious puzzles, and some are just dodging.
Follow the path to the ice skates, which includes a Russian Roulette sliding bullet, then jump behind the paramecium with the red keys and move 3U LD 2R 4D and up through the teleport, which is a convenient shortcut. Open the rest of the locks to the east, dodge to the west at the end of the path, and then switch to the right side when the paramecium moves up. When it moves away, take the fire boots and follow the ice path to the suction boots. You can also collect the ice skates at the very start by simply jumping back U, but without fire boots, you can't get back through.
Skate back to the center, hiding on the gravel as the paramecium slides by, then skate through the center area, waiting again, and then run to the very top to take the fire boots. Hide as paramecia close in: 3L D and on the gravel, then sneak out to the west and return to the teleporting paramecium near the start. Climb two rows to the next rung on the right, then L 2U L, and Chip can now exit with a time of 228.
Because there is no boosting in Lynx, the ice slide at the beginning makes Paramecia unsolvable in this mode.
Level 125: Blocks 'n Bombs[edit]
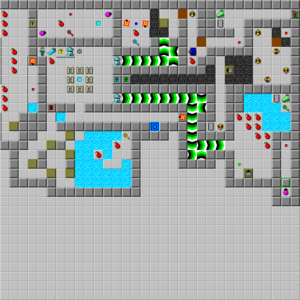
It turns out that an entire section of this level is not required, so you can finish it in only 68 seconds. As such, move to the top section and take the blue key, then hit the blue button, which allows Chip to take the other goodies to the right. Now, go to the very bottom end, move DR to override the force floors, and touch the green button to release the pink ball that clones the blocks. As the clock goes to 282, the first block will clone; move it 2R and north, then use another two blocks, wait [1] before stepping on the button for block four, and then finish the bridge north. With both keys, open the two locks in the center of the level.
Go directly over to the red button in the bug circle, then move the block DRL to trap the bug in a 2x1, and now clone another block to stuff him in a 1x1, allowing Chip to collect the goodies under the block including the last chip. Move the free block against the sockets, then remove the sockets on the right, move the block to the teleport and follow it, and move it U to stop the fireballs cloning. After the last two sputter out, you can reach the exit with 232 seconds remaining.
Level 126: Dodge![edit]
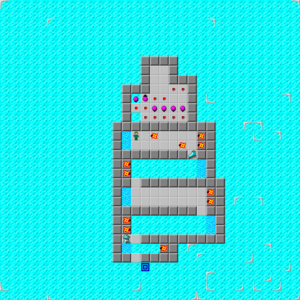
This level is a very easy little jumble when you figure out the patterns, and with only a few seconds spent in the namesake maneuver, it won't be long.
Zigzag DRUR to the ice skates, then move 2D 2L and repeat ULDLULDLD. Halfway done...continue [3] D 3R [1] D [1] U 3R [1] D [1] UR 3D. For the last area, step 3L DLU 3L 2D LR 2D, which will send you on a long ice slide to the exit located just under you, and no more dodging! It's 156.
Level 127: Escape from Chipkatraz[edit]
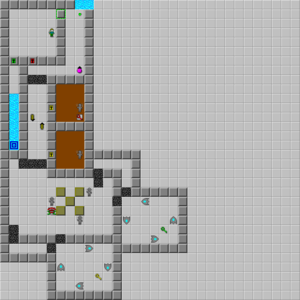
In this small prison, Chip has to move several blocks past a teeth and across a pair of paramecia circling in a smaller area. Even step is preferable, as although odd step will initially save a move, it is lost later, and it throws off the timing for further endeavors.
Escape from the prison, pass the paramecia, and step on the gravel. To outrun the teeth, feint L [1], then 2R 2D, and walk out to the green and yellow keys. Emerge from the gliders, move block 4 3L and up through the paramecia, and then take a detour into the upper yellow lock to pick up a red key under the dirt. Move block 4 2U to save four moves at the cost of just two, open both locks, and then drop it in the water, followed with block 1.
Now, run across the east, move block 5 3L, block 3 UL, and then block 2 out. As you go to use block 5, move block 3 2L, then push blocks 5 and 3 to the bridge to exit the level...INMATE 112 MISSING. 112 SECONDS.
Level 128: Fantasy Island[edit]
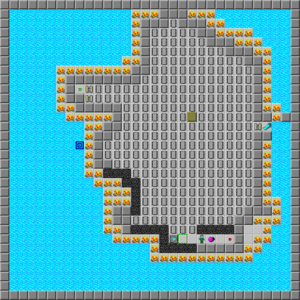
This island contains many, many chips, and also a glider clone machine which slowly adds more and more gliders. There is a block available to stop it, but you won't need it if you watch how you collect the chips. There are many, many possible routes through without stopping; a sample route is shown below.
Collect row 23, U 4L, across row 21, and zigzag DRUR to collect rows 21 and 22, then pick up the edge of rows 20 and 19 and zigzag ULDL, collecting all of these rows. Continue to run east and west for rows 18 and 17, then with gliders messing around near you, walk as such: U 2L ULURUR 2D 2R D. Pick up the remainder of rows 16, 15, 14 and 13, and then 12 and 10 around the block on row 11, removing the chips here as well - except for the extreme right column on rows 12 all the way up to 6, which will be the finishing run.
As most of the gliders are deflecting off the chip in front of the socket, never passing row 13, with very few exceptions which can be dodged in almost all routes, Chip is generally free to take the remaining nine rows in any pattern. When you finish, coming across the far eastern column, take the flippers and swim around to the exit. 336 seconds have become a reality.
Level 129: Miscellaneous[edit]
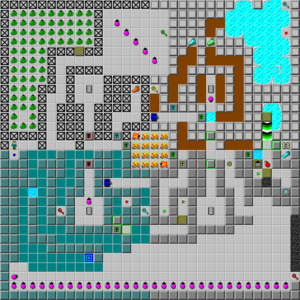
This level looks like it's going to be a multisectioned, extensive affair, going along with the name of Miscellaneous - but the blue wall section under the exit, while possibly added as a joke, is actually passable, causing the level to be busted. To enter this, move 2R 3D R 6D 2R D 5R DUR 2D RDL [3] 2L R [1] 2L U. 593 seconds are left.
Level 130: Frozen Birdbath[edit]
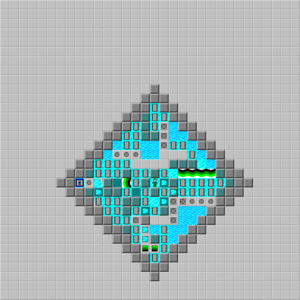
In this small ice diamond, Chip moves through hidden recessed walls, hidden ice spaces, blue walls, and some force floors, to collect 51 chips. As there is no convenient way to describe such a route otherwise, only the directional notation is shown:
R 2D L 3R U 2R UR 3L DUL 2U 3R LU 2L 3U LUDR 4D 2L DL 2D L 2U 2L U 3R 3U RU 4D RDLRDR 3D LDULUL 2U 2L ULURL 2U L, which leaves 385 on the clock.
Level 131: Time Bomb[edit]
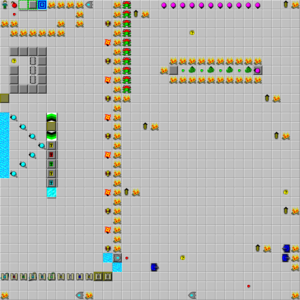
Specifically, Time Bomb looks like it will require eight blocks to complete due to the nature of the glider's left turns and the fire through which it must move, and Chip only has four blocks available. The trick is to reuse some of the blocks, meanwhile keeping the glider occupied.
Drop underneath block 1, pick up the chips, and leave it where it is, where it can temporarily trap a glider in the chip room. Open the second socket, leaving the first as another obstacle, then play (2R) to collect a few items, and open the remaining sockets, meanwhile revealing blocks 3 and 4. Off the final socket, run ULD (2R) LD 4R 3U, which will set up some of the apparatus. Pick up the other tools, jog north to free block 2 from the five locks, and push this block 2U 5R 19D 4R 2U in total. Block 3 belongs D, which will redirect the glider north and then west, north with the single socket, into the chip room and back out, and then to a spot where Chip can intercept him towards the exit.
Now, clone a glider in the southeast, and then push blocks 4 and 3 3D and 3D, 5L and 7L, and U (to intercept the glider north) and 21U. Now, this block is ready to turn the glider west towards the exit, but Chip must first move block 1 3U to redirect the glider UR into the "time bomb"; otherwise, he will die by moving D. Run back out, as the glider will be directly behind you, and move block 3 into place, which allows the bomb to detonate. Chip can now exit with 241 remaining.
Level 132: Captured[edit]
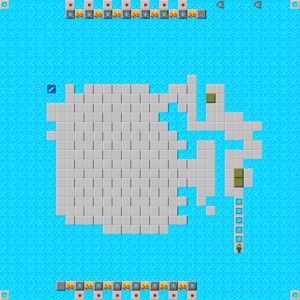
If you want the bold, the Mouse Panel Glitch is required. Captured requires Chip to move three blocks around, using two of them to drop the third into a thin wall maze, where it is flicked westward one column at a time. In the meantime, Chip has to avoid gliders cloned from both directions!
Mouse route for 250: Run over the sinking floor, move block 2 R, block 3 3U for later use, and block 2 U to reach block 1. Flick this out a total of 3D, and now use block 3 to bridge to the main section, while intercepting block 1. Stick this in the main section 3R D 2R 2D 5L 2D 2L, then circle back through the water maze, move the block U, then run RU and *D. When you make such a mouse maneuver, make sure to hit the keys hard in order to override the mouse, otherwise Chip will continue going in the direction he was directed to.
Follow this route through the rest of the level from where the mouse click moves Chip down: LDLUL 2U RDRD *D LDL 2U RU *U LULD [1] DRD *U LUL 2D RD *U LUL 2D RD *D 5:[LDL 2U RU *D]. Chip approaches the exit, and in this case, move slightly different towards the exit: LDL 4U RU *D, then move the block into the water below the exit and exit the level.
Key-only route for 246: Move the same in the beginning until you get ready to start moving block 1 west. Drop the block D instead, and then follow the route as posted: RD -L U [2] LULDL 2D RURU -L DLDL 2U RU -L UL 3D [1] L 2U RU -L DLDL 2U RU -L ULUL 2D RD -L 2:[DLDL 2U RU -L] ULUL 2D RD -L DLDL 2U RU -L DLDL 2U [5] RU [1] -L 2:[DLDL 2U RU -L] ULDLDL 3U.
Level 133: Block Maze[edit]
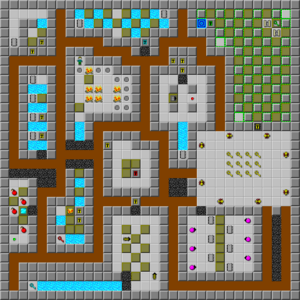
Block Maze is, of course, a block maze; it is more unconventional, as it moves blocks through different sections containing monsters, locks, water, and bombs, and walking through dirt corridors.
Free yourself with the given two blocks, then and move the block into the second water, then continue with D 2R 2U, around to the gravel, and step DR onto the gravel rather than RD. Follow with RU [1], then step into the bugs and collect the 12 keys, which will be used throughout the level's area. One dirt, U off gravel 1, is left behind to block the bugs from running through the corridor and interfering with other parts of the level. From the keys, collect the three chips on the left of the ball room, then 2R and collect up, 2L and open the yellow lock to the paramecium room.
Start with 2L 4D 3R-D, use blocks 9 and then 7 and 2, and move block 6 D on the way to using block 8, which will redirect the paramecia around it. Immediately erase block 1, then drop block 3 D and use block 5, and use blocks 2, 6 and 3 individually. The subtle rearrangement will allow Chip to avoid any clashes with paramecia.
With the blue key in your possession, turn west 4L from the first lock, then 4U 6L to open some key dirt, and enter the small room below with two yellow locks, moving L 2D L off the second one to pick up the red key. Walk directly north to the next row of gravel, to avoid releasing bugs into this area, and then open the red lock and move block 3 here L 3U 4L and 5U 7D through the start. Drop block 1 2U off this, then move block 3 through the open dirt, and then divert below, passing all the bombs, to reach the green button before moving this block north. Continue to exchange the other two blocks 5U 7D to complete the bridge to the other locks and chips, and afterwards run across the west side to pick up the other chips.
The first one is easy; off the blue lock, run 2U and both directions for another two; the final chip is also easy to collect, with a simple clone machine. Now, move further east, through the final yellow lock, and U and 2:2R2U2L2U (2R 2U) to the green key, then LULULDLU 2L to exit. You get 832 seconds.
Level 134: Microcosm[edit]
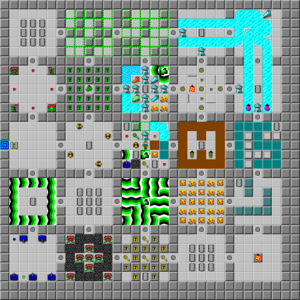
This type of level, with a grid of squares and random assortment of items in Chip's square, is actually a mini-map: room 13 contains a tile that best represents what is in each square of Microcosm: hidden fire, a clone machine room, force floors, tanks, etcetera.
Pick up the green key, chip 1, down to chip 2, the key and chip 3, then power south through room 18 and some yellow locks for another chip. Remove the 9 chips in room 24, then move through 25 and in 20, avoid all blue walls. Pass 19, then move directly north, with this timing ignoring the paramecia, for a chip, then U 2R DR into room 15, where Chip must stay on the blue walls.
Continue ULUL to room 3, hold south into the southeast corner of this, and then run through rooms 8 and 7, then enter room 2 and walk 2L U and U to room 1 and all the way south into room 16. Finish the level through rooms 17 and 12, then exit to the west; you score a microscopic 361 (!) seconds.
Level 135: Zartacla[edit]
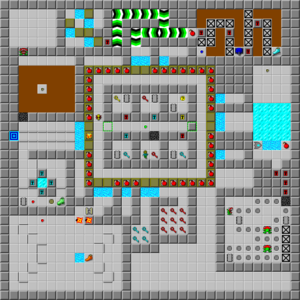
Run the name backwards, and Zartacla is the famous Alcatraz! Despite the bombs everywhere under the block prison, Zartacla is not quite as difficult as it seems, as the exits are obvious.
Escape! Open lock 5, then lock 4, press the green button twice to send the bug out, and then remove locks 2 and 1, leaving lock 3 for another passage through here. On the left is one safe area; block 2 will lead to the exit when Chip finds fire boots. Move block 1 to a dirt bloc, and walk 3U R 2U to allow a teeth onto the brown button. Before using this, Chip needs the blue keys on the south edge; move both blocks, then collect both sets of keys, and then push block 3, open the blue locks, and touch the red button before standing on the trap. It will take 11 moves on the trap before the teeth release you; run out of this and turn north to bridge the water into another area.
Take the left fork and open the red lock, then step 2U RU 3L DRDLD specifically to get the block out the quickest. Free the tank from the dirt, swap it, and follow the dirt to the ice skates, then switch the tank again to escape. With the ice skates, Chip can enter the east section; open the trap to explode the bomb, then remove the red locks and follow the recessed walls, which stays away from the teeth to pick up more chips. Now, finally return to lock 3 at the start, with the bug opening the toggle wall, to pick up the final chip, and then use this to enter the socket.
To pick up the fire boots safely, run L 4D L 2D 2R U, and then escape 2U L and run out when it is safe. Now, Chip can move block 2 on the west side to access the exit, worth 402 seconds.
This is the only CCLP2 level busted in Lynx; because Chip can push blocks without moving them, he can solve Zartacla in five seconds.
Level 136: Switch Hit[edit]
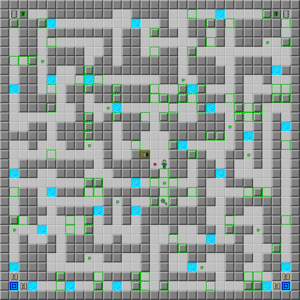
Switch Hit contains many obstacles in the form of simple toggle walls, creating a rather difficult maze. What you learn from it will help you in Key Color, so be mindful!
Clone block 1 and push it onto the green button, which frees all use everywhere else, then block 2 and move it 5U 4L to water 1, and a third 5U 7L 3U to water 2. Touch the button twice, then take block 4 to water 2, swap walls, and drop the block west onto the next water and leave the dirt. Now, switch the walls back and take block 5 to water 2, switch the walls twice and put block 6 3L off water 1, and now move block 5 RD off the dirt, pass the dirt and switch the walls, which allows Chip to keep moving the block. Drop this 3D LD, switch again, and now move the block southeast. In this type of situation, Chip wishes to switch the walls in order to ram the block off; do this twice, but Chip can click *L on the second push, which will save one second in the end.
When this is done, walk to the south and switch the walls, and remove the water under the block and switch the walls. Use the passageway above this to collect block 6, move it through in the same way (the mouse is not required for the bold now), and this time, after it goes on the most recent water space, swap the walls again and you can use the block to reach the green key. Go back to the old location of the dirt from block 4, take the chip above, and now go back to the clone machine to exit.
Before cloning, Chip must switch the walls away from their starting position; build east with block 7, slightly south with block 8, then move block 9 east and the tenth a total of U 7R D. Now, switch the walls and drop the block through the second shaft on the right. You can flick the block to the bottom row; now, switch the walls back to normal and build to the south of the shaft with blocks 11 and 12, which will link up with block 10 so as to reach the exit at 423.
Level 137: Iron Mysticus[edit]
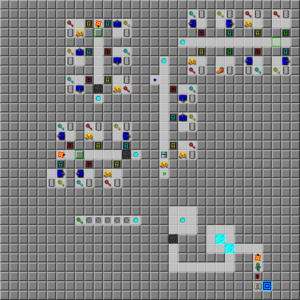
Here's a fun level: it's a bunch of tanks blocking out alternate locks, each containing goodies, in different sections, growing in difficulty with the addition of the fireballs and toggle walls.
Start with [1] 2U 3L UR, then teleport west to the green key and out. Shove east, open locks 4, 7 and 6, and now continue through the level as follows, with teleports in brackets and lock numbers in parentheses: [LD] (swap tanks) [UR] (2, 5) [LD] (swap tanks) [UR] (1) [LD] (swap tanks) [UR] (8, 3) [UU] (5) [D] (swap tanks) [UU] (3) [D] (swap tanks) [UU] (6, 4) [D] (swap tanks) [UL] (3) [RLD] (swap tanks) [UL] (2, 5) [RLD] (swap tanks).
At this point, there are 8 chips remaining and about 440 on the clock. Continue by collecting the yellow and red keys below, touch the green button with no further need for the fire boots, swap tanks again and collect the blue key. At this point, the two fireballs blocking some of the chips are released, and accurate movement is required.
Swap the tanks again, and finish the level as such: [UU] 4U L (wait) R 3U (2, 1, wait) R 3D L (wait) [D] (swap tanks) [UL] 4L D (wait) U 2L (1, wait) D 3L U (wait) [RLD] (swap tanks) [UL] 4L D (wait) U 3L (4) U 3R D (wait, 6) [RL]. Now, jump after the fireball and sneak past it using the ice to reach the exit. I'm mystified...you got 400?
Level 138: Patrolled[edit]
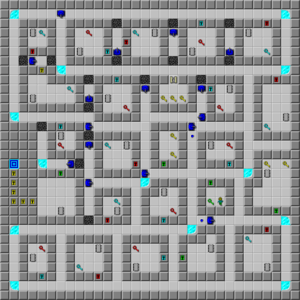
Patrolled contains many tanks circling around the level with the assistance of some ice, but changing every now and then. Switching the tanks will alter their self-switching point, which makes it a little harder.
Wait as a tank runs east, then take the two yellow keys, use ice 8 and take the chip by the exit. You require six yellow keys to exit the level, and you can only get four without the socket, two of which you took earlier. You'll use one key somewhere, so the three keys behind the socket will be enough. Return to the start, hit the blue button above twice, then run 2U R 5U and hold west to the yellow lock. Slide back over ice 3 and south to a red key, circle above the tank on your head, and take the blue key to the east, while you can sneak past the moving tank to take the red. Return to the northwest corner, take the blue key, and hold to the south to collect a red key. At this point, make the transition to the south: 3U 3R 7D R and squeeze west when you can.
Start with the first lock to the east, then move 3L 6D 2L behind the tank for the next key, further east for the next one, and more east to another key, plus a chip. Touch ice 11 and the blue button, then continue L 5U 5L U, take the key and chip, and just slide across ice 8 to safety and another key below. Now, slide across the blue button twice, move through the green and red locks on the far southeast corner, and retreat back out. Directly above the start is the next key, and as you come out, the tanks will swap and you can slide up.
Continue all the way over ices 4 and 2, take the chip and blue key, and wait for the approaching tank, at which point you dart through the western shaft to a blue lock, and then slide back over 2 and 4 to the final red lock. You can visibly see the chip, so go towards the chip; a tank is about to hit you, so dodge above, and then dive in to take only the chip before you enter the socket to collect the keys. Now, touch the blue button above the start twice, again slide over ice 8, and open all the yellow locks to finish the level. The tanks are fired and you score 481.
Level 139: Frostbite[edit]
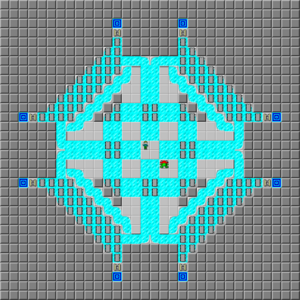
This common type of level (see Bounce) contains chips with ice under them, forcing Chip to plan routes through by avoiding specific chips and using boosting to maximize efficiency. In addition, there is a teeth, but he won't bother you in this route.
This level was the last level that I (the person writing this guide) finished in this set, as this type of puzzle is quite hard! Most of the level is composed of steps rather than routes; thus, move as directed:
Northwest: 2U LDLDL (this takes Chip into the room) URLDLRURDULRULRD 2U RU (2D) 2D LDLD. Now you are exiting this section and the clock should be at 394.8. Ride the ice to the next chip.
Southwest: DLDRDRD (inside the area) LUDRDULURLDULDUR 2L UL (2R) 2R DRDR. Notice the pattern is identical in this and the next section! You are now leaving this area and the clock should be at 387.8. Ride the ice again.
Southeast: RDRURUR (inside now) DLRURLDLUDRLDRLU 2D LD (2U) 2U RURU. Here, you are leaving at 380.8.
Northeast and exit: URULULDU (inside) RDULUDR, and here the pattern changes slightly, as Chip has to exit here: UDLRUDLRUDL 2R DR (2L) DR 2L (U) and exit. The UDLR section here is very likely the hardest move in the level, as it moves quicker than other boosting in the level because of continuous bent boosting. Think the key presses as you're doing them.
If you don't have "bite", don't expect to get 373; this is the bold score on this level and it is nearly impossible unless you remember the patterns.
Level 140: Keep Trying[edit]
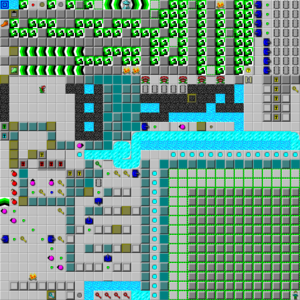
And that you shall have to do. This could just be the hardest bold in existence just because of the sheer amounts of randomness required, maybe even harder than straight random routes such as Mads' Rush II. In MS CC, it's going to be all but impossible. When I angled towards beating the previous record of 476, I made sure to use Tile World v. 1.2 to make the job a million times easier. However, even with my new route, it took about 2 hours straight to pull it off. Over time, my routes of 477, 479, and 480 received noticeable attention and work, which eventually got broken at 481. This is why Keep Trying is level 140!
Hold all the way west, teleport west, then step DRU and hold left to four red keys, and finally teleport RL to reach the locks they belong with. Pick up the three yellow keys, then open lock 2, lock 1 above, and move the block RD 4R U into the teleport, then [2] and follow it. Splash through the dirt and continue L 2U and through a zigzag six horizontal and two vertical, waiting for the tanks when necessary, and then finally up to the chip, green key, and then [4] and follow the tank as it bounces east for two more yellow keys.
Retrace back out to the entrance, and turn to the left and under the first yellow key. Keep moving [3] 4U 2D 4L 2D 2L (5D 5R) for a blue key, and then run onto the two locks and 3U 10R into the blue walls, then follow the tank out and U. Above are several teeth guarding several chips at once; they must be separated to take the chips. Move 2R U 4R URUR 3L DU 2L [1] 3L D to pick these up, then move through the water and open the five yellow locks from the bottom. With this timing, the tanks should avoid you; take the chips on the far right, zigzag south to take the rest of the chips, and then D 2L and into the socket. Wow! You made it this far?! But you're just starting...this is where it's going to get tough.
Slide through west, then down, up, and into a central room. Step into the toggle wall at the south, which should leave 518 on the clock, and power west to the fire boots at about 515. Return back out, being at the very top turn at a 511 minimum, and power through the up and down turns. This ends most of the random areas; touching the gravel at 508 will lead to 481, and at 507 will lead to 480.
At this time, move the block D into the water, and listen to the bouncing tank on the left. It will take six moves to reach the brown button and come back out. The tank is going 4R 4L repeatedly without pause, so watch its movement. If you see that taking the six moves will cause you to wait less, hit the button, and if not, go through now and do this later. At the 481 time diary, you should be able to touch the button; at 480, leave it.
Open the wall under the left fire and pass the fire to a force intersection; under the block at the end of the southern path are suction boots. The other one has nothing, so watch out!! Step back out, wait for the tank, continue out with D 2R UR, and very important: move D onto another green button! Now, smash the brown button if you haven't yet, then go back to the random section and walk through the toggle walls. The wait time will be noticeably decreased at any time, more than the 2 moves spent on the button. Step into the consecutive toggle walls, then hold left to get to the exit. Your time depends on your luck, but you can take a check on your status by following the "goal" times for completing each section.
The theoretical maximum was calculated to be 488 seconds, but this was before I fixed the teeth room and other spots, and in any case, it's only in theory - in practice, it would likely never happen unless God was playing it.