
Third floor[edit]
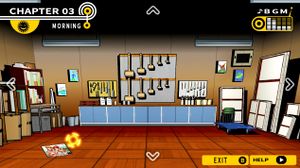
Exit the dining hall and take the set of stairs from the second floor to the third. The rec room should be close by, so head there first. Recreational activities and all genres of magazines can be found here, though Monokuma won't expound on why he won't provide the students with the latest issues. Exit to the art room and speak to Hifumi. React when he says [sculpting tools]. Examine the door at the back of the room to enter the repository, where a photo can be found on the floor. Examine it to view a strange picture: Mondo, Leon, and Chihiro, three of the now-deceased classmates, can be seen smiling in a place that doesn't look like Hope's Peak. After the short scene, exit to the physics lab.
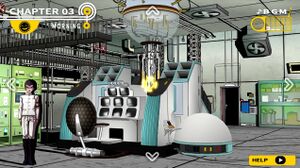

Attempt to speak to Kiyotaka before examining the massive air purifier in the center of the room. Monokuma claims it provides the students with clean air, but why is it so large? Turn Makoto's viewing angle to spot a camera on a table to the right. It looks worn down, but it seems to still be in working condition. Could this have been what was used to take that picture? Examine the doorway at the back of the lab to enter the equipment room, where you can speak to Genocide Jill. There isn't much else here, so Makoto returns to the dining hall.
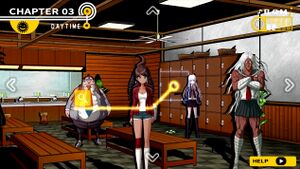
Speak to Aoi, who shares that the nurse's office on the first floor is now unlocked. Speak to Kiyotaka, Yasuhiro, Kyoko, Celeste, and Sakura. Finally, speak to Hifumi and react when he says [anime characters] for a very important discovery. Speak to Celeste and react to [bothering me]. Speak to Aoi and react to [the truth]. In the dressing room, examine the open locker by Kyoko. Inside is a laptop, which Kyoko recognizes as the same broken laptop that was previously located in the library. Kyoko points out that it was most likely placed here by Chihiro in order to hide it not from them, but from the mastermind, as the dressing room is the only room in the building with no cameras. Examine the laptop to meet Alter Ego. After some scenes, the day concludes.
Alter Ego[edit]

Exit Makoto's room and head to the dining hall to start the day. Choose someone to spend free time with to end up back in Makoto's room. Examine the door, then exit to the dressing room. The next day, exit to the dining hall. In the dressing room, speak to Kyoko and react to [the same mistake]. Speak to Hifumi to hear his side of the story. Afterward, you are given two more segments of free time. The next day, exit to the dining hall. After two more segments of free time, examine the note by the door of Makoto's room. Exit to the dining hall as instructed to meet with the note's writer. Speak to Kyoko for some bad news.
Traitor[edit]
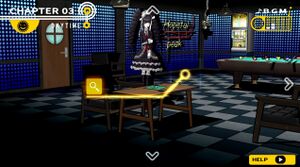

Enter and exit a couple of rooms on the first floor to trigger a scene. In the rec room, speak to Celeste to find that she's been attacked. Examine the hammer by her feet, which seems to be a regular wooden hammer except for its strange design, reading "Justice Hammer 1." Celeste claims to have seen the strange man that attacked her on the first floor early in the morning, after which she followed him in secret. This was followed by the attack, just after 7 A.M. (which would at this point have been an hour ago). React when she says [serious problem]. Apparently, the strange man had Hifumi with him. This is evident based on the photograph Celeste was able to take before he left, right down to his strange inhuman appearance.


In the library, speak to Hifumi to find out the identity of the attacker: Robo Justice. Then just as with Celeste, examine the hammer by his feet. This one is similar in appearance, indicating the same attacker, but seems to be larger and has a different marking: "Justice Hammer 2." His story seems to correlate with Celeste, and as there's not much more investigating to do here, the group takes Hifumi to the nurse's office. After the discussion on who the traitor might be, head to the second floor and begin the search by entering any room. Exit to trigger a scene. Enter the nurse's office to trigger another scene. Examine the hammer, this time marked "Justice Hammer 3" and even bigger than the last two. Back on the third floor, enter the physics lab and then the equipment room in the back for another shocking discovery.
