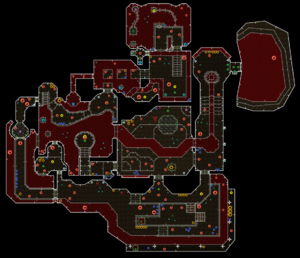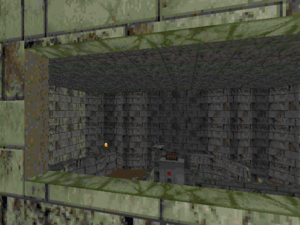
This map contains all weapons for those who haven't collected them all. However, there are some nukage areas that can inflict damage. Unlike other maps, you are not required to collect all the keys as there are routes behind the blue and yellow doors.
At the start of the map, there may be a cacodemon outside that will attack you instantly, but it is not much of a threat by itself. The initial room has a demon with a few former humans as well as shotgun ammo. Head to the south to continue, although you can shoot into the room containing the red key.
In the southwest room, there is a second northern door in the middle, and two exits on the west of the room. You need the red key to use them. The teleporter in this southern room allows you to reach the ledge containing a green armour and a rocket launcher.
Proceed through the middle door to the red key room. It is located above the lift in the north-east corner.
There are three routes to the middle room:
- To the immediate west, where you can collect a plasma gun. If you jump down, get the radiation suit to the left.
- In the southern chamber, take the northern west door, which provides a direct view to the radiation suit.
- In the southern chamber, take the southern west door, which has the optional blue key in the path. The key is only required if you want to return to the earlier sections of the map.
The middle chamber contains a Baron of Hell, which is dispatched easily with a plasma gun. You can try the rocket launcher, but it may be a little too close. From here, you have two paths:
- Through the blue key door, where you walk along the pillars to reach the yellow door area.
- Through the nukage; look for a supercharge near where you drop in.

In the yellow door room, you can quickly jump through the window and flip the switch to exit the level. If this doesn't work, go down the stairs and turn to the left. This leads to a teleporter where you can get the yellow key required to open the door.
Once you have the yellow key, you can open the final door to reach the exit. The key also allows you to return back to the previous area if you jumped through the window and landed on the exit platform.
Weapons[edit]
- A chain gun is south of the first door.
- A rocket launcher is in the south-east ledge, accessible by the teleporter.
- A plasma gun is available by taking the west door from the red key area.
- The BFG is in the exit room, available by jumping.
Secrets[edit]
There are only two tagged secret areas in the map.
- Behind the red door leading to the plasma gun, you can open the wall on the south. It reveals two stimpacks.
- In the teleporter room that leads to the yellow skull key, the south wall opens to reveal a beserk pack.
The BFG is not tagged as a secret, but it can be reached by jumping from the window leading to the exit onto the outer ledge surrounding the exit area. Walk along the ledge to reach the path to the BFG.
Multiplayer[edit]
The design of the map makes it easy to move towards the exit, but gives limited path back to the "entrance" (where there are less items of interest.) Because of the design of the map, the central area is the most dangerous, as players can easily enter it from any direction, which they have to if they want to explore the map.
- An extra rocket launcher is in front of the yellow door, in the small room between the south area and central room.
- An additional shotgun is in the central room.
- A second chaingun is in the southwest area of the yellow door.