Locating the Zone entrance[edit]
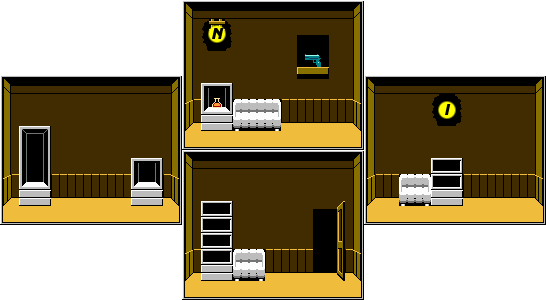
Now that you have the Zone Detector, any time you are facing a wall that contains a zone entrance, the detector's lights will blink, making it far easier for you to know when you are in the presence of such an entrance. The only problem is figuring out which one to go to next. There are two items that you need to find which are crucial for your survival. One is the air helmet and the other is the jump shoes. Before you try to collect them, you can visit the only other zone in the game where neither item is required in order to obtain a much needed boost to your health. To find this zone, we need to climb the flight of stairs outside room C.
Room J[edit]

Room J is immediately to the left of the top of the stairs. You don't need to enter it for any particular reason, but inside, you will find both a gun and a yellow potion. It's a good idea to make sure that your health is at 99 before you proceed to the next zone, so collect all of the potions you need. Getting your ammo supply to 99 bullets isn't as important, but it can't hurt. You will find that you can access neighboring rooms by hitting certain locations on the wall between them. It just so happens that you can access Room I to the East this way, but you can just as easily access Room I through either of it's front doors. Break a hole in the wall only provides a shortcut. The room we're really interested in is to the west.
Room K[edit]

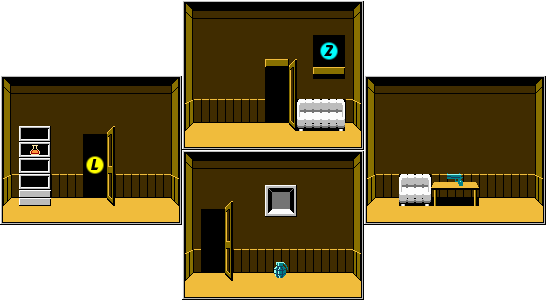
As soon as you enter Room K, you should be facing North, and you will notice that the Zone Detector is blinking. This means that one of the two entrances on the North wall will take you to a new zone. Before you enter, however, be sure to grab the gun from the East side, hit the frame on the South wall for more grenades, and collect the potion from the West wall if you need it. Having grenades is particularly important in this zone. Entering with anything less than four is not advisable.
Into Zone 2[edit]
Once again, this zone is broken into three sections. The outer two section present slightly difficult jump challenges, while the middle section is more of a slog through a tunnel full of bats. Slimes dot the floor, but some will also appear on platforms.
Your goal is to remain on the top level by jumping from one small platform to the next. Of all the enemies you need to worry about, the winged demons are particularly troublesome. It takes two bullets to remove them, and it is a good idea to get rid of them as quickly as possible. They can very easily knock you off a platform and down to the floor below. Without the jump shoes, you will have no choice but to retreat to a point in the zone where there is a low block so that you can jump back up and repeat the process.
When you reach the middle section, very carefully take out each of the bats in front of you. Remember that they may very quickly respawn after you kill them the first time. Once you make it to the other side, you need to continue jumping along the top of the platforms. Every now and then, you may encounter a particularly large enemy. This beast takes four bullets to destroy. It is generally not very threatening since it usually gets hung up on the platforms and is not likely to be able to reach you if you stay a safe distance away from it.
In a worst case scenario, if you have a lot of enemies on the screen at one time, and particularly if you have more than one winged demon on your tail, you may wish to lob a grenade to clear the screen. It will immediately defeat every enemy except for the large beast enemy. But it will also cause 5 points of damage to you. Use them carefully, but don't over use them. You should bring a minimum of 3 grenades with you to the boss battle.
Boss[edit]

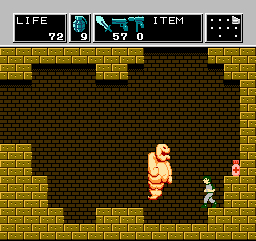
The boss of the second zone appears to be a ghostly apparition, but this ghost can really hurt you. Not only will it float about the room making a large arc, it will also shoot a small ball of energy at you periodically. Since this boss is constantly moving in and out of range, a knife is an incredibly ineffective way to attack it. The best strategy overall is to use your grenades. Three consecutive explosions will destroy it. They have to be consecutive, however, because if the boss leaves the screen, it will return with full health.
On the far right of the room is one of the items that this boss is guarding: a red capsule. This capsule will extend your life by 100 points. In fact, you will immediately gain 100 points of life the moment you collect it. Grab it as soon as possible, as it will help your chances for surviving this fight immensely. If you run out of grenades, you will have to try to attack it with other weapons, but this can cost you a lot of life.
Once it is defeated, you will get the second machine gun part and another password. Then you must return to the entrance of the zone. Like the last zone, you can return to the entrance by walking along the ground level and dealing with the slimes. There are only a few times when you must use the platforms to escape. As soon as you leave the boss room, a winged demon will attack you, so have your gun ready.

