- Green text on this page indicates that it is exclusive to the GBC and SNES versions.
| Monsters in Crater Area |
|---|
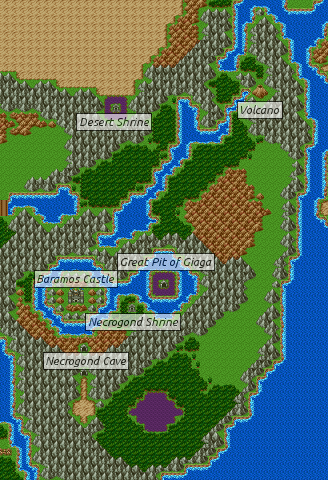
The list of places that you have yet to visit is becoming smaller and smaller. One very large region that has been inaccessible to you so far is the mountain locked region south of Isis. No rivers provide access to its interior, and no Travel Doors warp you inside. A nearby volcano acts like a lock, but what is the key? If you access the interior, you'll have to battle through a land populated with the toughest opponents yet, in order to reach a cave that takes you into the heart of the Necrogond Mountains. Only the best warriors will be able to survive the grueling maze, and only the smartest explorers will be able to find the exit. And even when you succeed, you're still a long way off from challenging the Archfiend.
Investigate a volcano[edit]
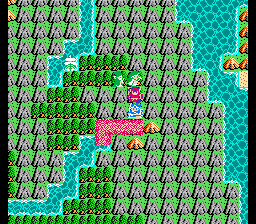
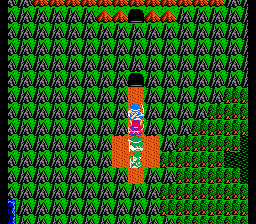
Provided you have The Sword of Gaia, then it's time to take a trip to the volcano found between Isis and Assaram. Return to Assaram, board your ship, and sail south until you have a chance to sail west towards the desert. Just below the desert is a small river that leads down into the interior. Follow it down until it ends near a volcano. Park your ship and approach the volcano. Stand before the mouth and use the Sword of Gaia. You will hurl the sword inside, causing a volcanic eruption. The lava will flow down to the left and cool in the water, forming a land bridge that you can now cross to reach the interior.
As you walk through the heart of this land, you will be attacked by some fairly powerful enemies. Trolls and Minidemons are bad enough, but the Frost Clouds/Ice Clouds with their ability to cast SnowBlast are particularly troublesome. One thing you can count on is rather substantial gains in experience points. Nevertheless, you shouldn't attempt to tackle the Cave of Necrogond unless you're above level 30 if you did not change professions, or above level 20 if you did. The ability to cast Healmore multiple times will be essential to your survival. Sages with RobMagic should use it liberally to keep up with Healing duties after battles.
Follow the interior south and then west until the entrance to the cave comes into view. Then walk up the sandy path to the cave, and prepare for a long journey.
The Cave of Necrogond[edit]
| Monsters in Cave of Necrogond |
|---|
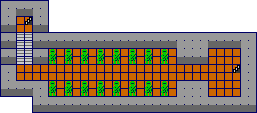
The cave starts out very simply, with a short passage through a hallway of statues. You will begin to encounter some of the strong enemies that occupy the cave, such as Marauders/HellNites who are like powered-up Skeletons/Skeletors, and the Lionheads. Trolls and Hologhosts also wander about to make life dangerous. While you may be fortunate enough to encounter a Metal Babble/Metabble in this cave, they will almost certainly run away before you even have a chance to strike one. One thing should be certain: unless you are particularly high level, you will be leaving and returning to this dungeon many times until you find you way through it safely. Climb the grand staircase up to the stairs that lead to the next floor above.
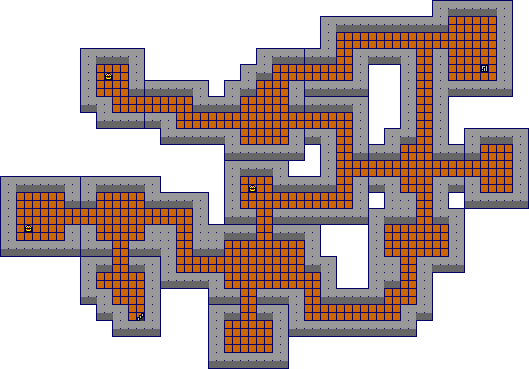
In comparison to the previous floor, the second floor is much larger and sets the stage for the kind of exploration you'll have to conduct in order to make it through this cave. If you wish to be thorough and discover all of the treasure that the cave contains, it's best to start by following the top path to the left. Continue going left until you reach a dead-end with a treasure chest. Search the treasure for 784 gold (![]() TinyMedal /
TinyMedal / ![]() Small Medal), and then double back.
Small Medal), and then double back.
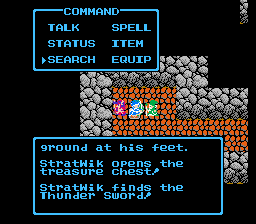
On your way back, take the lower path to the right, and follow it down and around until it returns to the left, leading to another treasure chest. In this chest, you'll find the ![]() Thunder Sword (
Thunder Sword (![]() Thunder
Thunder ![]() ), and excellent weapon to give to your Hero, or a non-spell casting Soldier. When used it battle, it casts the powerful spell Firevolt.
), and excellent weapon to give to your Hero, or a non-spell casting Soldier. When used it battle, it casts the powerful spell Firevolt.
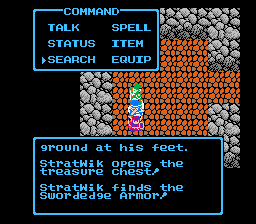
From this chest, head down and continue to explore the paths that lead to the left. Eventually, you'll reach another dead-end with a treasure chest. In this chest is the Swordedge Armor (![]() Blade
Blade ![]() /
/ ![]() Blade Armor), an interesting form of protection that not only has a high level of defense, but also causes damage to anyone who strikes the wearer! It's best equipped on whoever leads your party, since they receive the most attacks statistically.
Blade Armor), an interesting form of protection that not only has a high level of defense, but also causes damage to anyone who strikes the wearer! It's best equipped on whoever leads your party, since they receive the most attacks statistically.
Believe it or not, you've actually discovered all of the treasure that there is to be found in this cave (There is one more treasure to find in the Remakes). From this chest, walk to the right, and take the first passage that leads down. There, you'll find the staircase that leads to the next floor.
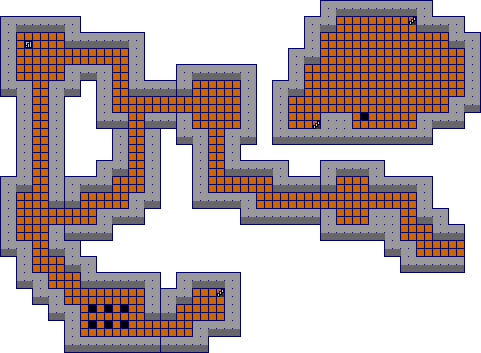
When you arrive here, you'll have two choices: head down or head to the right. It turns out that heading right is not such a wise choice. It leads to a set of two tunnels that loop on themselves continuously. However, regardless of how far you travel to the right, one trip back to the left ends the loop and returns you to the regular part of the dungeon.
Obviously, you should make your way down the lower path, either straight from the entrance, or along the small tunnel that leads there from the right. You will eventually reach a set of six pits. While you may be curious to investigate where they lead, rest assured that they simply take you back to the floor below, and not to any place of interest. Ignore them and continue walking right to the staircase beyond.
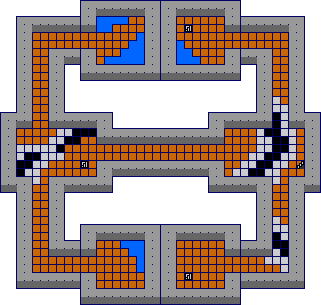
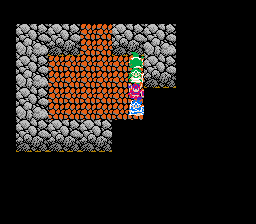
When you arrive on this floor, you can choose to go in one of three directions; up, down, or to the right. Visiting the top or bottom path will lead you to dead-end rooms, so your only real choice is to head right. However, after walking a short distance to the right, you will find a long crack in the floor that prevents you from reaching the staircase on the other side. Summon your courage and jump into the crack.
You will land in an enclosed room on the third floor, separate from the section you were previously in. Check the middle of the room for a ![]() TinyMedal /
TinyMedal / ![]() Small Medal, "Seek Out" will be a great help to find it in this big room. This room contains two staircases and a hole. The hole will drop you down to the second floor, and should only be used as an emergency means of escaping the dungeon. The two staircases will take you back up to the fourth floor. However, the bottom staircase will take you to another portion that is separated by a crack, forcing you to drop back down again. The top set of stairs will take you to a section of the fourth floor that is connected to the staircase that leads up to the fifth and final floor.
Small Medal, "Seek Out" will be a great help to find it in this big room. This room contains two staircases and a hole. The hole will drop you down to the second floor, and should only be used as an emergency means of escaping the dungeon. The two staircases will take you back up to the fourth floor. However, the bottom staircase will take you to another portion that is separated by a crack, forcing you to drop back down again. The top set of stairs will take you to a section of the fourth floor that is connected to the staircase that leads up to the fifth and final floor.
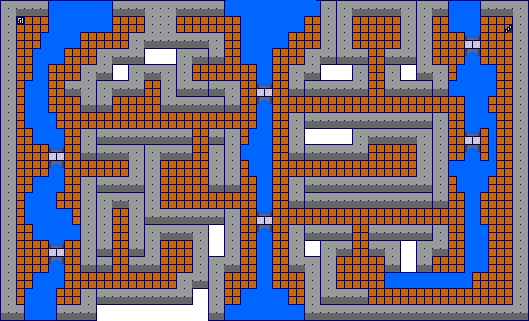
The final floor is intended to be quite confusing. To reach the dungeon exit, you must find your way through three corridors built around rivers, which are connected by a series of small chambers. You arrive in the upper left corner of the floor. As you walk down, you will notice two bridges across the water. Beyond the bridges are three potential passages to the right. The bottom two lead to dead ends, so take the highest passage.
As you walk to the right, the passage splits off and part of it heads down. The path that continues leads to the top bridge of the second corridor, while the path that heads down leads to the lower bridge. Ultimately, it doesn't matter which one you take since you can access each of the passages on the opposite side of both bridges.
Once across, you have three choices again. The middle passage leads to a quick dead end. The upper passage may appear hopeful, but you will find that the bridge it leads you to goes to a small dead end island. Instead, take the lowest path. If you go straight, it will lead you to a section of land with no bridge that leads you across. However, if you walk down to the bottom, you can clearly see that a path leads from the bottom of the floor to the far right wall. As you head back, explore the passage leading down. It will lead to a room with a black space in the lower right corner. You can walk through the bottom of it to reach that lower path that you could see from above. From here, you can simply walk up along the right side of the floor and reach the exit of this grueling dungeon.
Beyond the cave[edit]
| Monsters in Necrogond Area |
|---|
When you exit from the dungeon, you will find yourself on the north face of the mountain range. From there, you can see a number of features. One is the large castle to your north. This is where the Archfiend Baramos resides. Unfortunately, without a means to cross the water, you cannot reach it yet. To the east, you'll find a shrine, also surrounded by water. This is the entrance to something known as the Great Pit of Giaga, and like the castle, you can't reach it yet.
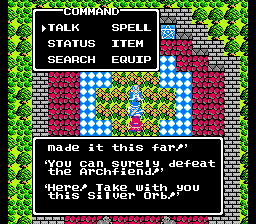
That leaves one small shrine to the east which lies somewhat between the other two locations. Since you can actually reach this shrine, head on over and enter. Inside, you'll find a man standing in the midst of a bed of flowers. When you speak with him, he will congratulate you and declare you capable of defeating Baramos. Then he will give you the Silver Orb. If you've followed along with the walkthrough, this should be your sixth and final orb. Check the left and rightmost tomb for a ![]() Token /
Token / ![]() Pachisi Ticket each and the middle for a
Pachisi Ticket each and the middle for a ![]() TinyMedal /
TinyMedal / ![]() Small Medal.
Small Medal.
