- Green text on this page indicates that it is exclusive to the GBC and SNES versions.
The time has come to use your ship to navigate the world and reach far away lands to investigate the secrets they contain. One such destination is a castle on an island found to the west of Kanave and north of Portoga. However, under no circumstances will they permit entrance into the castle. You'll have to search the world for a means of sneaking into the castle. You just may find such a means in a town on an island continent to the south.
Setting sail[edit]
| Monsters in Ocean |
|---|
Whether you went to Dhama to change your class or not, cast Return and head to Portoga. Your ship will be waiting for you in the water below the kingdom. Once you board the ship, you will see a shrine very close by to the south. Visit the shrine if you like, and climb up to the second floor. You'll find a man who tells you the lay of the land if you sail to the south. He will also tell you that whoever collects six orbs will gain the ability to travel anywhere in the world. However, he says nothing about sailing to the north.
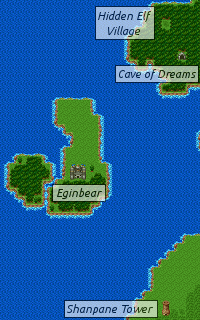
If you set sail north of Portoga, you will eventually arrive at a small island kingdom with a castle on the south portion of the larger island. The castle is named Eginbear (named after Edinburgh, the capitol of Scotland.) However, after you park your ship and approach the castle, you will find it difficult to get past the snobby guard who insists that you aren't distinguished enough to enter the castle. The castle is very secure, and there's no other method of entering. You'll need to find some way to sneak past the guard. Surely somewhere in the world, another method can be found. If you try sailing south of Portoga, you may find a town where you'll get a substantial hint on how to proceed.
Note: It's unlikely, but if you happen to have a level 33 Wizard or Sage who happens to know the spell of Invisible, you needn't search the world for a solution; you have all the ability you need. Another solution would be to fight Witch near Tedanki or Old Hag to the far east of Kazave and hoping, they drop the Herb. You'll still have to visit Lancel eventually, but you can jump down to the Castle Eginbear section of the walkthrough.
Tedanki[edit]
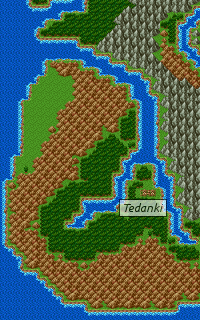
The occupant in the shrine south of Portoga told you that you'll find Tedanki to the south. As you sail down the west coast of that continent, you will see some rivers that lead into the heart of the land. Along some, the ship's progress is blocked by bridges, but you will eventually find a river with unblocked access to the interior. Follow this river until it splits, and you will find the small village of Tedanki nestled on the peninsula.
| Monsters in Tedanki Area |
|---|
| Services | |
|---|---|
| Inn | Healing |
| 124G/person | Yes |
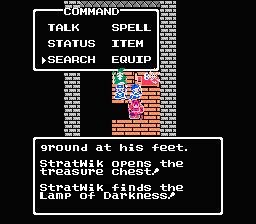
If you first visit Tedanki in during the day, all you will find is a deserted town with positively no signs of life. If you visit the very top of the town, you'll find a damaged jail cell with a skeleton lying inside. Although it may seem futile, if you talk to the skeleton, you won't receive a response but you will notice a message on the wall stating that this person wished he could give away an orb while he was still alive. A staircase in the abandoned equipment shop leads to a bedroom which contains a treasure chest. Check the drawer for a ![]() Black
Black ![]() /
/ ![]() Black Hood. Open the chest, and you will find the Lamp of Darkness (
Black Hood. Open the chest, and you will find the Lamp of Darkness (![]() Dark Lamp /
Dark Lamp / ![]() Darkness Lamp), an item which, when used, cause night to fall immediately. It would be a good idea to give it a try while you're in town.
Darkness Lamp), an item which, when used, cause night to fall immediately. It would be a good idea to give it a try while you're in town.
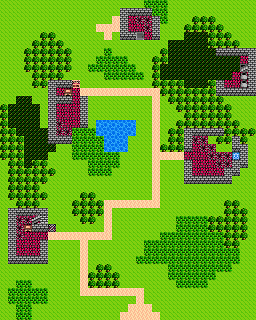
Whether you arrived after dark, or used the Lamp of Darkness, you'll find that Tedanki is entirely different at night. Under the light of the moon, it seems, the town comes to life. You will learn that the town was destroyed by the Archfiend, but whatever evil magic was used keeps the spirits lingering in town at night. You also learn that the Archfiend resides in the Necrogond mountains, which are found to the north of Tedanki. You are told that if you continue to sail along the east coast, you'll see a hole in the earth which is actually the mouth of a volcano.
There are two particular points of interest. One is the prison cell at the top of the town. A jailer blocks the open hole in the wall, while a prisoner lies behind the cell door. You'll only be able to talk directly to the prisoner when you obtain the Final Key. The other is a patch of poison marsh that covers the entrance to a house in the upper right corner. In the middle of thr marsh is a ![]() TinyMedal /
TinyMedal / ![]() Small Medal. Check with "Seek Out" to find where exactly it is and use "Stepguard" to walk over the marsh unhurt. Check the bottom pot behind the old man to find 55 gold. The old man there will tell you about the need to visit Lancel south of Baharata if you're searching for the Final Key. This is your next destination. Go downstairs and search below the Coffin near the Stairs for an Acorn of Life (
Small Medal. Check with "Seek Out" to find where exactly it is and use "Stepguard" to walk over the marsh unhurt. Check the bottom pot behind the old man to find 55 gold. The old man there will tell you about the need to visit Lancel south of Baharata if you're searching for the Final Key. This is your next destination. Go downstairs and search below the Coffin near the Stairs for an Acorn of Life (![]() LifeAcorn /
LifeAcorn / ![]() Life Nut).
Life Nut).
Tedanki has an equipment shop with the best equipment you've ever seen so far, but it is incredibly expensive. It's too good, so it got replaced with weaker equipment, but still good enough for some times. The Zombie Slasher is a great weapon, not only for Soldiers, but for Sages as well. Magic Armor can also be worn by Sages. This is a big opportunity to boost the offensive and defensive capabilities of your party. It also has an inn and a House of Healing, but like everything else, they are only accessible at night. If you stay at the inn and wake up the next morning, the town will return to its lifeless self.
A land down under[edit]
| Monsters in Lancel Area |
|---|
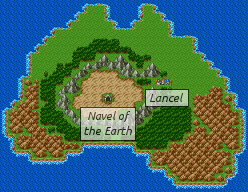
An old man in Tedanki informed you of visiting Lancel. You won't find the Final Key there, but they do have something that can help you find it. To reach Lancel, you'll have to find a small island continent that lies in the southern sea. It can be a little difficult to find, but there's one sure-fire way of reaching it. Return to Baharata, board your ship, and simply travel due south until the eastern portion of the island comes into view. Park your ship along the east coast and walk to the west to the town that awaits you. If you wander around the continent, you won't encounter any enemies that you haven't seen before, except perhaps for Goategons and Witch Doctors/Shamans.
Lancel[edit]
| Tool shop | ||
|---|---|---|
| Fairy Water Repellent Holy Water |
Wing of Wyvern WarpWing |
Invisibility Herb Hide Herb Invisible Herb |
| 20G | 25G | 300G |
| Services | |
|---|---|
| Inn | Healing |
| 60G/person | No |
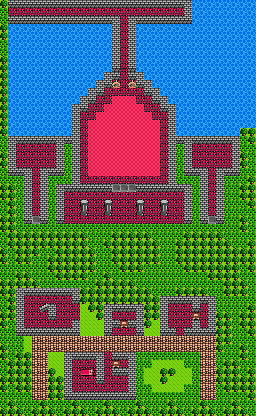
Lancel isn't so much a town as it is a small village with a large shrine at the top. It has an inn, and item shop, and an equipment shop, and a few occupants but not many. Items from the equipment shop aren't as powerful as those found in Tedanki, but they're a little more affordable. The Sledge Hammer (Giant Hammer) is a powerful alternative weapon for a Soldier (Warrior). The Sacred Robe (Magic Robe) is great for spell casters, and the Iron Mask is good head protection for Heroes and Soldiers (Warriors). A little girl walking around will introduce herself as the daughter of the item shop owner, and will implore you to buy Invisible Herbs, the most expensive item at the shop. However, it may be good advice to follow. You will hear rumors about the Vase of Drought. Supposedly, it is needed to find the Final Key, and it's kept inside Castle Eginbear.
If you wish to visit the shrine above the town, you'll need to find a path to get there. Such a path exists on the right edge of town. You can walk around the right side of the equipment shop and continue up to the top. You'll reach the gates, but they are locked. A woman nearby will tell you that you can reach the Navel of the Earth from here. There are two doors on either side, but they are also locked. Clearly, this will be a good place to return once you obtain the Final Key. If you weren't convinced about the Invisibility Herb, and strange man (Slime) standing in an alley between the left door and the main gate will advise you to buy the herbs and visit Edinbear. That is your next task. Check the right alley for a ![]() TinyMedal /
TinyMedal / ![]() Small Medal. Head back to the item shop and buy some Invisibility Herbs (Witch near Castle Eginbear and Tedanki and Old Hag east of Kazave also drop it). Visit the House left of the item shop and check pot and cupboard for 5 gold and a
Small Medal. Head back to the item shop and buy some Invisibility Herbs (Witch near Castle Eginbear and Tedanki and Old Hag east of Kazave also drop it). Visit the House left of the item shop and check pot and cupboard for 5 gold and a ![]() Token /
Token / ![]() Pachisi Ticket. If you already visited Eginbear, you can simply cast Return to go back there. Otherwise, cast Return and visit Portoga before sailing north around the coast.
Pachisi Ticket. If you already visited Eginbear, you can simply cast Return to go back there. Otherwise, cast Return and visit Portoga before sailing north around the coast.
Castle Eginbear[edit]
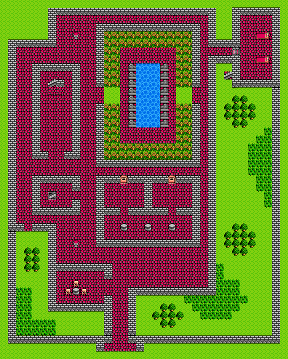
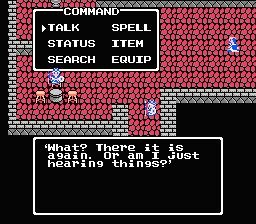
Standing just outside of Eginbear's main entrance, you should utilize the Invisibility Herb that you purchased in Lancel (or, if you have the spell, cast Invisibility.) or gotten from Witches. With your party invisible, you can slip right past the guard without incident. Don't walk around too much unnecessarily until you're all the way in the castle, as the invisibility won't last long. Once you're past the guard, you'll have the run of the place until you leave.
As castles go, Eginbear is fairly average. People inside talk about the Vase of Drought, and the history of a shrine that sank into the sea. People will still note that you're foreigners, and the princess will laugh at your accent. A gap in the lower left wall leads to a small garden where a children will inform you that the Final Key is in a shrine. Check the middle of the ring of flowerbeets for a ![]() TinyMedal /
TinyMedal / ![]() Small Medal. Go to the east part of the castle and enter the room with the servant lady inside (it's the royal bedchamber). Search the bookshelf for a
Small Medal. Go to the east part of the castle and enter the room with the servant lady inside (it's the royal bedchamber). Search the bookshelf for a ![]() Lady
Lady ![]() /
/ ![]() Lady Manual book and both cupboards for
Lady Manual book and both cupboards for ![]() Party
Party ![]() /
/ ![]() Party Dress and
Party Dress and ![]() Dandy
Dandy ![]() /
/ ![]() Slick Suit. You can go upstairs to visit the king, and he will record your progress. His chancellor appears to be an expert on the continent to the west, and he will tell you about a tribe of Indians that live there called Soo. The south wall of the throne room has two gaps which you can use to explore the roof of the first floor. If you examine the right side, you'll find a stairwell that leads down to the gardens outside of the castle, where a single man stands in the lower right corner. He will tell you about arranging boulders in the basement. Check the lower left corner for another
Slick Suit. You can go upstairs to visit the king, and he will record your progress. His chancellor appears to be an expert on the continent to the west, and he will tell you about a tribe of Indians that live there called Soo. The south wall of the throne room has two gaps which you can use to explore the roof of the first floor. If you examine the right side, you'll find a stairwell that leads down to the gardens outside of the castle, where a single man stands in the lower right corner. He will tell you about arranging boulders in the basement. Check the lower left corner for another ![]() TinyMedal /
TinyMedal / ![]() Small Medal.
Small Medal.
| Monsters in Eginbear Area |
|---|
To visit the basement, return to the first floor and walk down until you see a flight of stairs leading down. When you arrive, you will be in a room with three boulders, a couple of pools of water, and a blue and white pattern floor at the top of the room. Your objective here is to move all three boulders on to the blue and white pattern. To do this, you must carefully position each boulder so that they do not become stuck, or block you from completing your task. To learn the solution, read the spoiler down below.
Once all three boulders have been pushed into place, a door will open to your right. Walk through the door and follow the narrow corridor to the end, where you will find a treasure chest. Open the chest, and you will find the Vase of Drought (![]() Dry Vase /
Dry Vase / ![]() Thirsty Pitcher). With that, your quest in Eginbear has ended. However, there's one more discovery to make. If you return to the castle at night time (which will require another dose of invisibility), visit the throne room. You will embarrass the chancellor by catching him seated on the throne. Speak with him, and he'll reward your secrecy by advising you to explore an empty field on the shore of the continent to the west.
Thirsty Pitcher). With that, your quest in Eginbear has ended. However, there's one more discovery to make. If you return to the castle at night time (which will require another dose of invisibility), visit the throne room. You will embarrass the chancellor by catching him seated on the throne. Speak with him, and he'll reward your secrecy by advising you to explore an empty field on the shore of the continent to the west.
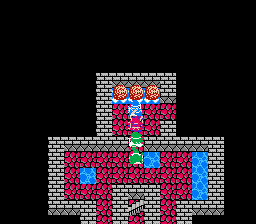
Remember that if you make a mistake, simply leave the basement and return. The boulders will always reappear in their starting positions.
- Move the first (left) boulder up one space, then walk around the puddle and push the boulder to the right two spaces so that it sits above the center boulder.
- Move the third (right) boulder down one space, and move the second (center) boulder left two spaces, but don't push it into the water.
- Stand below the first boulder, and push it up to the patterned floor. Then push it into either corner, it doesn't matter which.
- Return to the bottom of the second boulder by walking around the left puddle. Push it up one space. Then walk back around the puddle and push it right two spaces.
- Push this boulder up two spaces, and then push it left or right so that it sits under the unoccupied corner of the floor, then push it up into position.
- Now walk below the stairs, and push the third boulder up one space. Push it to the right four spaces (don't push it into the water). Walk around the puddle and push it up once space. Walk back around the puddle and push it right twice.
- Stand beneath the third boulder and push it up into the final position between the first two boulders.
Finding a sunken Shrine[edit]

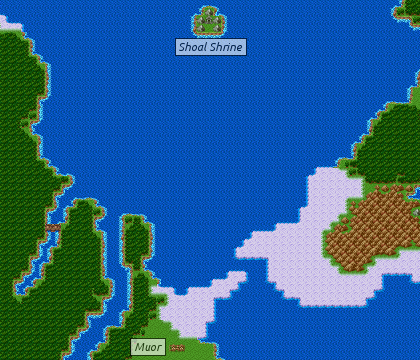
With all the information that you've received concerning the Final Key, you should know that it requires the Vase of Drought (Thirsty Pitcher), that it's contained in a shrine, and that there's a shrine that sunk into the sea, leaving shoals in its place. Clearly these three pieces of information are connected. The problem is figuring out how to locate the whereabouts of a sunken shrine. This is one aspect of the game, that you'll receive very little help with by talking to people. If you wait until you visit the tribe of Soo Indians in the new continent to the west of Eginbear, you may learn a little about the Vase and where to use it. However, assuming you want help finding the shoals now, there's two easy methods of finding them.
The first method is to return to Aliahan, jump on to your boat, and sail due south for a very long time until you reach the shoals. The second method is to sail to the location in the world that corresponds to the Bering Strait, the icy region where Russia and Alaska almost touch. You can find this location by sailing east from Baharata and following the coast around to the north. Once you reach the ice (shown to the right), and sail through the strait, continue north to arrive at the shoals.
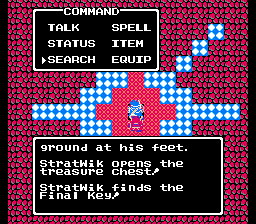
Which ever way you choose, steer your ship right up to the shoals. When you're parked next to it, use the Vase of Drought. It will cause the water to recede from the shoals, and the shrine to rise up out of the water. Once the process is complete, step inside the shrine. You'll find a single chest in the center of a decorated floor, and in this chest, you'll find the ![]() Final Key (
Final Key (![]() FinalKey). Check the northmost Tile for a
FinalKey). Check the northmost Tile for a ![]() TinyMedal /
TinyMedal / ![]() Small Medal. In the back, you'll see a skeleton sitting on a throne behind a set of jail doors. You can now open these doors with the Final Key. Speak with the skeleton, and he will tell you about a pit in the Necrogond mountains.
Small Medal. In the back, you'll see a skeleton sitting on a throne behind a set of jail doors. You can now open these doors with the Final Key. Speak with the skeleton, and he will tell you about a pit in the Necrogond mountains.
Unlike when you obtained the Magic Key, there's little reason to return to any previous prison doors that you've encountered at this time. Other than all the jail doors in Lancel, there is a prison in Aliahan, and one jail cell in Romaly, but you won't obtain anything useful by visiting them. However, it would be a good idea to visit the vault in Aliahan and store the Magic Key and the Vase of Drought there since you won't be needing either one in the future.
This is not so in the Remakes where you can grab several Treasures. First is Aliahan where you can also trade in the small medals for rewards. In the Jail are 2 pots which have 500 gold and a ![]() STRseed /
STRseed / ![]() Strength Seed. In Romaly, once you enter the castle, go left and downstairs. In there are 2 treasure chests with
Strength Seed. In Romaly, once you enter the castle, go left and downstairs. In there are 2 treasure chests with ![]() Dagger
Dagger ![]() /
/ ![]() Assassin Dagger and
Assassin Dagger and ![]() Expel
Expel ![]() /
/ ![]() Expel Shield. Go back upstairs and go north and climb up the left Tower until you find another Jail Door. Check the water bassin for a
Expel Shield. Go back upstairs and go north and climb up the left Tower until you find another Jail Door. Check the water bassin for a ![]() TinyMedal /
TinyMedal / ![]() Small Medal.
Small Medal.
Exit the Castle and go to Romaly Barrier (Shrine). There is a ![]() TinyMedal /
TinyMedal / ![]() Small Medal near the pond top left corner. Now enter the Travel Gate to a Shrine with 3 Travel Gates. Check the middle of the north Tile for one more
Small Medal near the pond top left corner. Now enter the Travel Gate to a Shrine with 3 Travel Gates. Check the middle of the north Tile for one more ![]() TinyMedal /
TinyMedal / ![]() Small Medal. Enter the middle Travel Gate to go to Olivia Shrine. Search left between the 2 Travel Gates for the next
Small Medal. Enter the middle Travel Gate to go to Olivia Shrine. Search left between the 2 Travel Gates for the next ![]() TinyMedal /
TinyMedal / ![]() Small Medal. Now you're finished with treasure hunting and can continue with your Quest.
Small Medal. Now you're finished with treasure hunting and can continue with your Quest.
