Center Room[edit]
| Approach from | Row 6, Room 8 | Strategy | Agility | ||
|---|---|---|---|---|---|
| Exits | North, East, South, West | ||||
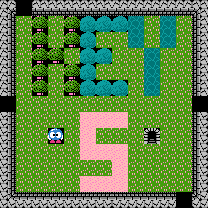
There actually is no problem to solve in this room. It is actually a clue. It lets you know that there are a total of 5 special keys to find. Once you find all five keys, a new chamber entrance will appear which will lead you to the King Egger Rooms, so you must remember to visit this room when you have collected every key. In addition each of the rooms that this room leads to has a dungeon exit. The dungeon exits lead to a regular room where one of the Guardian Chambers can be found if you push the correct Emerald Frame.
North Room[edit]
| Approach from | South | Strategy | ★ | Agility | ★ |
|---|---|---|---|---|---|
| Exits | South | ||||
Solution:
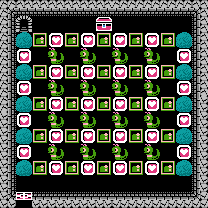
There is very little to figure out in this room. Every single Heart Frame provides Lolo with two Egg shots. In order to proceed, you will have to shoot each Snakey twice to remove them from the stage, but there are more Heart Frames than Snakeys, so you should have no problem removing them and clearing out the nearby Heart Frames before the Snakeys return.
The dungeon exit that appears leads to the third room of the fourth row.
East Room[edit]
| Approach from | West | Strategy | ★ | Agility | ★ |
|---|---|---|---|---|---|
| Exits | West | ||||
Solution:
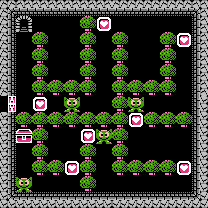
Like the North room, every Heart Frame that you collect provides you with two Egg shots. So as you approach each Leeper, you must be sure to fire at them first before they touch you and fall asleep. If they fall asleep in the path before you, you will be unable to clear the stage, so leave the room or sacrifice Lolo if this happens. As long as you shoot and remove each Leeper, you can simply follow the singular path through the room to the Treasure Chest at the end.
The dungeon exit that appears leads to the right room of the seventh row.
South Room[edit]
| Approach from | North | Strategy | ★ | Agility | ★★★ |
|---|---|---|---|---|---|
| Exits | North | ||||
Solution:
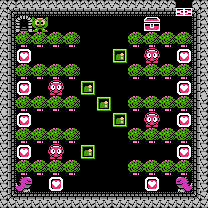
- First, run past the treasure chest and meet the Leeper head on before it can get any closer to the chest.
- Next, begin to clear out Heart Frames from the safe alleyways, working your way from the top of the screen down to the bottom. When you reach the Emerald Frame in the center, push it down until it is one space above the bottom of the stage.
- Collect the two Heart Frames at the bottom by the Gols, and then push the Emerald Frame that you moved down to the right against the trees. Now prepare to push the Emerald Frame that blocks the left Alma up, allowing the Alma to escape and roll towards you. When the Alma begins to roll, duck out of its way, stand beneath the Emerald Frame against the trees, and push it up to block the Alma in.
- Repeat these steps for each Alma as you work your way back up the stage. The only thing you will do differently with the top Alma is to push the Emerald Frame that blocks it down instead of up. You will need to move quickly to the left to stay ahead of the Alma before you can duck down and push the other frame up to block it in.
- After the last Heart Frame, you should be able to collect the key with no difficulty.
The dungeon exit that appears leads to the left room of the ninth row.
West Room[edit]
| Approach from | East | Strategy | ★ | Agility | ★ |
|---|---|---|---|---|---|
| Exits | East | ||||
Solution:
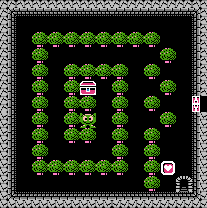
This room is also relatively simple. After you collect the only Heart Frame near the entrance, you must lure the Leeper out of the spiral in the center of the room, and get it to follow you to the outer portions of the stage. You can cause it to safely fall asleep by standing one space below the upper right corner, or directly on the lower right corner. You may need to use the gaps between the trees near the entrance to help the Leeper move down and around if you are trying to lure him out without getting too close.
The dungeon exit that appears leads to the seventh room of the fourth row.