You've made it to the crane, but now you need to get up to it and find a way to use it to cross the ravine. It will take too much climbing for Trip to get up there, so you'll leave her hidden behind to wait for you at the bottom.
Drop the pipe[edit]

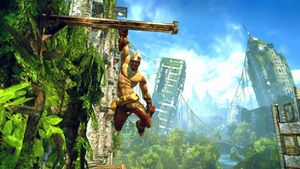
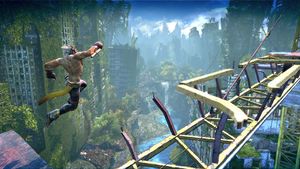
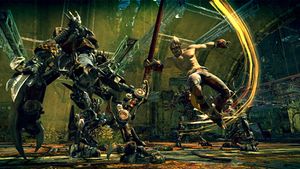
Head across from where Trip's hiding to the broken brick wall and use the handholds to start your ascent. When you get up to the first platform, turn around and go to the left around the building to pick up a ![]() Mask, then head back and go the other way. You'll go up the side of the building to another platform where a mech is waiting. Take him out and jump across a series of beams along the inner wall toward another platform. You'll see a new type of mech, an Electro Mech, that shoots stun blasts at you. These enemies can't be stunned, so you'll need to keep moving to dodge the attacks. Keep going along the beams then over to the pipe and handholds and finally to the platform where you can take the mech out. Head back outside and jump to the branch off the side of the platform and continue around to the other side of the building. The climb will take you up to a platform and back around the way you came where you'll climb up a sign on the corner of the building that falls down, leaving you back inside the building.
Mask, then head back and go the other way. You'll go up the side of the building to another platform where a mech is waiting. Take him out and jump across a series of beams along the inner wall toward another platform. You'll see a new type of mech, an Electro Mech, that shoots stun blasts at you. These enemies can't be stunned, so you'll need to keep moving to dodge the attacks. Keep going along the beams then over to the pipe and handholds and finally to the platform where you can take the mech out. Head back outside and jump to the branch off the side of the platform and continue around to the other side of the building. The climb will take you up to a platform and back around the way you came where you'll climb up a sign on the corner of the building that falls down, leaving you back inside the building.
This area is guarded by machine gun mechs and you don't have Trip's decoy, so you'll need to be careful about going from cover to cover and waiting for your shield to regenerate. Hop down into the lower area and start crossing the open space going from wall to wall. The low brick walls here are semi-destructible, so don't stay behind one for too long. Whenever you can, use the white pillars, as they will keep you safer. If you still have Stun Blast ammo, you can immobilize a mech through its shield and then switch to Plasma Blasts to take it out. Take out as many as you can this way to make the rest of the area a breeze. Head to the right under the mechs where you can jump across to a pipe and start climbing up the wall there. If you're still taking fire, quickly go up two handholds so you're in behind a piece of wall and wait for your shield to recharge. Keep going up and most of the remaining climb is protected from gunfire. Drop down on top of the Stun Blast ammo and quickly run underneath the level with the two mechs on it. Stay behind the pillars and move up to the low wall beside the mech on the same level as you. Either jump over and use you charge attack to stun it, or just shoot it with your Stun Blast. Head up the stairs and if there are more mechs, stage behind the brick wall next to the first mech. Rush out and use your charge attack, or wait for it to get close enough to you on its own. You can use the same technique on the other one if it's still up there, as it will come to investigate while you're behind the wall.

Go through the exit behind the mechs and drop down a level where you can pick up another ![]() Mask. Keep going over to a beam sticking out from the floor where you can jump to a handhold on the far wall and continue climbing up. At the top of the stairs you'll run into two sleeping mechs, one on each side. The one of the right is an Electro Mech and the other is a normal one. Either of them have the power to broadcast when you attack the other one, so shoot the mech on the left with a Stun Blast so he can't call for help, then destroy the Electro Mech on the right and go back to finish off the broadcaster. On the other side of the rooftop you can run up a beam to where you can jump across to the top of the crane. Predictably, it breaks, and you'll need to use the handholds to climb up the side of it while it's falling. Quickly jump to the right to avoid some falling debris and don't waste time going up or you'll fall down and have to start over. At the top, run along the yellow beams to the mechanism and use it to release the pipes below. After a close call with a big Dog mech, Trip will cross the ravine along the pipes you dropped and you can climb down to meet her.
Mask. Keep going over to a beam sticking out from the floor where you can jump to a handhold on the far wall and continue climbing up. At the top of the stairs you'll run into two sleeping mechs, one on each side. The one of the right is an Electro Mech and the other is a normal one. Either of them have the power to broadcast when you attack the other one, so shoot the mech on the left with a Stun Blast so he can't call for help, then destroy the Electro Mech on the right and go back to finish off the broadcaster. On the other side of the rooftop you can run up a beam to where you can jump across to the top of the crane. Predictably, it breaks, and you'll need to use the handholds to climb up the side of it while it's falling. Quickly jump to the right to avoid some falling debris and don't waste time going up or you'll fall down and have to start over. At the top, run along the yellow beams to the mechanism and use it to release the pipes below. After a close call with a big Dog mech, Trip will cross the ravine along the pipes you dropped and you can climb down to meet her.
Escape the Dog[edit]
When you get close, Trip will tell you the mech is climbing back up out of the ravine and you'll soon come out into the open where you can rejoin her. As soon as you do, you'll see the Dog climb up and you'll have to carry Trip while running away. The chase starts you with you running toward the camera, so do your best to dodge around or jump over obstacles. When it throws a car at you, bear to the left (Monkey's right) to go through a rusted out vehicle. If the Dog catches you, you'll have to start over from the beginning of the chase. Shortly after you go through the tunnel, you'll make it to a building and the Dog will be temporarily stopped by some metal beams at the entrance. Go across the room and throw Trip up to the ledge above, then climb the stairs and use the pipe to jump up when the Dog breaks in. Go down the walkway and jump across the far chandelier to another piece of the walkway where you can start climbing up again. Use the upper walkway and the chandelier to go around to where Trip is waiting. Head through the doorway and drop down to the next section where you can climb up and move the rubble aside to continue.

Drop down and head through the doorway to find yourself in an old derelict theater. As you're passing through Trip finds a power cell and you'll have to get it for her before you can move on. There are a bunch of mechs down at the bottom and a scan will reveal that the Electro Mech has a weird pulse, so make your way over to the one marked with an exclamation point over its head and take it out first. When you're fighting it, press ![]() when you get the prompt for a takedown, and you'll do a special maneuver that will stun the other mechs around you. Use this to your advantage and start destroying them while they're stunned. When they wake up, defeat the broadcaster first if you haven't destroyed it already. When they're all take care of, Trip will come down and you can help her up to the platform she goes over to. Keep going up to the top walkway and throw Trip up where the icon indicates. She'll climb up to the power cell and start working on disabling it and a
when you get the prompt for a takedown, and you'll do a special maneuver that will stun the other mechs around you. Use this to your advantage and start destroying them while they're stunned. When they wake up, defeat the broadcaster first if you haven't destroyed it already. When they're all take care of, Trip will come down and you can help her up to the platform she goes over to. Keep going up to the top walkway and throw Trip up where the icon indicates. She'll climb up to the power cell and start working on disabling it and a ![]() Mask appears over on the stage. Go grab the Mask and a hologram actor will narrowly save your life when the Dog finds its way inside the theater.
Mask appears over on the stage. Go grab the Mask and a hologram actor will narrowly save your life when the Dog finds its way inside the theater.

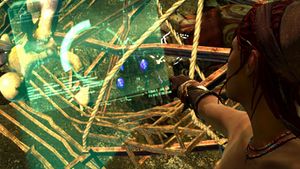
You'll climb up on top of some set pieces and Trip will tell you she thinks you can trap the Dog by dropping the scaffolding above down on top of it. The scaffolding is jammed, so Trip can't do it herself. You'll need to get up to it and unjam it, and to do that you'll have to line up the three lighting rigs over the seating area so you can get to it. Go around the set pieces jump across a platform to the red lighting rig and take it over to the platform on the side. There you can jump across the beams to get back up where you'll see an icon at the edge of the top walkway. Trip will point out the three controls for the lighting rigs, and each one can either lower or raise its rig. Jump over to the first one across from where you tossed Trip up to the power cell to raise the green rig. Now you can jump out to the green rig and over to the blue one, which lets you get over to the next mechanism that lets you lower the blue rig. Go off the side of the platform and use the red rig to jump to the blue one and go up to the last mechanism to raise the red rig. From the platform with the red rig's control, jump over to the beam off the side and take up to another platform that goes down to the first rig's control. The last thing you need to do is raise the blue rig again, so jump across to the green one and use it to get up to the mechanism. After raising the last rig, walk off the beam on the side and jump across the beams behind you to the upper walkway and take the rigs across to the angel figure next to the scaffolding. After bringing down the scaffolding, Trip will scan the Dog as it's in its death throes, and then you'll move on to the next chapter.