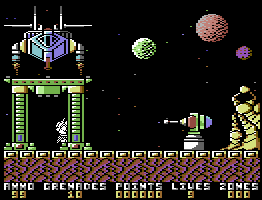
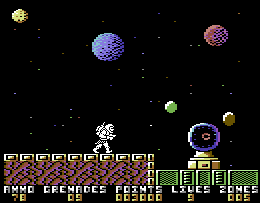
Exolon consists of 125 zones, in blocks of 25.
General gameplay[edit]
At the start of the game, you get 9 lives, 99 ammo and 10 grenades. Lives are depleted when you take a direct hit from a projectile or alien, with the game ending once lives reaches 0. Ammo and Grenades may be replenished by a white or yellow pickup, and will also be replenished when losing a life.
Your blaster can hit floating aliens, but is blocked by obstacles. Later, you will encounter a force field, which takes 25 blaster shots to destroy. The grenades are used to destroy obstacles or turrets.
Some zones have aliens spawn from the right. They will appear at your level in two or three positions. If it approaches high, you need to duck udner it. Otherwise, you need to shoot it. They stop their approach when you reach 3/4ths of the distance, where you see the lives indicator, but there is dangerously low reaction time available at that point. This is fixed by firing a few shots before reaching the dangerous section
You have 20-30 seconds to complete a zone. If this time limit is reached, an indestructible enemy will approach quickly from the right. If you manage to dodge it, it will reappear on the right again. This timer is reset only on advancing to the next screen or losing a life.
In some places, you may opt to retrieve a more powerful armor, known as an exoskeleton. This lasts until the end of the 25-zone block (even when you lose life), and gives you a doubled shot and makes you immune to most background hazards. You won't receive the 10000 bravery bonus, but survival is a better option.
Zone 0-24[edit]

- Zone 0: You are in immediate danger when you start the zone, but you can easily fire a grenade to take out the turret. Fire a second grenade to take out the rocks.
- Zone 1: Fire four grenades, one for each obstacle. There's also your first grenade pickup.

- Zone 2: Your first teleport. In general, the top path is generally the best option. If you don't want the teleport, you can also walk behind the brick wall - it won't obstruct you.
- Zone 3: You will now see your first alien. Remember that there's two positions - either duck or shoot depending on how they enter. The positions are also relative to the soldier, which makes a slight difference if he is jumping.

- Zone 5: This is the first obstacle that contains enemies. Hit it with a grenade, then shoot the red dots that float around.
- Zone 6: A small turret will fire at you. You need to shoot its bullets as you approach (switching between standing and ducking). It will stop firing when you get close, and once you touch it, you will receive a score bonus.
- Zone 7: This is your introduction to land mines, or a long jump.
- Zone 8: There is a missile that approaches from the right-hand side. It cannot be destroyed directly, but you can hit the antenna-like object with a grenade to avoid danger.
- Zone 9: You can upgrade your suit here. Use the jump command to upgrade to double shot and receive immunity to background hazards.
- Zone 12: The lower path deals with a grenade launcher, as well as a crusher. Avoid if you do not have the upgrade.
- Zone 14: You can bypass the grenade launcher with the teleport. If you want, you can even approach it from behind to get a point bonus.
- Zone 18-21: If you have trouble with the floating dots at the end of the upper path, you can try jumping as soon as you exit the structure. However, you shouldn't need to lose more than one life.
- Zone 23: This is a tank/turret hybrid. Hit the turret with the grenade, and defend against shots from the lower portion.
- Zone 24: Approach the structure to complete the block. You are awarded a bravery bonus if you didn't get the upgrade, and also points for each life remaining. There is also a bonus screen where a well timed button press can award upto 7000 points.
Zone 25-49[edit]
- Zone 25: Destroy the mushrooms and the rock formation.
- Zone 28: This may be difficult, but if can't make the jump, wait for a short gap in the tank's attack. However, if you just miss the jump, it should stop firing if you land close enough.
- Zone 33: Upper route leads to the suit upgrade.
- Zone 35: Take out the force field with 25 shots. If you collected the upgrade, it only takes 13 shots.
- Zone 43: From the upper path, launch a grenade exactly where you stand. You may need to advance if you took the lower path.
- Zone 47-48: The upper path is probably safer. In Zone 48, you are able to land on the obstacle, then drop down once the projectiles provide an opening.
Zone 50-74[edit]
- Zone 53: The lower route provides ammo here, but the upper route may give a better tactical position on incoming enemies.
- Zone 59: Use the teleport to hit the antenna. Once you take it out you can either jump down, or take the teleport back to the bottom.
- Zone 66-68: The upper route is more dangerous, but makes it a bit easier to approach the force field.
- Zone 70-71: The upper route requires a tricky jump, but may be safer.
Zone 75-99[edit]
- Zone 86-88: the lower path provides an ammo refill, but it is harder to stop the guided missile in Zone 88.
Zone 100-125[edit]
This zone is a repeat of 25-49, with only cosmetic differences past zone 101. Completing this zone returns you to the beginning of the game.