Arrival[edit]
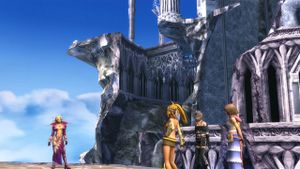
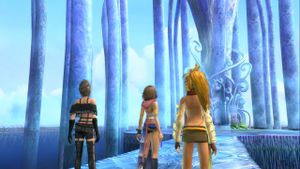
After the arrival scene, follow Rikku and Paine along the path. As you come to a gap in the path, you will be given a tutorial on how to jump. This is done by pressing ![]() as you approach to reach the other side. This also works for ledges. When you reach the second gap, drop down for a chest containing a Yellow Ring. Equip the ring if you wish and then jump back up to the ledge. Now jump across.
as you approach to reach the other side. This also works for ledges. When you reach the second gap, drop down for a chest containing a Yellow Ring. Equip the ring if you wish and then jump back up to the ledge. Now jump across.
- Area Enemies
- Ahriman -
- Bomb - Will only appear again in Via Infinito.
- Divebeak - Bird fiend. Easily dispatched. Steal Ethers from them.
- Goon -
- Quadricorn -
- Recoil -
- She-Goon -
- Yellow Elemental - Will only appear again in Via Infinito.
After a short scene, take the stairs down to a Save Sphere, then walk past Rikku and Paine to a switch on the wall and press it to activate the lift. Take the lift down to the bottom and head left at the intersection toward a waterfall. Climb the various ledges to find an Elixir from a chest. Head back to the intersection and climb up the right side.
Battle with the Syndicate[edit]

Logos, Ormi and Leblanc are back. Steal from them for accessories. You can also gain quite a bit of Gil with Pilfer Gil as well. Use a Songstress's Darkness Dance to keep the enemy party blind. Attack with a Gunner or Warrior. Use Power Break and Thunder to finish them off easily. If you have learnt any new skills by now, you can try them too. Concentrate first on Leblanc since her attacks damage the whole party then focus on Logos and Ormi.
| Leblanc | |
|---|---|
| HP: 120 | MP: 320 |
| EXP: 20 | AP: 2 |
| Gil Dropped: 250 | Pilfer Gil: 700 |
| Steal: Normal - Tiara; Rare - Tiara | |
| Drop: Normal - Hi-Potion; Rare - Hi-Potion x2 | |
| Logos | |
|---|---|
| HP: 100 | MP: 25 |
| EXP: 310 | AP: 1 |
| Gil Dropped: 80 | Pilfer Gil: 280 |
| Steal: Normal - White Cape; Rare - White Cape | |
| Drop: Normal - Potion; Rare - Phoenix Down | |
| Ormi | |
|---|---|
| HP: 130 | MP: 10 |
| EXP: 10 | AP: 1 |
| Gil Dropped: 80 | Pilfer Gil: 280 |
| Steal: Normal - Gauntlets; Rare - Gauntlets | |
| Drop: Normal - Potion; Rare - Phoenix Down | |
Race[edit]
After the battle, the Syndicate challenge the Gullwings to a race. A six minute timer will start. You now have to traverse the area while trying to beat the Syndicate to the end. If you reach the top before them, you have a chance for a great accessory. If they beat you, they will open the chest it is in taking the accessory away. Don't panic! It is possible to get all the items with plenty of time to spare. Be sure to get them as you can never return here and once you reach a place where the timer stops, you can't turn back for anything you missed. (Keep in mind that the timer will stop for battles).
Run along the path and jump the small gap. Run to the far end of the platform you are currently on for a chest containing Mega-Phoenix then go back a bit and cross a collapsed column to the left. From here, run to the door to the Temple interior. Once inside, climb up either to the left or right and press the mysterious switches on each side. This drops a column that will make your trip easier further up the path. Head back to the middle and run north.
Run forward. Drop into the first pit to open a chest containing a White Ring. Jump back out, heading north again, this time holding ![]() to jump across the pillars that serve as stepping stones. Take the right turn and follow the path (the column you knocked over if you pressed those mysterious switches) to a chest outside containing a Red Ring. Go back to the main path and continue straight this time. At the end of the path run along the path to a fallen column bridge near the end and at around halfway jump to the other side.
to jump across the pillars that serve as stepping stones. Take the right turn and follow the path (the column you knocked over if you pressed those mysterious switches) to a chest outside containing a Red Ring. Go back to the main path and continue straight this time. At the end of the path run along the path to a fallen column bridge near the end and at around halfway jump to the other side.
Ormi will order some She-Goons and Recoils to attack. Quickly take them out then hope up some floating rocks to the right next to a toppled pillar. Follow the curvy path next to this pillar for a Star Pendant. Head back and this time cross the pillar. Keep heading forward. When you reach the Save sphere the timer stops. If you made it before the Leblanc Syndicate, open the chest found here for a Muscle Belt. If you failed, the chest will be empty. (Reload the game and try again if failed. It's not hard - especially now you know the path - the Muscle Belt is really worth it). Now, enter the hall and fight Boris.
Boris[edit]

Before the fight, put all the girls in the Warrior dressphere, and have them attack with Power Break and Flametongue. If you equipped the Red Ring, have the girl with it use Fire, While the other two use Flametongue and Power Break. Another strategy would be to equip two characters with an dressphere that enables them to attack while equipping the third with the Songstress sphere. Cast Darkness Dance to blind Boris while stealing and attacking with the other two.
Every fourth turn he uses an attack called Sticky End. It can be very annoying, as it inflicts Stop on your party, but just ignore it and the effects wear off. A single attack from Boris can cause about 50 Damage, so heal with potions if a character drops below 60 HP.
| Boris | |
|---|---|
| HP: 480 | MP: 0 |
| EXP: 26 | AP: 1 |
| Gil Dropped: 300 | Pilfer Gil: 700 |
| Steal: Normal - Remedy; Rare - Remedy x2 | |
| Drop: Normal - Star Pendant; Rare - Star Pendant | |
Return to the Ship[edit]

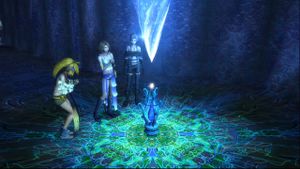
After the fight, head into the ruins to find a sphere. After they claim it, head back outside to board the Celsius. Talk to Brother and choose to "Comfort Him". Then speak to Shinra to view the contents of the sphere you just claimed. The images from it won't be that useful but the sphere turns out to be the Black Mage Dressphere.
After talking to Shinra, Buddy reports several Hotspots for spheres. Besaid Island and the Zanarkand Ruins. Head on to Besaid Island. (Traveling to Zanarkand first will trigger a key event causing you to miss the extras at Besaid and many other areas).
