Level 1[edit]
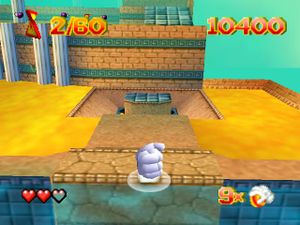
The first part of Atlantis is simply getting the ball across to the other side, thus the difficulty is from collecting 50 garibs in the level. Of the garibs:
- 9 are on the beach ahead of the tiled section.
- 13 appear at the first water section.
- 5 appear between the two water sections, including those in the cracked object, and the one by defeating the creature.
- 3 in the cracked pillar
- 12 appear in the second water section, on the square platforms
- 8 near the exit, six of which are in a long arc.
There are also three extra balls:
- One is found on the right side of the starting area.
- One is found in the cracked pillar
- One is found at the exit, and is reached by jumping onto the arch above the exit.
There is only one route to the exit, with all parts of the level being one simple line. As you travel, you can detach from the ball as desired to collect garibs. There is plenty of room to maneuver or evade enemies as well.
Between the two water sections, there is one bull-like enemy running back and forth. He can be defeated by two ground slams. There is also a nearby pillar hiding garibs that will wobble when struck with the ball. Even if you can't knock down the pillar, the garibs may still be collected if you strike the correct location on the pillar.
The second water section has two enemies patrolling between the square platforms. They won't chase you, allowing you to reach the ramp on the other side.
To open the exit, slam the button just before the doorway. Bring the ball with you to complete the level.
Level 2[edit]

Garib locations (43/60):
- In the starting location
- 2 in the breakable pots
- 4 on the ledge visible left of the first resevoir
- After lift:
- 5 in blue area on the right
- 5 on roof of structure
- 3 from killed flies
- 3 on yellow path leading to checkpoint
- 1 in pot near checkpoint
- On tiled pathway
- 3 from killed creatures
- 10 on path
- After second water resevoir
- 5 on the yellow wall on the left.
- 2 just left of said wall
In the staritng area, there is a resevoir with a cracked wall section. Smash it with the fist to release the water to the area below, and activate the lift.
Once the lift brings you to the second floor, you can retrieve garibs on the right or from the creatures - continue left for the checkpoint and move along the tiled section until you reach the second water resevoir. Slam the star button just past the resevoir, and roll the ball onto the button in the now-drained resevoir. This will open the exit, but there's no route there yet.
To reach the exit, look for a potion somewhere on the left. When you touch it, you will grow in size and can push against the brown wall with arrows, allowing a bridge to the exit.
Level 3[edit]
There are 80 Garibs. 49 of them are located:
- 5 located on the pathway in the starting area (including 1 hidden in the monster)
- 8 on the platform in the starting area.
- 5 on the stairs
- 4 in the monsters near the yellow speed potion
- 5 to the right of the flowing water obstacle
- 7 on the outside wall starting from the button
- 5 past the turning wheel before the first turn
- 9, after the aquaduct's first turn and underwater
When you enter the level, you are placed on a small pathway. While there's a gap in the path, it's trivial as you can simply enter and exit the water on the other side. The end of the path leads to a set of stairs, where you can bounce the ball to the top.
At the checkpoint, the path splits in two. Leave the ball here for now, and head left. This leads to an area where creatures fly back and forth, which you should clear out to make the potion use easier. The potion at the end is a speed potion. When you get it, run back to where you left the ball, and head down the right path. The extra speed will get you past the flowing currents. If you have enough time left, you can even use it to use the momentum to jump over the ramp with the ball (otherwise, you have to precisely throw it.)
Getting the ball onto the button will activate the gear where you saw the first checkpoing. Head there, and ride over the gear to reach the second checkpoint. Follow the aquaduct to the end, and you can bring the ball into the vessel to depart to the boss battle.