

Franziska returns with bad news - the auction gavel was nowhere to be found. Debeste taunts you, while Courtney prepares to declare her verdict... but instead of finding Kay guilty, as expected, she instead indicts Debeste. She produces the IS-7 Incident Documents (IS-7号事件の資料 IS-7 gōjiken no shiryō), which were what she came to the meeting room for on the night of the murder. She explains that in the IS-7 case, the detective in charge reported to Debeste that the victim's body had never been recovered, but Debeste intentionally failed to pass this information on to Manfred von Karma. Debeste also forced Dr. Young to produce a false autopsy report for von Karma, unknown to von Karma himself. Debeste says that von Karma alone was responsible, but Karin says that the Conductor told her that he would expose Dr. Young if she didn't agree to help him murder Crane. She didn't see the Conductor's face, so she isn't certain who it was, but the part of his face that the mask did expose had a "tattoo" on it.
Debeste says that this clears him of suspicion, as his face has no tattoos. Courtney refuses to give up and says that she and Jill Crane had been pursuing him. He responds that he didn't know much about Crane. Courtney orders him to testify about what he did know about her.
Blaise’s Testimony: Regarding Jill Crane / 万才の証言 ~被害者・籠目 つばさについて~[edit]

- The victim, Jill Crane, was a member of the Prosecutorial Investigation Committee, y'see.
- Personally, I didn't really know her that well, y'know.
- Either way, it's not like I had a motive to murder her, y'know.
- I have no idea why she was pursuing me, y'see.

- 被害者の籠目くんは、検事審査会のメンバーだったよ。
- あんまり個人的なおつきあいはないんだよねー。
- どっちにしろ、僕には殺害する動機だってないんだけどねえ。
- 彼女がなんで僕の追っかけをしていたかは知らないけどさー。
Sebastian is continuing to deny his father's guilt. You have to prove that the older Debeste did it, though, no matter how hard it will be on his son.
Rebuttal: Regarding Jill Crane / 追求 ~被害者・籠目 つばさについて~[edit]
Press on the second statement. He says he didn't know about the burn mark on Crane's hand.
- I only just learned that she had a burn mark on her hand, y'see.
- 彼女の手にヤケドがあることも、初めて知ったくらいだよ。
Press this statement. Courtney mentions that Crane always wore gloves and that she also didn't know about the burn mark. Debeste adds another statement to his testimony:
- Maybe she was always wearing gloves in order to hide the burn mark, y'know.
- いつも手袋をしてたのは、ヤケドを隠したかったのかもしれないねー。

Present the Stuffed Animal (ぬいぐるみ) on this statement. If Crane always wore gloves, then that changes the meaning of the conversation recorded by the stuffed animal. "You can't hide that burn from me." You had believed that that was said by the culprit, but if the victim was wearing gloves, then everything changes. When asked what this tells you, select The culprit also had a burn mark (犯人にもヤケドがあった Han'nin ni mo yakedo ga atta). This means that the voice heard on the recording is the victim. Debeste asks you where the culprit's burn mark was. Present the Conductor's Clothes (マスターの特徴). The Conductor's mask left a small part of his face exposed, revealing what Karin believed to be a tattoo - but what if that "tattoo" was a burn mark? Sebastian reacts to this, but his father quickly orders him to be quiet. That reaction alone, however, is all you need to prove your theory to yourself.
Blaise has also realised that Sebastian has figured out the truth. He throws a barrage of insults at his son and reveals that he only came top of his classes because Blaise ordered his teachers to score him highly. Sebastian runs off in tears at this. Courtney now wants you to deliver the decisive blow that will prove that the Conductor had a burn mark on his face. Present Karin's Testimony (武藤の証言). Recall that she found two wigs while putting on her disguise - one straight, and one wavy. The wavy one was not a wig at all - it was Blaise Debeste's fake beard! He shamed Sebastian into running away because Sebastian had already realised the truth. Debeste burns away his fake beard, revealing the damning burn mark on his chin.
What really happened / 何が本当に起こった[edit]
Blaise Debeste was one of, if not the most corrupt man ever to inhabit the position of Chief Prosecutor. Among his many misdeeds was the forging of the autopsy report in the IS-7 incident. 18 years ago, the lead detective of the IS-7 incident, Rip Lacer, reported to Debeste that the body of the victim, Isaac Dover, had never been recovered. To deceive the prosecutor on the case, Manfred von Karma, Debeste coerced the coroner, Dr. Bonnie Young, into supplying von Karma with a falsified autopsy report. By the time von Karma discovered that the body was missing, he had already indicted Jeffrey Master for the murder. To back out of the case then would have meant forfeiting his perfect record, which would have been unthinkable for von Karma. He used the forged autopsy report to press ahead with his case and later made Lacer force Master into confessing. Gregory Edgeworth, Master’s attorney, was able to prove that his client’s confession was forced. While he still won the case, von Karma did end up receiving a penalty from Debeste for his unlawful actions.
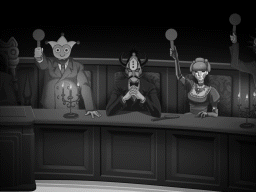
At some point during the intervening 18 years, Debeste began hosting illegal auctions of evidence. He abused his position as chairman of the Prosecutorial Investigation Committee to obtain the usage of the P.I.C.'s meeting room for the black-market auctions, and to block access to the 51st floor of the Grand Tower, to have it serve as a storeroom for the evidence to be auctioned. Information on Debeste’s illegal activities eventually reached the defence attorney Jill Crane, also a member of the P.I.C., and she set out to expose Debeste. She obtained a place as a participant in one of the auctions and won a bid on one of the items being auctioned. Crane followed Debeste to the storeroom, where, having confirmed Debeste’s identity from the burn mark on his face, she confronted him, while recording the meeting with the stuffed animal, which contained a hidden recording device. Unfortunately for her, however, Debeste had also been tipped off - he knew that Crane would be coming for him. When she confronted him in the storeroom, Debeste attacked her with his auctioneer’s gavel.

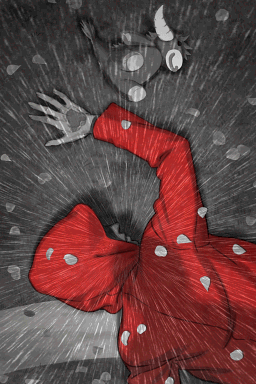
Since Debeste knew that Crane would be participating in the auction, and had planned to kill her during it, he had prepared an accomplice, albeit an unwilling one. He approached Karin Jenson, the granddaughter of Dr. Young, and blackmailed her into cooperating with his plan, by threatening to expose Dr. Young’s role in forging the autopsy report of the IS-7 incident. He planned to murder Crane and have Karin take her place in the auction to cover up his crime. After killing Crane, Debeste stole her clothes and mask, and hid her body inside a costume trunk. Karin disguised herself as Crane, and the two returned to the meeting room to continue the auction. Karin won the costume trunk in which Crane’s body was hidden. However, Debeste’s attack had not killed Crane - she managed to escape the costume trunk and retrieve the stuffed animal, and had gotten as far as the viewing platform of the Grand Tower before succumbing to her wound. The moment of her death was witnessed by Kay Faraday, who had been kidnapped and taken from Gourd Lake Park by an unknown person. Shocked by the scene before her, Kay stumbled and fell into the storeroom hatch.
After Karin won the costume trunk, she and Debeste returned to the storeroom. There, they found Kay Faraday lying unconscious at the foot of the ladder, and Jill Crane dead, not in the trunk, but on the viewing platform. Debeste inspected the two women and found letters addressed from one to the other on each. Assuming that the two were acquainted, he saw an opportunity to frame Kay for Crane's murder. He hid the two in the costume trunk until the auction had ended. After the auction, he removed Crane's body from the trunk and stabbed it with the candelabra. He left the candelabra in the wound and moved the body to the meeting room. There, he removed the candelabra, resulting in the pool of blood found there, and placed the body on the bench of the meeting room, with the candelabra nearby. This was done to create the impression that the murder had occurred in the meeting room, and prevent the storeroom from being discovered. He then had Karin take Kay (who had developed amnesia after her fall) elsewhere, after planting various pieces of incriminating evidence on her person.
The following day, the body of Jill Crane was discovered in the meeting room. Here, the next part of Debeste's plan kicked into action: Dr. Young was called in to perform the autopsy, but Karin, who was in charge of recording the details, recorded false information which stated that the cause of death was the stab wound and not the blow from the gavel. Miles Edgeworth, who had been investigating the cause of Kay's memory loss, took upon an investigation into Crane's death, eventually linking it to Kay's amnesia, and uncovered the hidden storeroom and illegal auctions. Thanks to the few memories Faraday managed to retain, Edgeworth was able to connect both incidents to Debeste, bringing an end to his reign of corruption. As for who had kidnapped Kay and brought her to the Grand Tower, the identity of the "ghost" in the red raincoat remains a mystery... for now.
Epilogue / 結語[edit]
Kay thanks Edgeworth for believing in her innocence, even when she didn't herself. Courtney says that while the search for the murder weapon is ongoing, it's likely Debeste has already disposed of it. She also mentions that Debeste denies having anything to do with the letters supposedly sent by Kay and Crane to each other. He found the letters, which suggested that Kay and Crane were acquainted, and decided to pin the crime on Kay. Courtney explains the truth behind why Debeste killed Crane.
Several years ago, Crane was in a relationship with a cameraman, who was investigating the black market auctions. He got too close to the truth, however, and was murdered. Crane learned of the auctions from the belongings her lover left behind, and came to seek revenge on Debeste, but ended up being killed herself.


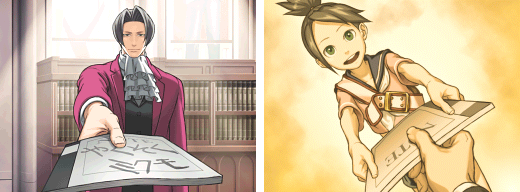
Sebastian remains missing, despite efforts to contact him. Franziska says that he will need to accept the truth eventually, to lead his path in life. Karin apologises to Kay for helping Debeste throw suspicion on her. Courtney prepares to leave for the courthouse - she's presiding over the trial of Patricia Roland, the murderer of Horace Knightley. Crane was supposed to defend Roland, and Sebastian was to be the prosecutor, so replacements for both will need to be arranged. As for Edgeworth's badge, Debeste's arrest leaves his fate uncertain for now. Courtney offers to help Edgeworth get his badge back, but he declines. Before leaving, Courtney gives Edgeworth the notebook found beside Crane's body - Kay's "Promise Notebook". Debeste used it as another way of casting suspicion on Kay, but Courtney believes that it should finally be returned to its proper owner. Kay reads through the notebook, and all her memories come flooding back... Kay Faraday, the second Yatagarasu, is finally back! Karin returns Kay's clothes to her, and after helping her change into them, leaves with Franziska for questioning.

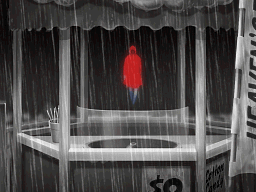
Now that Kay has her memories back, Edgeworth has some questions for her to settle. He asks her what she was doing on the day she lost her memories. She tells him that she was asked to go to Gourd Lake. As she was looking at the moon, someone in a red raincoat approached her and knocked her out. When she woke up, she was on the viewing platform of the Grand Tower. She stumbled across the person in the red raincoat, now dead, and fell into the hatch in shock. She's still confused about some details, though, such as why she saw the person walking in midair. When asked, say that this is because of Your memories of two places (2つの場所の記憶 Futatsu no basho no kioku). She was probably confused by one or two specific objects - present either the cherry tree or the food stall. Both places have a cherry tree and a food stall, causing Kay to confuse them. This also means that the person in the red raincoat was not floating in the air, but simply walking on the ground at Gourd Lake. There still aren't any clues as to this person's identity, though.

Just then, a sound comes from the storeroom. Kay and Edgeworth go to check it out, followed by the scoop-sensing Lotta. The sound is coming from a transceiver. These things never ring with good news... It's Shelly de Killer. Why is he calling? He asks if you can consider the case to be fully solved and says that there is a "mastermind" behind the incident. He wants evidence that proves the existence of a mastermind. Present the Victim's Letter (被害者の持っていた手紙). Kay certainly didn't write the letter, and Debeste is denying having anything to do with it, so who did write it? And how does de Killer know all of this? Despite having given up his badge, Edgeworth swears to reveal the truth, once and for all.
