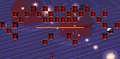
Round 1: Stages 1-5[edit]
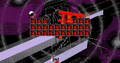
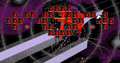
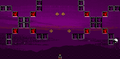
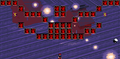
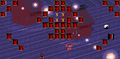
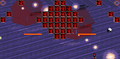
Stages 1, 2, 3, and 4 are quite simple and straight-forward. Bumpers are introduced in stage 2. Your goal is to finish each stage as fast as possible. If you take too long to complete a stage, "harry up" will appear on screen and bullets will come raining down until you complete the stage. This continues until stage 5. Every five stages, you'll have to face a boss.

SinGyoku, the Gatekeeper, is the first boss of Highly Responsive to Prayers. It appears as Reimu approaches the gates to Makai (the Demon World) and Jigoku (Hell) and has three forms. Its first form is a large Yin-Yang Orb. In this form, it shoots a wide range of bullets which spread across the screen. Its second form is a red-haired priestess who shoots two lines of bullets. Its third form is a male priest who shoots bullets in random places. Try using Reimu's Yin-Yang Orb as both a shield from the bullets and as a weapon against the boss. Get the Orb to hit the boss until its health is fully depleted. After completing the round, you'll get your score for the round and a screen asking you which route you wish to take: the Makai route or the Jigoku route. Choose either route to set your path for the rest of the game.
-
Stage 1
-

Stage 2
-
Stage 3
-
Stage 4


Makai[edit]
Round 2: Stages 6-10[edit]

Reimu encounters the next boss at the tenth stage: Yuugen Magan, the Evil Eyes. A set of five eyes spawn above Reimu when the stage starts, and promptly shoot lasers directly below them. At this point, three of the eyes will vanish, leaving two to start on the attack. The upper two shoot bullets that are spread and can be easily avoided from a distance. The lower two shoot missiles in opposite directions so as to trap Reimu. Both series of shots can be avoided by timing slides or repelling them with the Yin-Yang Orb, though you can also use Bombs to considerably lower the health of the eyes. After surviving the shots, the top eye will finally make an appearance and shoot a laser that moves across the screen. The laser doesn't reach the end of the screen, so stay on the edge to avoid death; the same goes for the following laser. Afterward, it shoots two lasers at a time, both moving into the center. If Reimu stays in the absolute center of the screen, the lasers will not reach her in time and the eye will conclude its attacks.
Once all eyes have had their chances to attack, they will spawn together and create a pentagram that moves on its own, in turn releasing a wave of bullets that the pentagram shoots with no clear direction. While these attacks go on, one eye will appear at a time, vanishing only after it's hit. At this point, Bombs would come in handy, as a single eye is not an easy target to hit. Deplete its health to clear the round and move on to Stage 11.
-
Stage 6
-
Stage 7
-
Stage 8
-
Stage 9
-

Stage 10


Round 3: Stages 11-15[edit]

Clear the fourteenth stage and another boss will arrive in Reimu's path. Elis, the "Innocent Devil", begins attacking by shooting a long series of lasers across the screen. Dodge these by getting in between two of them before they drop. At times, she forms a circle around her that transforms into bullets, which target Reimu. She can also nonchalantly toss missiles below her, which can be dodged if slid through fast enough but cannot be repelled by the Yin Yang Orb like most other bullets. One of her strongest attacks involves her creating a pentagram which unleashes a barrage of bullets around her. Fortunately, these are slow and spread further the longer they travel so keep your distance. When enough of her health is knocked off, she will begin to take on more advanced techniques.
Further into the battle, Elis can create a damaging circle around Reimu and, even more dangerously, transform into a bat. Her small size makes her difficult to target and her bullet barrages last long enough so that they become increasingly difficult to dodge. At this point in the battle, Bombs become very useful. Elis will tend to switch back and forth between human and bat forms following her first transformation, so save the Bombs for when she decides to transform back. Defeat her in either form to clear the battle and move onto the sixteenth stage.
-

Stage 11
-
Stage 12
-
Stage 13
-

Stage 14
-

Stage 15


Final Round: Stages 16-20[edit]
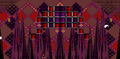
Reach the twentieth stage to come face to face with the one responsible for the destruction of Reimu's shrine, Sariel, otherwise known as the Angel of Death. Her attacks are sporadic and difficult to avoid, starting with her first laser attack and followed by her random and heavy bullet attack. As large as she is, you can only deal damage to her by getting the Yin Yang Orb to hit the white center of her chest. Occasionally, she will spawn orbs next to her that can also shoot bullets, though these attacks aren't nearly as heavy as her own. Fully deplete her health to see the game's ending; clearing the entire game without using a single continue rewards you with the good ending, while anything else gives you a bad ending.
-
Stage 16
-
Stage 17
-

Stage 18
-

Stage 19
-

Stage 20


Jigoku[edit]
Round 2: Stages 6-10[edit]

Reaching the tenth stage pits Reimu against the Vengeful Ghost, Mima. Mima teleports often, and releases bursts of shots that eventually target Reimu whenever she reappears. However, she'll usually stay in the center circle, shooting bullets in different patterns and even shooting rockets that span the screen on their path. When she shoots lasers onto multiple random positions, she is usually preparing to target these positions with more bullets; get in between them but, most importantly, use the Yin Yang Orb as a shield. Nevertheless, if you lose enough lives, you should have enough Bombs to defeat her easily.
-
Stage 6
-
Stage 7
-
Stage 8
-
Stage 9
-

Stage 10


Round 3: Stages 11-15[edit]

On the fifteenth stage, Reimu is attacked by the Hellish Moon, Kikuri. Though she looks like a big target, her head is what must be hit to deal damage. Kikuri begins by shooting waves of bullets in a circular pattern. Dodging so many waves is a bit difficult, so shoot your own shots to cancel them out or use the Yin Yang Orb for protection. After a pause, she continues the same attack. Your best bet at this point is to hope the Yin Yang Orb manages to hit Kikuri by chance, as going on the offensive without losing lives is even more difficult than dodging. Following this attack, she finally eases up by unleashing smaller attacks that are more spread out, such as small circles of bullets. She also releases two purple flames that shoot bullets of their own, though these are only in pairs to begin with. After a while, their attacks become more difficult.
The flames will begin to shoot rockets after their initial smaller attacks. These rockets would be easy to dodge if it wasn't for their splash effect, forcing Reimu to wait before she can cross where they landed. At this point, Kikuri will also begin using a new attack in the form of thick red lasers. Needless to say, dodging both and remaining on the attack is a chore; defensively, the center is the best place to be in as it tends to be in between both the lasers and the rockets. However, this is your best opportunity, as the screen will fill with random bullets being shot in all directions in a short while. Kikuri will then begin to shoot thinner lasers but in bigger rounds before returning to random bullets. You can hit her with Bombs at whatever point you deem the most difficult, and defeat her to move on to the final round.
-

Stage 11
-
Stage 12
-

Stage 13
-
Stage 14
-

Stage 15


Final Round: Stages 16-20[edit]
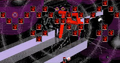
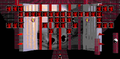
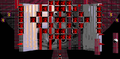
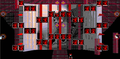
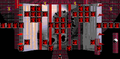
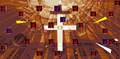
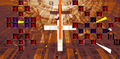
During this final round, your stats become more difficult to see due to the red text blending in with the red background. These stages are also generally difficult due to the heavy use of bumpers. As tough as this may be, saving your Bombs for the twentieth stage is important. Here, Reimu finally finds the one behind the destruction of her shrine: Konngara, the Astral Knight. Konngara's attacks are the usual heavy barrages of bullets. At times, she can also send blue bullets that stay in place and block Reimu's path, and can also attack with both bullets and lasers simultaneously. Konngara has many different patterns to her bullet attacks, some of which can be followed by watching the swipe of her sword. Survive long enough to defeat her to complete the game, although your ending may vary; completing the game without using any continues leads to a good ending, while any use of continues leads to a bad ending.
-
Stage 16
-
Stage 17
-
Stage 18
-
Stage 19
-

Stage 20


