- Noroino Kyokai (呪いの教会 Church of the Curse?)

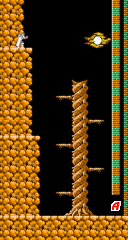
Holy Diver starts you off at the top of a cliff. You must jump down to the floor in order to access the entrance of the church. You can use the tree to practice jumping and maneuvering in the only area of the game that contains no threats. Enjoy it while you can, the rest of the game is far more challenging.
1: The real action starts when you set foot in the first hallway. You'll encounter two types of enemies in here: red hooded henchmen, and flying demon knights. The henchmen walk forward without regard for their own safety, and are easily dispatched with a single shot from your fists. The flying demon knights are another story. They appear and hover above your head before slowly diving in for an attack and then retreating. You can overtake them if you walk forward, but this actually puts you at a disadvantage because it allows them to get closer to you. Instead, let them hang back and wait for them to fly in before showering them with attacks. Once they are destroyed, you are free to move on.
2: Here you will find a powerful bracelet lying on the floor. Be sure to pick it up, or you won't be able to make it very. The top of the staircase in the corridor above is literally blocked off. The bracelet enables your attacks to remove the blocks so you can progress. Don't forget that you can also fire straight up. As you remove the blocks, watch for life restoring hearts, or mana restoring orbs.
3: The flying demon knights continue to appear in this hallway. The henchmen are gone, but they are replaced by something more nefarious: winged skulls. At first these skulls may remind you of the floating medusa heads from Castlevania. However, unlike those heads who continued on past you and off the screen, these skulls have a nasty trick in store for you. After they are far enough past you, they turn around and travel straight back. You'll have to keep attacking the skulls until there is a break in their appearances. At the same time, remember not to advance on the flying demon knights in order to give yourself the best chance to destroy them before they get too close.

4: The skulls will attack relentlessly, but if you make it to the end of the corridor, you will encounter a stack of blocks along with a new small round enemy who bounces around and rolls. If you manage to destoy this creature, it will actually produce a red potion which can completely restore your health. Collecting this may mean the difference between being safe, or just a few hits away from death.
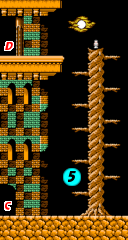
5: On the other side of the hallway, you'll emerge back outside, with a tree growing to the right. You'll need to climb this tree in order to reach the top where the entrance to the stage boss can be found. Along the way, more of the purple rolling enemies will appear, dropping down to attack you while you make your climb up. Attack them if you can, avoid them if you can't as they eventually drop to the floor below. At the very top of the tree, you'll find a 1-up doll which you should collect before you proceed to the boss.
Boss: Satyr[edit]
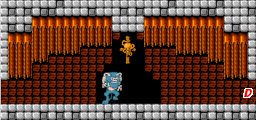
When you first encounter the Satyr, he may seem rather imposing. The truth is, he takes a lot of attacks to bring down, but if you understand how he moves, it's easy to avoid taking any damage yourself. For starters, the Satyr rushes towards you, but it will always jump over you. So if you don't leave the ground as it's running, you'll be safe. Second, after leaping over you, the Satyr will turn around and freeze. This is the cue that he is getting ready to attack you. It does so by releasing several orbs of energy at you. However, like your own regular attack, these orbs can only travel so far before fizzling out. Once the attack begins, simply move out of its range and you'll avoid getting hit. In order to take the Satyr down, you must hit it enough in the eye. Your normal attack can achieve this as long as you jump when you shoot, but the magic of Twin Flame can actually make the job a little easier. As the twin flames spread out, they hit the Satyr's eye much more easily. Since you get all of your mana back on the next stage, feel free to use it all up. A full 50 mana is enough to destroy the Satyr with Twin Flame attacks if you don't miss.
Destroy the Satyr and then walk to the left where another door will open. Beyond the door is your prize for defeating the Satyr: Blizzard magic. Collect it to advance to the next stage.


