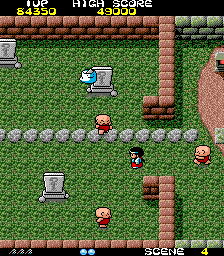
You begin this stage by walking to the left, which you will do so for a long time. This stage introduces a new enemy, the Toosenbou. They look like walking tombstones. They patrol a given area, walking up and down the screen, trying to line up with Sayo-chan. When she walks in front of them (above or below), they will suddenly charge in her direction in an effort to crush her. They fall down at the last minute and shatter on the ground. You can outrun them and move out of the way in time, but the better strategy is to attack them and destroy them before you try to cross in front of them.
To make matters worse, there are a much larger number of Puka Pukas and Rumurus on the stage. If even one Rumuru grabs on to your legs, it will slow you down enough to make dodging the falling Toosenbou impossible. Even if no Toosenbous are in the vicinity, the Rumurus can be a danger if enough Puka Pukas fill the screen with bullets. If Rumurus do pile up on you, there are no toriis to cast them off with until near the end of the stage, so you'll be forced to walk closely around the lanterns in an effort to separate them from Sayo.
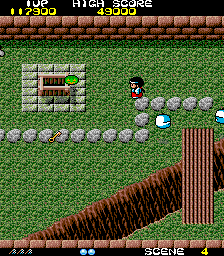
As tempted as you may be to rampage through the level, it is important to stop every once in a while and clear the stage of as many enemies as you can before proceeding. Waving your wand can sometimes be more effective at clearing the screen of enemies than shooting them.
You will have to cross a number of bridges. Obviously the wider bridges are safer to cross, but sometimes the smaller bridges may take you through safer regions of the screen. Decide which one to cross carefully. The Hashiritai (running fish) will start to appear as you cross the bridges. This presents a problem if you're stuck on the bridges. Normally, the Hashititai are not much of a threat, but with limited room to run in, you must be much more careful when they approach.
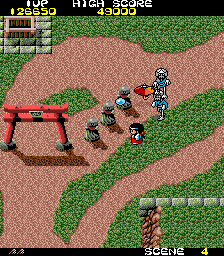
You will pass three wells from which the Baku Uri melons will appear. The stage is set up in such a way as to force you to come in close proximity to the well. However, the closer you get to the well, the greater chance you have of getting hit, so it's a good idea to take your time and maneuver safely around the well. Because of the danger presented by the wells, you may even decide that now is a good time to use one of the time freezing blue crystals. If you can safely get by the first well, the best time to activate it is when you are past the second well, or just approaching the third well. This will freeze all the enemies in place as you collect the stage key from below the third well without fear of getting attacked my melons. If you use it just before the line of Toosenbous near the end, you can also get past them without fear.
When you reach the far left edge of the stage, you will see a well in the upper left corner, and a torii below, as well as three statues. The upper right statue contains a blue crystal if you shoot it. The lower left statue contains a blue Ofuda power-up. This means, if you are not careful and shoot down and to the left so as to hit all three, you will cause the blue crystal to disappear because only one power-up will ever be shown on the screen. The screen will begin to scroll down, and you will encounter a hut with an Ogei inside. Defeat it or run around it, and prepare to deal with the Bake Chouchin (flying lanterns) shortly before you reach the boss room.
Boss[edit]

The boss of the third stage is named Sanba, and she is a demon known as a mountain hag. She only has one kind of attack, but it is a rather deadly one. From either hand, she will regularly throw out a set of knives, either three or five at a time, which fan out in various directions. To survive, you must stand far enough away, and stand in the gaps between the knives as they sail past Sayo.

When squaring off against Sanba, the best strategy is to stand as far back as possible (assuming you have collected enough blue Ofuda power-ups to shoot across the screen) and shoot as rapidly as possible straight up the screen. Always prioritize moving out of the way of the knives, but then immediately resume firing straight up at the boss until she is defeated. She doesn't move very fast, so you'll rarely have to reposition yourself in order to hit her. If you fire rapidly enough, you can defeat her quite quickly. The strategy does not change when you meet up with her the second time around.
The god that you rescue from Sanba is Benzaiten. The only female goddess out of the seven gods of fortune, she is the goddess of luck, love, eloquence, education, the arts, science, and patron of students, artists, geishas, and entertainers in the eating-and-drinking business. Her virtues also include happiness, prosperity and longevity. She can protect us from natural disasters and gives wisdom to succeed in battle.