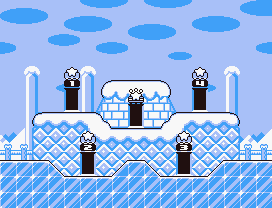
With a name like Iceberg, one can certainly expect this island to be full of slippery surfaces. All three Animal Friends will certainly see some use here. Rick doesn't slip on ice, Kine is helpful for the numerous submerged portions of the stages and even Coo has some use in certain stages. There are now four stages total, and new obstacles like powerful winds and auto-scroll segments will be introduced. The boss of Iceberg is the Ice Dragon, a pudgy lizard with control over ice.
Stage 1[edit]
Section 1[edit]

The stage starts out just like any other, with a standard horizontal scrolling section. There is quite a wide variety of enemies here, and multiple copy-abilities that you can get from inhaling them. The door halfway through the section leads to a small room, while the door that is required to advance is located on top of some thin platforms. Be careful not to fall into the bottomless pit while jumping to it!
(1) The Propeller Bomb makes a return, and it can be very difficult to avoid since it is located right near where you start. If you can't keep it at bay long enough, you could instantly lose Kine. There is another Animal Friend up ahead though.
(2) The blocks around the door melt easily, so don't stand on them for too long. Watch out for any other similar looking blocks as you play through this level!
(3) Another Propeller Bomb is waiting not far after you get Rick. Again, carefully approach it and defeat it if you don't want to lose your Animal Friend.
Section 2[edit]

Section 2 is simply an enclosed area where you can find Rick or Gooey. The bag that contains him is blocked by two ice blocks. You have to melt through the blocks using the Burning ability to reach it. Fortunately, there is a Flamer right above the entrance at Section 1 that can provide you with Burning, so you don't have to make too much of an effort to get it.
Section 3[edit]

The entire floor of this section is paved with ice. Without Rick's good grip, you will find it quite hard to slow yourself. There is also a new enemy in this section called Master Pengy. Inhale these penguins to get the Ice ability, letting Kirby breathe cold air that freezes enemies into ice blocks, which you can kick away as projectiles.
Section 4 - Mid-Boss: Blocky[edit]

You are introduced to another mid-boss, but this time it isn't holding anyone prisoner. Blocky is basically a walking stone block, thus its attacks are very simple. It will either charge at you and slam into a wall, or jump up high and try to land on you, shooting rocks at both sides when it lands. Lacking a copy-ability, you must inhale the rocks and spit them back at Blocky to defeat it. Blocky gives you the Stone ability if you inhale it.
Section 5[edit]

This entire section is a vertical slide, which works especially well with the Stone ability. Just jump over the gap at the start and turn into Stone form and watch as Kirby rolls down the slopes, crushing any enemy in his path. You will finally come to a stop in a small pit beside the door, which is patrolled by a single Gordo. Wait for the Gordo to be a safe distance from you before transforming back. If you don't have the Stone ability or want to stick with a previous copy-ability, you will have to go down the slopes slower, dealing with a ton of enemies along the way.
Stage 2[edit]
Section 1[edit]

Immediately upon entering the stage you will be blown to the right by a strong gust. The wind is extremely powerful, and without assistance you won't be able to even walk to the right. For now, avoid the enemies and ignore any power-ups until you get blown all the way to the right. At the end of the section is two doors. The wind will have subsided a bit once you reach there. You can now walk left and right as you wish, but the wind is still too strong for you to fly to the left. This means you can't reach door B, so for now, enter door A.
Section 2 - Mid-Boss: Jumpershoot[edit]

Jumpershoot is back for a rematch, but his attacks remain the same. As before, attack him with a copy-ability or launch his sandals back at him. Once he is defeated, the bag that drops will always contain Coo, unless you manage to keep Coo with you all the way here. With the help of Coo's great flying prowess, you can fly against the strong winds by repeatedly tapping ![]() . You need this ability to get to door B back at section 1, so you must partner with Coo to continue onwards.
. You need this ability to get to door B back at section 1, so you must partner with Coo to continue onwards.
Section 3[edit]

This section of the level is a straightforward climb to the top. There are no enemies other than icicles that fall from certain positions above you. For this reason, you must advance carefully and patiently, as flying up too hastily will make it hard to evade the icicles as they emerge on the screen. If you happen to have the Parasol ability, this section is made much easier, as you're shielded from icicles whenever you're holding the parasol up. At the top is a Maxim Tomato to replenish any health lost up to this point.
Section 4[edit]

The left half of the section is easy enough to pass through, if not a little bit tedious, but you cannot reach the exit without the Burning ability. The ice blocks blocking the passages at the right half cannot be inhaled or destroyed without the firey power of Burning. Luckily, door D leads to a room filled with enemies that grant copy-abilities. Once you have the Burning ability, you can simply burn down the ice blocks and dash toward the exit.
(1) You can only reach this area by combining Coo's flying abilities with Burning, letting you burn through the ice on the ground with a flaming dive bomb. The left end of this hidden area contains a 1-Up, but the right end contains a Propeller Bomb! Do not explore down the right passage to avoid losing Coo.
Section 5[edit]

As mentioned above, this room contains enemies that grant every copy-ability except Spark. The one you want is Burning, which you can get from the Flamer. Every enemy is trapped in slots where they have limited space to move around, but you can still inhale them through the wall. Note that Master Pengy can still hit you with their ice shots, so watch out for the one on the top-right.
Stage 3[edit]
Section 1[edit]

The starting section is in a cavernous area instead of an open-air horizontal scrolling area. The section itself is still quite linear, with a branching path along the way. You don't need to explore both paths, but the top does contain a Small Star. You can get quite a number of copy-abilities here, so pick any one you want and head through door A for a boss fight.
Section 2 - Mid-Boss: Mr. Frosty[edit]

Mr. Frosty is a humanoid walrus who, as can be deduced from his name, has the power of Ice. He will try to tackle you, being able to swallow you and spit you out if he gets close enough, or toss ice cubes at you. If you don't have a copy-ability, you must inhale the ice cubes he tosses and spit them back at him. Once he is defeated, Kine will be freed from the bag and you can swallow Mr. Frosty to get the Ice ability. While getting Kine is optional, he is quite helpful for clearing the water section ahead.
Section 3[edit]

Most of this section takes place underwater, while parts of it require you to surface and go pass small corridors. The enemies here are the standard ones you can find underwater, so they shouldn't give you too much trouble. Midway through the section is a large wall of Star Blocks. You can destroy the entire wall and swim upwards to reach a small area with a Small Star and a Maxim Tomato, as shown above.
Section 4[edit]

You might want to abandon Kine for this section, as it has no water and mostly require precise jumps. There are a lot of thin platforms as well as blocks that break if you walk over them. There is a lot of pits that you could fall into, so you can lose a few lives if you are too careless.
(1) A Propeller Bomb appears almost next to you upon entering the section. There is also another one on the final thin platform bridge. More of these menaces will appear more frequently in future levels, so you must start making strategies to defeat them. You can actually freeze and defeat a Propeller Bomb in one hit with the Ice ability, so that is one of the ways to quickly dispatch of them.
(2) The path to the goal is tricky, and you will really want to ditch Kine for this section. Falling into any of the gaps will mean that a melting block is the only thing preventing you from falling to your death, and you have to hover out. The goal is also surrounded by melting blocks and guarded by a Flamer. Try approaching the door from below to safely enter it.
Stage 4[edit]
Section 1 - Mid-Boss: Efreeti[edit]

The stage starts off with another mid-boss rematch. Efreeti's attacks are simple like before, but the slippery floor could make you slide right into him. Try to evade his attacks more in the air, or duck into the lower-right corner for safety. Once you defeat Efreeti, any of your Animal Friends can be freed from the bag. However, if you want to get the Rainbow Drop located in this stage, you must get Kine. You must also get the Burning ability from Efreeti, and keep it until you reach the Rainbow Drop room.
Section 2[edit]

This section will be the first auto-scrolling section you will encounter. The stage automatically scrolls to the right, and you have to keep up to avoid getting crushed between a wall and the left border. Keep moving forward while remaining cautious. Clear any enemies and obstacles in front of you, and don't go for the Small Star if you're not confident you can make it. At the end is some Flamers in slots in case you lost the Burning ability. However, the screen will continue to scroll, so you must inhale them and quickly enter the door to avoid death.
Section 3[edit]

The entrance to the Rainbow Drop room is located here, but to getting to it involves a tricky and deliberate process. If you don't have Kine or the Burning ability, you may skip past the center of this section and go straight for the exit. If you do, then drop down to the center and prepare for one of the most complicated method of obtaining Rainbow Drops in the game. Drop down to either side of the three ice blocks at the center and use your fireballs to melt them away. Then, jump back up and drop down into the pool below. The rest of the method is detailed below.
(1) It is imperative that you DO NOT burn the ice blocks covering the 1-Up or the Maxim Tomato. You need them to jump back up to the ledge and fall down the center. Without the ice blocks, you will be forced to abandon Kine to get back up, preventing you from getting the Rainbow Drop!
(2) The entrance to the Rainbow Drop room is quite puzzling to get to. You need Kine to swim against the strong current coming out of the pipes, you need Burning to get the Rainbow Drop once you are actually inside and you can't break the Star Blocks due to the trajectory of Kine's fireballs. To reach door C, you must drop your Burning ability, inhale one of the Star Blocks and spit it out, then swiftly inhale your ability star before it disappears. After that, just swim against the current to reach the door.
Section 4 - Rainbow Drop[edit]

The Rainbow Drop is blocked by a wall of ice blocks, so obviously you need the Burning ability to burn through them. If you followed the instructions above, you should have no trouble getting the Rainbow Drop. Once you get it, you can now collect the 1-Up and Maxim Tomato from before, and you may abandon Kine and/or the Burning ability after that.
Boss: Ice Dragon[edit]

Ice Dragon is, as its name implies, a big dragon with the powers of ice. It can use its tail as a propeller, strong enough to let it hover in the air. It will mostly try to charge at you, or fly and land on you. He can also unleash an icy breath that can freeze you, flashing blue just before to warn you about the attack. The Ice Dragon can also create icicles and kick them across the ground, which you can simply avoid with a well-timed jump. Finally, he can cause three icicles to fall from the ceiling, which split into two when they hit the ground, which is still capable of hurting you.
Ice Dragon is a pretty big target, but small enough that you won't have trouble evading him, especially due to his slow attacks. There will be a lot of time between his main attacks, such as if he is simply charging towards you. If you have a copy-ability, you can do a lot of damage during these periods. Without a copy-ability, you must inhale the icicles that drop from the ceiling and spit them back at him. Ice Dragon will hover slightly above the ground after the icicles fall, so you must do a short hop to ensure it hits him.
With the Ice Dragon defeated, the next island is revealed to you. Move your Warp Star over to the sandy Red Canyon!
Bonus Chance[edit]
In this Bonus Chance, both Small Stars and icicles will rain down from above. You have to collect the Small Stars while avoiding the icicles, which end the Bonus Chance immediately if you're hit. Both the Small Stars and icicles will fall at different speeds, as well as bounce on the ground a few times after they reach the floor.