Waste Wharf 1[edit]

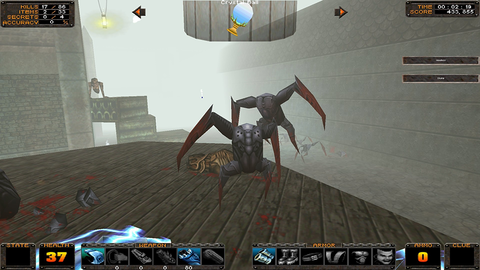
The same roadhouse and the same front door leading to another place. To begin with, this level is really vast with two huge open spaces available to you right from the start. Without the first piece of armor fighting enemies is a suicide, so make a dash to Elder Gauntlets and a Twister. Madame Raven will make a pun telling the air avatar your play for to run like a wind. You can kill a Headless or two with your bare hands but better not waste your time on them.
When you get your first weapon, you will see that there are much more enemies than you can deal with. You can easily notice that the first part of the level is divided by a tunnel with the first piece of armor into two huge blocks: the one hear the roadhouse and the one near the bottomless pit. There are plenty of Air Icons and Health Potions scattered all over this level, but after some time you might find that you’ve picked all those bonuses and you still need more.
Enemies will be constantly coming after you, so arm yourself and perform these actions in any order you like:
- Pick up a Windblade right after the first armor piece.
- Pick up a Scourge. It’s near the bottomless pit under the valve. There is a radio nearby, but it’s not working properly. You can use it to listen to Shout It Out Loud if you like. Picking up the Scourge will spawn two Gasbags. Don’t forget to pick up Hawk Eyes in a dead one nearby.
- Smash all the glass on your way to reveal hidden items.
- Shoot the barrel which is near the damaged grille to reveal a path to a valve. Turn it to open an underwater way.
- Deal with a Spawner on a scaffolding near the cliff.
- Deal with a Spawner you passed when you were running for the Twister.
- Deal with three more Spawners. From the Spawner above head past the big building with a sloped roof go until you see a Fat Lady stuck in a narrow way. Three Spawners are to the left and up above.
- Kill the Fat Lady blocking the way after those three Spawners.
- Look for a path near the cliff. There some Gasbags and a few Ice Strutters will attack you. An Arachniclown will be in the corridor after those foes. Turn the valve in the next room to open another underwater path.
Once you’ve cleared the territory and turned two valves, you can go to the big sewer pipe with crystal clear water which is under the scaffoldings near the cliff. A Gasbag or a few may attack you depending on if you’ve killed them before.
Dive and destroy another Spawner which is producing Gasbags. Sadly, they cannot drown unlike you. There is a rectangular opening above where you can pick up some Water Icons. When finished, swim up through another pipe and up the ladder. These are Black Diamonds on the left but you cannot pick them up yet, so just go forward.
In the next room you will be attacked by a few Ice Strutters, one of them is hiding under the slope behind. A few more will come out of the corridor ahead making you think that there is a Spawner ahead. Don’t worry, there’s none, so take your time killing them.
The corridor ends with a bottomless pit and a small platform with Elder Boots. The second piece of armor in the first level, nice! But once you take it, three Ticklers will emerge from the pit. You can simply run away if you don’t feel like fighting.
If you decided to kill those foes, you can use your Scourge on the hook above to grab three Black Diamonds. Anyway, head back and don’t forget to grab the Black Diamonds you couldn’t reach before. Once in the beginning of the level, you can pick up some items on crates and metal pipes you couldn’t reach before.
Secret: Look for some stacks of pipes near the sewer pipe you recently came from. Jump on them and soon you will reach a small metal fence. You can jump over it using a stack of pipes nearby. Pick up a Zero Cannon but beware of Blademasters guarding it.
Now you’re ready to head for the Key you might have seen before. Don’t forget to take a Blood Rose from the big pile of crates. It’s hard to miss. The Key was guarded by the Fat Lady you might have dealt with before. If not, deal with her now, she’s in the narrow way in the first part of the level.
Now you can open the door of that big building. Once the door starts opening, strafe to get out of the harm’s way since a Tickler will attack you with his beam of hate on sight. There are two Ticklers and one Strongman in total. Since enemies are in a narrow space, it’s easy to provoke them into attacking each other.
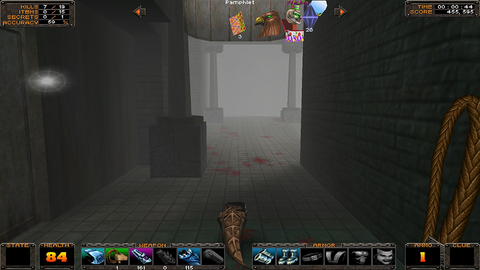
You will hear Love Gun through the door at the end of the corridor. Opening it will make the music sound louder and finish the level.
Waste Wharf 2[edit]

A small room is in front of you and the sounds of Love Gun are louder. Before exploring it you might want to destroy a Spawner in a corridor to the left of the room ahead. A way to the right is a dead end where enemies won’t get you from behind. The room itself contains a few Stumps and two flying foes one of which is a Meanie Beanie – a dangerous enemy in close quarters. You will also notice a Blood Rose on the shelf with magazines. Ironically, you cannot reach it from the higher ground but you can reach it from the floor.
One of the doors in a dead end on the right contains a Tickler and a Water Tablet. Another one is locked.
Anyway, the only path now is down the corridor. One more Spawner is waiting for you around the corner. When you’re done, look up to see a hook. Use it to reach 6 Black Diamonds. Two stone skulls hold a Health Vial each, just use them to get goodies.
Pick up the Key at a dead end behind the Spawner and head back. Another Meanie Beanie will attack you. When you’re ready, open the locked door and use the elevator to get down. Better save your game and prepare for the worst.
As soon as the elevator stops, three Unipsychoes will surround and attack you. You can hide from their self-guided fiery projectiles behind one of the thin columns. A damage boost in the hall will be really helpful to deal with the three dangerous foes here, so use it... or save it for later. No matter what you do, try not to go up the slope since this will only spawn a ton of new monsters.
When you’ve dealt with the Unipsychoes and picked up some items in the room, it’s time to save your game and prepare for the worst... again. When you make a few steps up the big slope, five Spawners will come to life, starting to create a whole lot of Stumps. Four of them are not hard to see: two are on the a bar and two more across the big gap. The fifth Spawner is hidden on a rise behind the huge block. Go up either of two slopes nearby and you will see the fifth Spawner guarded by two Arachniclowns. Good thing, there are plenty of Health Potions and Elemental Icons nearby.
When you’re ready to move forward, look across the gap and you will see two Arachniclowns hidden in a mist (or at least their glowing eyes). They can be shot with Windblade from afar, just keep your distance. After you kill them, a chime will sound indicating that you’re ready to proceed forward.
When you pick up Hawk Eyes on a platform across the pit, some flying enemies will appear right in front of you. Jump down to have more room to maneuver or run across to finish the level as quickly as possible.
A Ballbuster will be waiting for you behind the door. The mirror is right after him.