A desolate location, in this place you will encounter the unusual Morph Moth. That deadly adversary will push you to your limits as his home area contains scrap monstrosities and weird machines that seem to latch onto other robotics in order to control them.
Before entering this stage[edit]
If you are following the Normal walkthrough, this is the stage where you should fight the X-Hunter Violen, that is weak against B. Crab's Bubble Splash.
If you are following the Speed walkthrough, this is the stage where you should fight the X-Hunter Agile. It is weak against M. Centipede Magnet Mine, but you still have to obtain that weapon. Therefore, use the X-Buster. Climb up in a corner of the arena, then drop down when Agile jumps up to shoot at X.
Stage walkthrough[edit]
The junkyard is the home of the Maverick called Morph Moth. The overall theme is in relation to junk, magnetics and evil little bug-robots who like to latch onto X's head.
Heart tank[edit]
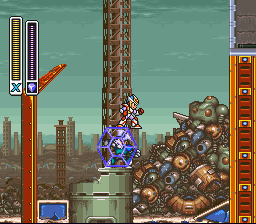
As you enter into the area and head to your right you might notice what looks like a dead Reploid hanging from a metal support. If you shoot at it, but you hit the green magnetic beam, it will land on the ground and activate. Shooting its body will leave it with a head, which will fire at you. Shooting its head, however, results in causing the enemy to simply fall down and blow up, and is the optimal way of defeating it. If you choose to just run under it, the reploid will fall down and attack you.
There are several of these along the way, as well as another type of reploid that uses a shield. Simply charge up your buster, shoot the shield and it will go flying into the air. Then, while the opponent is trying to catch its shield, unload your buster on the robot.
Before you enter the building, use Crystal Hunter (from Crystal Snail) to freeze the nearest shield robot. Jump on top of it and dash jump to the right to get on top of the building. You will find a spare body (extra life), but continue right to find a Heart tank.
You can make this jump without using the Crystal Hunter weapon by performing a Neon Jump. This is an advanced technique that requires the Arm and Leg Upgrades. Start with a fully charged X-Buster and release the first charged shot, then stand on the edge, jump, air dash, and finally jump + release the second charged shot at the exact same time (the same frame) to reach the area.
Body upgrade[edit]
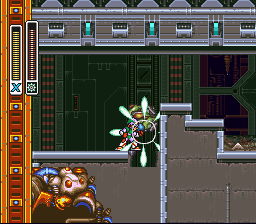
Continue along to your right. Through this area you might notice items in the background lifting up. This is because the magnets are pulling upward, and that makes you capable of leaping higher.
At the entrance to this area, if you have acquired the W. Gator's Spin Wheel, use the radar upgrade (if you have gotten it in Crystal Snail's level) and it will reveal two things: the first is a secret area off to the top, ignore this; the second should be in the floor. Use the Spin Wheel (it will take about three shots, or just one if fully charged) and go under the floor, where the Body Upgrade is hidden. Itwill give you the Giga Crush, a one-time use attack which is refueled when you take damage.
Sub-boss[edit]
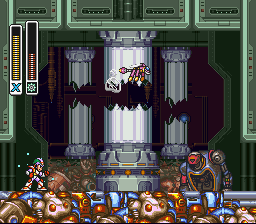
You will now encounter a spiked wheel riding Reploid. If destroy just part of it, it will simply regenerate the lost parts, so either avoid it or completely decimate it.
There is a ladder on the right area, past the shield user. Climb up this ladder and dash as well as leap to your left. If you do not reach the higher portion use the ladder in that area to climb up until you are there. Dash and jump to your right, and you should be up on a higher area now. If you once more dash and jump to your left you will be able to get a spare body.
After that, head to your right…and get ready.
As you enter into this next area, X stops being controllable and the screen scrolls to the right. That capsule in the background will shatter, releasing a pink insectoid robot that will then, parasitically, control a larger robot body.
This monster machine is not the easiest thing to dispatch, given that only when you aim for the open area of the torso can it be hurt. Aim there, using primarily charged up buster shots and you should get by without being hurt. However, at times the junk robot will leap up high into the air and hover there for a split-second, only to come crashing down on your head. Sooner or later it will start to fall apart, signaling that the pink insectoid is about to be spit out.
To beat the pink insectoid you might want to rely on charged up shots, given that a single pellet from your buster tends to bypass it while it is on the ground. If it does not blow up quickly enough it will burrow into the ground and pull out another zombie robot.
Use a charged-up Spin Wheel against the junk robot and a normal shot of Speed Burner against the parasitic droid.
X-Hunter room[edit]
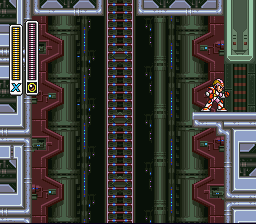
in the subsequent corridor you will run across a weird green robot similar to the pink one you just vanquished. Go ahead, merely stand there and stare at it as it leaps through the air and lands on your headwithout inflicting any damage. After it catches onto X's head the machine will start forcing you to either dash, jump or fire uncontrollably. The only way to stop that is to hit left and right quickly until it jumps off. The insect will leap off, hop about and potentially leap back onto your head.
This will not be the only time you encounter this type of robot, as more will lay ahead. Dispatch them, then head up and right, only to then climb down a ladder.
As you climb down the ladder you will see to your right a ledge where a shield robot is on. If you have not yet enraged the X-Hunters ignore this, as they will have no reason to care about showing up. Instead simply keep climbing down, or simply jump to release hold of the ladder and fall.
If there is an X-hunter present in the level, you can go there and fight, or you can merely ignore that area.
Last portion[edit]
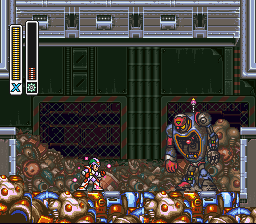
At this point you will encounter a descent to the right, as well as aerial green insects that will fly at you to hurt you. If you want you can go down further, dealing with spikes, or go along the top of the magnetic controllers, dealing with green insects.
After getting past that point, you will descend another ladder. Oh joy, all of these ladders are just so exciting, right? Head to your left after getting down and prepare for a hallway of green insects. Charged shots can hit them when they are low to the ground.
Destroy more green robots in your way, fall into the large chamber and get ready for another Pararoid sub-boss. Take it out, then keep heading to your right. More green insects await.
Before reaching the boss, you need to contend with an large door guard. If you have Wheel Gator's weapon this is a piece of cake, given that you can just drop your wheels down and let them cut it to ribbons. If you have chosen to be possessed by a green insect which gives you non-stop firing then you can utterly butcher it in a second by dropping right next to it and letting the insect kill it for you.
Maverick: Morph Moth[edit]
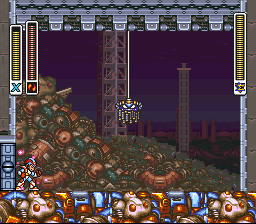
- Weakness: Speed Burner
Morph Moth first appears in a cocoon that will swing back and forth. As it gains momentum it will begin dropping projectile garbage down at you. Fire is this creature's primary weakness. After it finished swinging, the cocoon will jump off its silk thread and roll around on the ground, where it is invincible.0 When it goes back up, it will begin sucking trash in a spiraling pattern. You have to be quick, but you can dodge it.
Once 2/3 of its energy depleted, the cocoon will retreat into the ceiling that will explode, and Morph Moth will come in its second form. Watch out for the moth's powder, and blast it.
Special weapon[edit]
The Silk Shot drops a projectile in a small arc, then it explodes in four directions when it touches the floor or any target. The charged-up version shoots a bigger projectile in a longer arc that explodes in eight directions. Furthermore, in each level there is one or more hidden room where the charged-up Silk Shot summons either energy or weapon capsules.
The Silk Shot looks like junk in most stages, but it has a three more specific forms:
- in the Weather Control stage, it is made of leaves, it shoots upwards and it is mostly harmless;
- in the Energen Crystal stage, it is made of crystal and the uncharged shot slids on the floor without exploding;
- in the Deep-Sea Base and Volcanic Zone, it is made of rocks and the uncharged shot bounces once before exploding.
The Silk Shot is very effective against Magnet Centipede and the X-Hunters, depending on the stage:
- the crystal shot in the Energen Crystal stage is super-effective against Sagesse (Serges);
- the leaf shot in the Weather Control stage is super-effective against Violen;
- the rock shot in the Deep-Sea Base and Volcanic Zone is super-effective against Agile.