| Weapons for the boss | Weapons for the stage |
|---|---|
|
|
| Weapons refill between X-Hunters stages. | |
Before entering this stage[edit]
First of all, remember to refill the Giga Crush! A good spot is early in the Flame Stag's Volcanic Zone.
Locations to refill Sub-Tanks using the Silk Shot:
-
Deep-sea base
-
Desert base
-
Energen crystal?
No, weapon energy only


Stage walkthrough[edit]
Agile's stage tests your agility. There are many tricky jumps and other obstacles on your path.
Part 1[edit]

The first portion of the stage is rather straightforward.
An energy capsule and a spare body can be obtaining with a perfectly timed jump and Strike Chain. Later, three energy capsules require a precise mid-air jump. Do you really need these items? You should already have four Sub-Tanks that can be refilled after every stage.

The second moving platform you find is the beginning of the hard trial to get the Shoryuken. Every time X lands on it, the platform changes its direction by 90° clockwise.
If you want to change direction 180°, you should tap twice on the Jump button. Changing directio, 270° clockwise (or 90° counter-clockwise) is more tricky, but of course it will be necessary here!

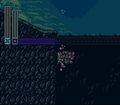
The trickiest passage in this area is the one in the picture.
- Tap Jump twice to go from downwards to upwards.
- When almost close to the "ceiling" platform, tap Jump once and get the platform against the wall.
- Take a breath (you player, not X)
- Tap Jump twice to down then left. The platform will easily go too low, and you will have to repeat from step n.2.
- Tap Jump once and get through the opening.
Part 2: Shoryuken[edit]

If X gets destroyed, this is the halfway starting point for this stage.
No need to drive the moving platform all the way here. Just lure a Batton Bone from the room to the left.

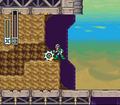
The first of three tricky jumps with mid-air dashes. Slide down the wall, jump, and when Mega Man X is just above the spikes, release the Speed Burner for a long mid-air dash. X should land on a small platform.
Destroy the two robots with a single, uncharged Spin Wheel. The second mid-air dash should pass through a "lion mouth" made of spikes. The Legs upgrade is sufficient.

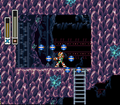
The last obstacle before the Shoryuken!
First of all, cherge up the Speed Burner. Then jump, dash in mid-air, drop, and then release the Speed Burner in the opposite direction.
When you land on the spare body, use a Sub-Tank if the energy bar is even just one hit point short.

Slide down the laft wall, and you should find a secret passage. The fifth capsule of Dr. Light can be found in there, but only if X is at full energy.
In order to perform the Shoryuken, press [Dwn], [Fwd], [Dwn-Fwd] and Shoot.
The Shoryuken can destroy any enemy robot in one hit, but only if the enemy is fully hit in the center. Otherwise, if you just brush against the enemy, the latter will suffer minimal damage.

After obtaining the Shoryuken, use the Crystal Hunter extensively and get past a long stretch of deadly spikes.
X-Hunter: Agile[edit]


- Weakness: Magnet Mine
- Weakness 2: Shoryuken
You should absolutely try out the Shoryuken against Agile! If successful, it will make for a spectacular jump and an extremely short combat. If you fail and get damaged, on the other hand, switch to the Magnet Mine.
Agile always stays high above the floor, but that is all the same when fighting with the Magnet Mine. In fact, this weapon is controlled remotely by pressing Up and Down, and it will hit Agile very easily.