001 Target Practice: No Limit[edit]
Mother Base Shooting Range
There isn't much to this mission. Your weapons will have infinite ammo and you have all the time in the world to practice shooting. If you're not comfortable with the gunplay, you can either leave at the orange goal area or you can practice on infinitely-spawning paper targets.
More interesting than all that, however, is what's up on the second floor of the range. Climb upstairs and check out the catwalks. You'll find the T-shirt, a plain white tee that you can wear on missions. It doesn't affect defense, speed, or ammo capacity, but it does significantly reduce Camo Index in all environments compared to the OD green Jungle Fatigues. It does look comfy, though.
This mission is unranked and it does not add development progress to any R&D projects or count as time spent completing Outer Ops. You can always return to this mission for unlimited target practice to sharpen your gunplay. It's a good idea to come back to this mission if you're not sure what to do to advance the plot.
002 Target Practice: No Limit[edit]
003 Target Practice: Score Attack[edit]
Mother Base Shooting Range
You have 3 minutes to shoot as many targets as you can. The number of targets is unlimited. S-ranking this mission is dependent on accuracy rather than time; miss one headshot and you lose the S-rank. Roughly 23,000 points is what it takes to get the S-Rank. It is suggested you be very comfortable with the gunplay and have a highly accurate, highly-upgraded weapon such as the M16A1 or the FAL with a laser sight. An S-rank on this mission will be very late in the game.
However, if you're playing the mission just for the checkmark, you can stand in front of the firing line while the timer runs out without firing a shot and still get a C-rank and even a bit of heroism.
004 Target Practice: Time Attack[edit]
005 Marksmanship Challenge[edit]
006 Marksmanship Challenge[edit]
007 Marksmanship Challenge[edit]
008 Marksmanship Challenge[edit]
009 Marksmanship Challenge[edit]
010 Fulton Recovery[edit]
During Investigate The Supply Facility, Snake neutralized a radio operator. That radio operator is still at the supply facility and may wake up and alert the guard any second. It is recommended that you complete this mission before starting Contact the Sandinista Comandante.
- Approach, secure, and extract the neutralized radio operator.
Mission Prep
Snake may not participate in this mission as he's en route to Río del Jade to contact the FSLN comandante. Play as Alligator, your best soldier. The ★1 Fulton Recovery System is required to participate in this mission. You do not need to extract any hostiles, but bring a non-lethal weapon if you wish. If you hit the target with any lethal force, the mission is a failure; lethal weapons are not advised.
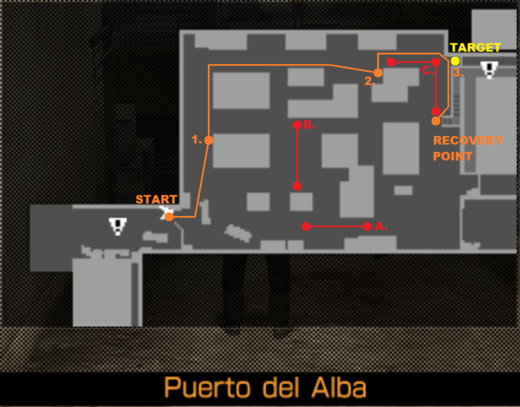
Puerto del Alba
The goal of this mission is to extract the target, just one soldier. The other soldiers don't have the skills to write home about and should not be neutralized and extracted unless you really want them. If you're not worried about S-ranking the mission, extract all of them.
You start by facing the east. Move forward and turn left to face the north.
- 1. Observe Soldier B
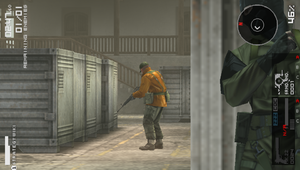
Move to point 1 and wait at the corner of the container. Keep an eye on Soldier B. When he turns around and moves out of your sight, it's safe to keep moving north. Turn eastward and you'll have a clear line of sight of Soldier C and the Target.
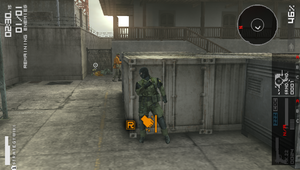
- 2. Observe Soldier C
Move to point 2 and wait at the corner of the container. Watch Soldier C. When he's out of sight, equip the Fulton Recovery System and move to the target. To equip the Fulton Recovery System, press and hold ![]() and use
and use ![]() or
or ![]() to highlight the Fulton System, then release
to highlight the Fulton System, then release ![]() to equip it. Quickly move to the target, as you don't want Soldier C to turn and face you when you're moving.
to equip it. Quickly move to the target, as you don't want Soldier C to turn and face you when you're moving.
- 3. Extract the Target; Wait for Soldier C
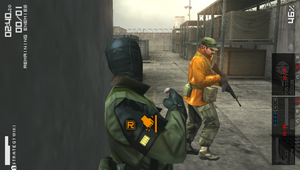
With the Fulton Recovery System equipped, stand over the target and press ![]() to extract him. Then, face the southern wall and press yourself up against it by facing the wall and holding
to extract him. Then, face the southern wall and press yourself up against it by facing the wall and holding ![]() . Alternatively, you may equip the Love Box. Wait until the guard passes you and then passes the corner of the nearby container before releasing
. Alternatively, you may equip the Love Box. Wait until the guard passes you and then passes the corner of the nearby container before releasing ![]() .
.
Once Soldier C out of the way, run to the Recovery Point at the base of the stairs.
Completion
For completing this mission, you receive the following:
- Solid Magazine Layout
The target will join MSF immediately. Move him to R&D. Hopefully, he has Gunsmith (Assault Rifles), Gunsmith (Sniper Rifles), or Gunsmith (Machine Guns), though all three are quite rare on this acquisition.
If you extracted any other soldiers, they are only good for their GMP+ and should be moved to the Combat Unit.
011 Fulton Recovery[edit]
An enemy patrol has occupied the Boathouse on the Rio del Jade. All these guys could be recruited into MSF.
- Neutralize the enemy contingent at the Boathouse and extract them with Fulton recovery.
Mission Prep
Bring one of your lower-ranked soldiers to boost his Life, Psyche, and GMP+. You will need the ★2 Fulton Recovery System to participate in this mission and a weapon to neutralize the hostiles such as the ★2 Mk.22. Wear the Squares uniform for maximum camouflage in this area. Killing any of the soldiers results in a failure, so do not bring any lethal weapons.
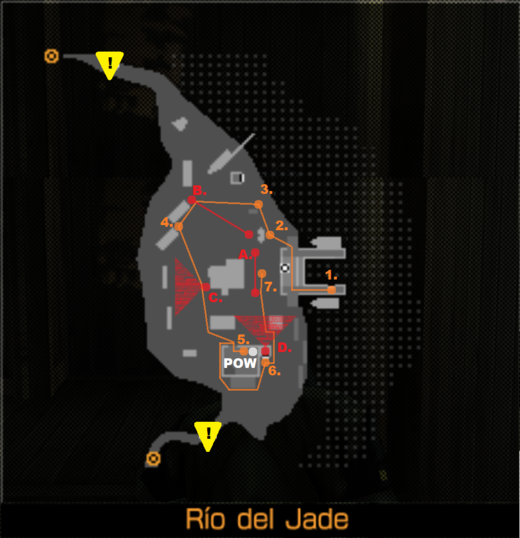
Rio del Jade
There are two hostiles patrolling, one on the north and one between the Boathouse and the central building. There is one hostile up on the observation post south of the boathouse and the southern building. He is surveying the area to the north. There is another guard posted west of the central building surveying the west. You start in the loft of the boathouse. How you got there is a mystery. You need to get down the ladder. None of the soldiers are wearing helmets, so you can neutralize them with headshots. If you're not comfortable with the gunplay, turn on Auto-Aim.
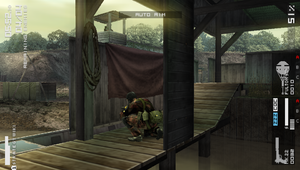
- 1. Get Down the Ladder
Just move over the top of the ladder and fall down to its base. Do not move immediately, or Soldier D will see you. Count one-one-thousand before moving, and he will have moved his head by then. Move to point 2 to the east of the two red barrels.
- 2. Neutralize Soldier A
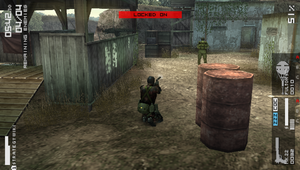
Aim at and put enough anesthetic rounds into Soldier A to neutralize him. Leave him there for now and move to point 3.
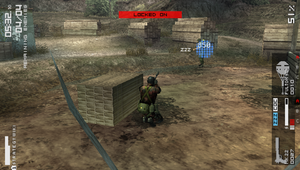
- 3. Neutralize Soldier B
From the north side of this lumber stack, you should see Soldier B with his back turned, but he should turn around any second. Eliminate the threat before he turns to see you. Make sure the Fulton system is equipped and move to extract him. Watch Soldier C, making sure he turns away before moving to point 4.
- 4. Neutralize Soldier C
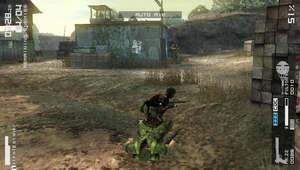
From between these stacks of lumber, take down Soldier C. Approach and extract him; the buildings should provide cover from Soldier D above on the observation post. Keep them between you and him as you move to point 5 inside the southern building.
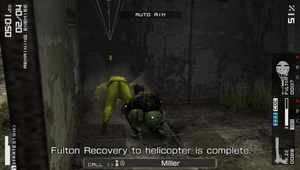
- 5. Extract the Friendly
Move to the POW and extract him. Quickly move out and west around the building to approach the observation post at point 6.
- 6. Neutralize Soldier D
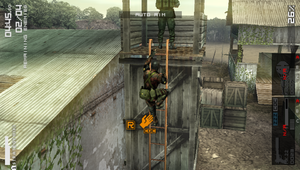
Approach the ladder and climb it gently, stopping just short of the top. Since he's the last soldier on the map, you have some latitude to get a little loud; press ![]() to neutralize him. Get off the ladder and extract Soldier D.
to neutralize him. Get off the ladder and extract Soldier D.
- 7. Extract Soldier A
Approach and extract Soldier A, then move to the Recovery Point nearby when it appears to end the mission.
Completion
This is a very easy mission to get an S-Rank if you followed all the instructions.
The prisoner will be a C-ranked R&D soldier. All the other soldiers are either medics or cooks, so you can put them in the appropriate team or the Combat Unit for their GMP+ for a negligible change in your setup.
012 Fulton Recovery[edit]
A researcher is being moved from the prison complex in the mountain village.
- Infiltrate the prison complex and extract the prisoner.
Mission Prep The ★2 Fulton Recovery System must be equipped to participate in this mission. If the prisoner is killed, the mission is a failure, so do not bring lethal weapons.
Aldea Los Despiertos
The village should be familiar terrain by now. There is a single patroller on the west side who is surveying the central main street, locking that down that avenue of approach. You must approach the target through the eastern lane, which is patrolled by Soldier B. You should be familiar with his patrol route as it was used by other patrollers on this map in previous missions. Finally, there are two soldiers guarding the truck to the north of the map where the prisoner is being held.
- 1. Approach and Observe Soldier B
Immediately get low and move east. Once you reach point 1, stay behind the stack of crates and observe Soldier B until he turns north.
- 2. Observe Soldiers B and D
Stay low and move from corner to corner until you reach point 2. Face the stack of crates and hold ![]() . Angle the camera so you can see Soldier B and hold
. Angle the camera so you can see Soldier B and hold ![]() so you can observe Soldiers B and D at a distance. D should be facing south and B should be facing north. They will turn around at the same time. When they do, move east into the back alley.
so you can observe Soldiers B and D at a distance. D should be facing south and B should be facing north. They will turn around at the same time. When they do, move east into the back alley.
- 3. Extract the Friendly
When you exit the north end of the back alley, immediately turn northwest and approach the prisoner; Soldiers C and D will be facing north. Make sure the Fulton Recovery System is equipped and quickly extract him.
Once the prisoner is in the air, immediately follow the orange path south of the truck, hugging the wall along the way until you reach the Recovery Point.
Completion
Hopefully, the prisoner is a C-Ranked Mess Hall soldier with the Three-Star Chef skill. If you extracted Soldier D, hopefully, he's a C-Ranked Medic with the Pharmacist or Counselor skill. If not, they should still be high-enough D-rank to be suitable for the Mess Hall Team and Medical Team.

