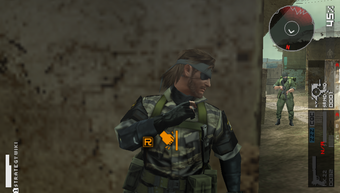
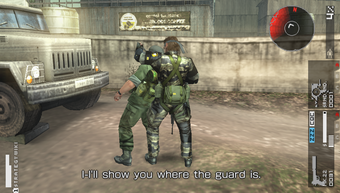
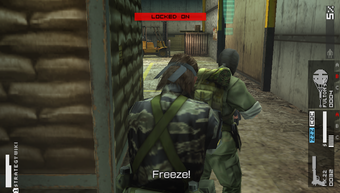
Chico's intel confirms the route and destination of the nuclear materiel as a rail terminal near a coffee plantation. Chico also reports the presence of many FSLN guerillas who are now prisoners of the enemy. To head off the shipment, you need to escape from the village navigate through the dry forest and cut through the coffee factory - which is an enemy stronghold. The rail terminal is the best place to stop the nuclear weapon from falling into enemy hands.
- Get to the rail terminal at El Cadalso and stop the shipment of nuclear weapons.
Mission Prep[edit]
You will start in the tight quarters of Aldea Los Despiertos, so bring the ★1 Surround Indicator as your top item. This mission has 5 prisoners of war and 1 C-Ranked Mess Hall Soldier you should extract, so bring the ★2 Fulton Recovery System. You should bring the ★2 Mk.22 and ★1 Smoke Grenades to neutralize some of the enemies. There is a shortcut you can take that requires you to bring the ★1 Love Box, so bring that if you're going for an S-Rank. The largest area in this mission and the village are best used with camouflage you likely don't have if you're in an initial run, so go ahead and wear the Tiger Stripe camouflage.
To Start[edit]
You'll start at the blue door where you found Chico in the previous mission. This means that the route is somewhat randomized, annotated on the maps below as best as possible. For clarity and approachability for new players, the routes from three of the five starting doors will have their own sections. Routes for the southern-most doors are not supported in this walkthrough because the odds of completing the mission Rescue Chico at any of the southern doors are effectively zero.
Aldea Los Despiertos: North Door[edit]
Soldier A is facing south, so immediately cross the street to point 1.
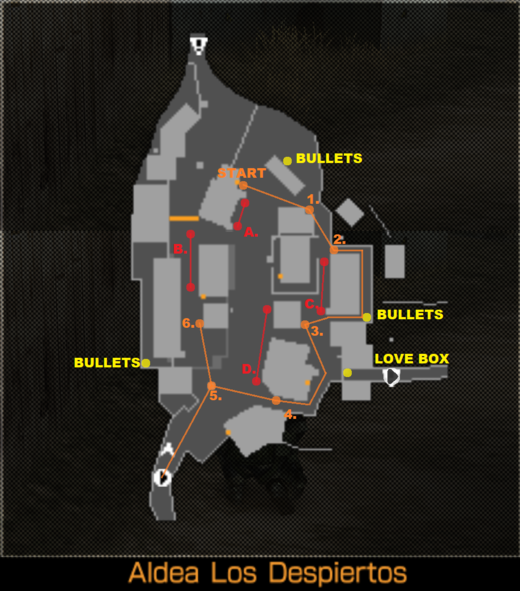
- 1. Observe Soldier C
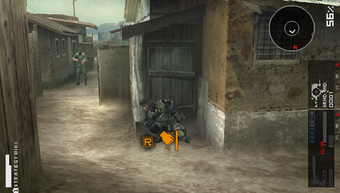
When you arrive at point 1, Soldier C will be facing the north. You need for him to turn around before you can move to point 2 at the north entrance of the back alley. Don't run immediately, as he moves very slow and will hear your approach. Either wait for him to move a few steps or stalk up to point 2. If you plan to get an S-Rank, you should stalk.
- 2. At the Back Alley, Observe Soldier C Again
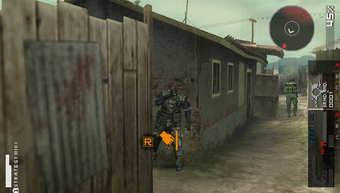
Soldier C will be facing the southern exit of the back alley. You will need for him to turn around again before you can proceed. Once he does, get low with ![]() and move at full speed along the back alley. As you exit, cross the east road to point 3.
and move at full speed along the back alley. As you exit, cross the east road to point 3.
- 3. Observe Soldier D
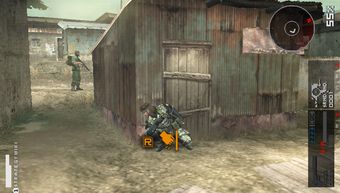
After crossing to point 3, wait at the corner for Soldier D to turn and face the south. Move around the east side of the southern building, then around the corner to the south side at point 4.
- 4. Observe Soldier D Again
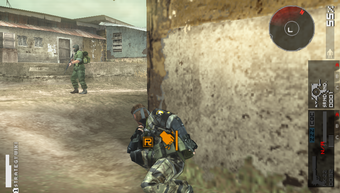
Soldier D will be facing the south. Get to the southern point on the southern building and hold ![]() to flatten yourself against the wall right next to the corner. The moment he turns, get low and move across the central street to the red barrel.
to flatten yourself against the wall right next to the corner. The moment he turns, get low and move across the central street to the red barrel.
- 5. Cross to the Red Barrel
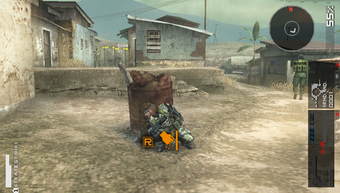
Despite the screenshot, flattening yourself against the barrel with ![]() is not reliable. Once you're here, there's nothing more to do but either move south to the next area or acquiring Soldier B to the north.
is not reliable. Once you're here, there's nothing more to do but either move south to the next area or acquiring Soldier B to the north.
When at the red barrel, Soldier D needs to turn north before you can move from the barrel to the next area.
Aldea Los Despiertos: East Door[edit]
From the door, run to point 1 and press ![]() to stand up.
to stand up.
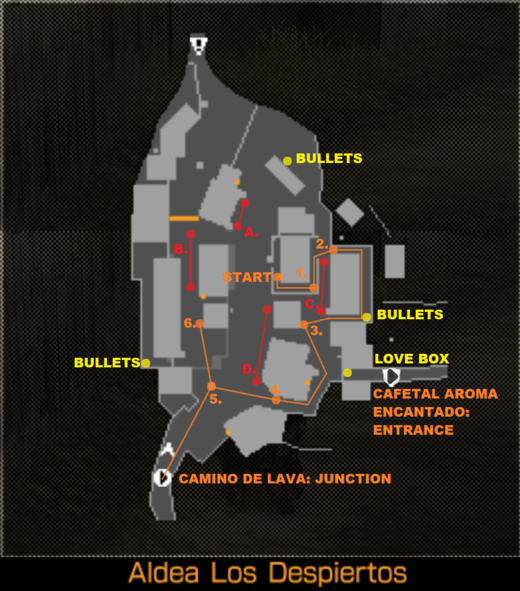
- 1. Stalk Past Soldier C
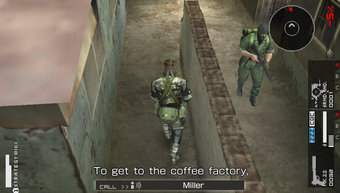
Gently tilt the Analog Stick to stalk within the wall to its opening on the east side of the building, next to Soldier C. Wait for Soldier C to turn around (which won't be long) and then cross the lane into the back alley.
- 2. At the Back Alley, Observe Soldier C Again

Soldier C will be facing the southern exit of the back alley. You will need for him to turn around again before you can proceed. Once he does, get low with ![]() and move at full speed along the back alley. As you exit, cross the east road to point 3.
and move at full speed along the back alley. As you exit, cross the east road to point 3.
- 3. Observe Soldier D

After crossing to point 3, wait at the corner for Soldier D to turn and face the south. Move around the east side of the southern building, then around the corner to the south side at point 4.
- 4. Observe Soldier D Again

Soldier D will be facing the south. Get to the southern point on the southern building and hold ![]() to flatten yourself against the wall right next to the corner. The moment he turns, get low and move across the central street to the red barrel.
to flatten yourself against the wall right next to the corner. The moment he turns, get low and move across the central street to the red barrel.
- 5. Cross to the Red Barrel

Despite the screenshot, flattening yourself against the barrel with ![]() is not reliable. Once you're here, there's nothing more to do but either move south to the next area or acquiring Soldier B to the north.
is not reliable. Once you're here, there's nothing more to do but either move south to the next area or acquiring Soldier B to the north.
When at the red barrel, Soldier D needs to turn north before you can move from the barrel to the next area.
Aldea Los Despiertos: West Door[edit]
You will start with Soldier B facing the path you must take. Either wait still, or hold ![]() until he turns around.
until he turns around.
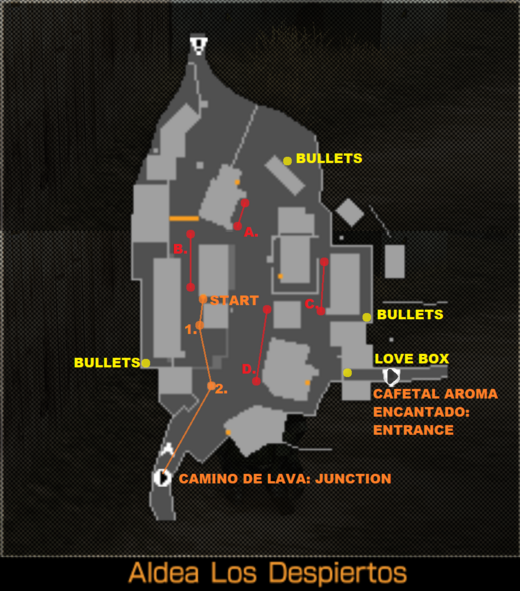
- 1. Observe Soldier D
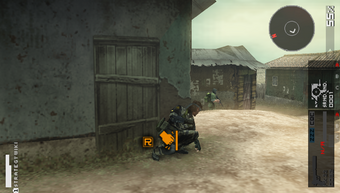
Whether or not you extracted Soldier B, you need to make sure Soldier D is walking south and facing away from your approach.
- 2. Observe Soldier D at the Red Barrel
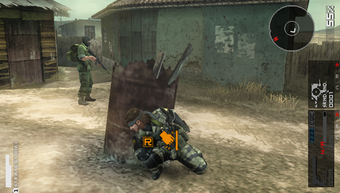
Wait on the west side of the barrel, keeping it between you and Soldier D. When at the red barrel, Soldier D needs to turn north before you can move from the barrel to the next area.
Camino de Lava - Junction[edit]
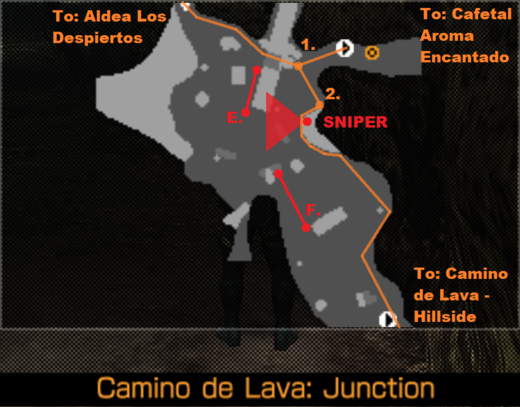
Just like in the previous mission, there are two patrollers, Soldiers E and F in the same routes as the previous mission. There is also the Sniper, who is now on the east side of the mission. He is still giving himself away with his target practice. You need to climb over the stalled train to get to point 1.
- 1. Climb Over the Train
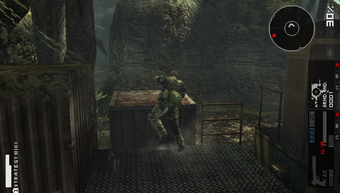
Hugging the north wall, get to the train. Run against the ledges to climb them, do not roll. Rolling may throw off your timing. At point 1, watch for Soldier F to reach the end of his patrol route.
- 2. Sneak Past the Sniper
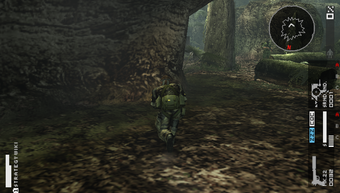
Cross the clearing to the east wall. Hug the wall and move southeast to the next area. Like in the previous mission, the Sniper cannot see directly beneath him.
Camino de Lava - Hillside[edit]
- Rescue the Hidden Prisoner
The two sentries, Soldiers F and G are on the same patrol routes as the previous mission, therefore the same methods from the previous missions will be used to get past them. For now, ignore Soldier F and go straight to point 1, taking care to keep the tree ahead between you and Soldier G.

- 1. Wait for Soldier G to Turn Around
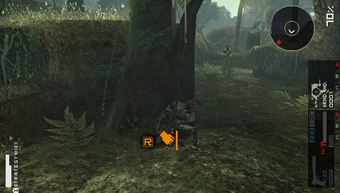
Wait at this tree until Soldier G turns around. Once he does, move around the tree and hug the eastmost walls until you reach the hidden Prisoner. Equip the Fulton Extraction System and send him to Mother Base. Immediately, begin moving to point 2 on the below map.
- Exfiltrate from the Hillside
Now that you have the prisoner extracted, you need to get out of here. Unlike during the mission Rescue Chico, in Camino de Lava: Hillside the soldiers are not quite up to MSF standards, so you'll have to sneak past them.
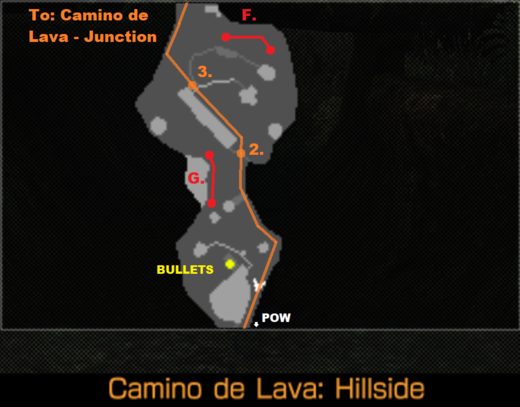
- 2. Get Up the Hill
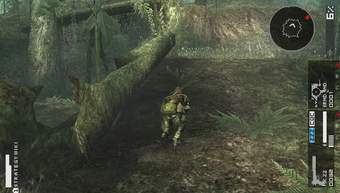
Just like the previous mission, tilt the Analog Stick against the ledge to climb and crouch-run northwest along the fallen log to point 3.
- 3. Hop Down the Hill
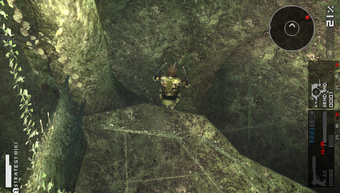
Run over the edge by tilting the Analog Stick and fall straight down to the roots of the tree. Move immediately to the west wall to avoid Soldier F's watch. While hugging the wall, move north back to Camino de Lava - Junction.
Camino de Lava - Junction, return[edit]
Now that you have rescued the POW at Camino de Lava: Hillside, you need to get past the sniper again so you may get to the coffee factory.
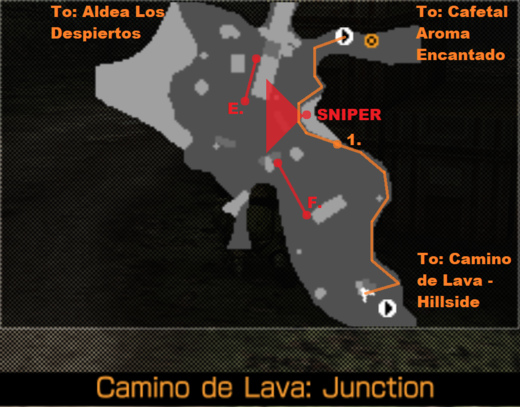
Hug the east wall until you pass a container and a tree. Point 1 is parallel with the tree and you cannot pass it yet.
- 1. Observe Soldier F
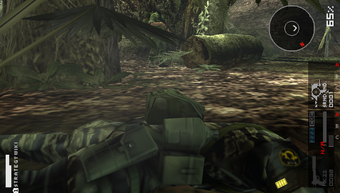
Get down at the ferns. Behind the tree to the west is Soldier F who will see you if you move now. Angle your camera at Soldier F to your left with the Camera Buttons . Once he turns around, get up and hug the wall until you reach the coffee factory.
Cafetal Aroma Encantado - Exterior[edit]
This area is huge. The southern area of the plant is contained by a chainlink fence and is suffused with plenty of containers to cover your infiltration. The path between the staging area and the actual building is long and empty with a single soldier who may be easy to sneak past. The outside of the building has two catwalks, each with a lone sentry. Your goal is to get past these two sentries and into the building.
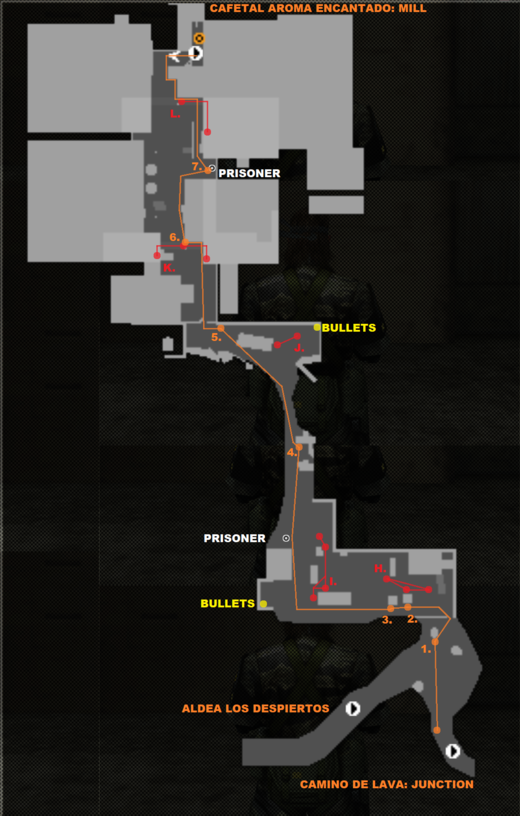
- 1. Get to the Tree
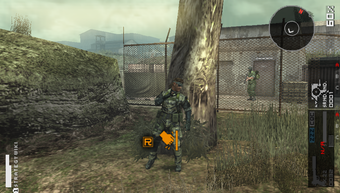
Approach this tree from the starting point. Try to keep the tree at point 2 between you and Soldier H on the other side of the chain-link fence; he's facing your avenue of approach. Once he turns west, he will walk slowly to those two containers. Go ahead and run to the chainlink fence, but as soon as you cross the fence, you should stand and stalk to point 2.
- 2. Wait for Soldier H
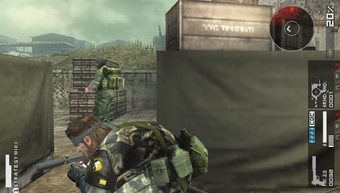
Soldier H will stop at the container so you should stop as well. He will angle northwest slightly then move to the next container. Go ahead and stalk to point 3 as he moves.
- 3. Confirm Soldier I's Position
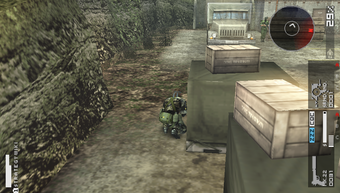
Watch the truck and your Surround Indicator. When you see Soldier I appear beside the truck and red indicating movement of Soldier H to your right, then move along the route around the southwest side of the truck. Try to keep your distance from Soldier I. Move north to point 4, stopping only to extract the prisoner.
- 4. Observe Soldier J
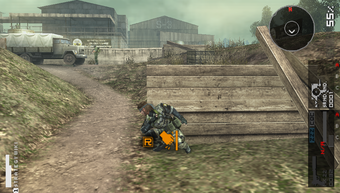
When Soldier J is facing the northeast, it is safe to make the approach to point 5. Make sure to keep the truck between you and Soldier J as you move, and you can move at full speed.
- 5. Observe Soldier K
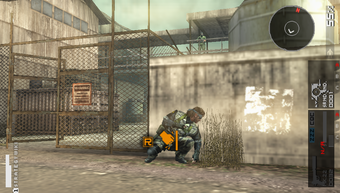
Move to the corner past the truck. You should be able to see Soldier K, and he should be facing in your direction. Just watch him until he turns east. As soon as he starts turning, you should move to the corner beneath him, then you should hug the wall to the corner at point 6.
- 6. Observe Soldier L
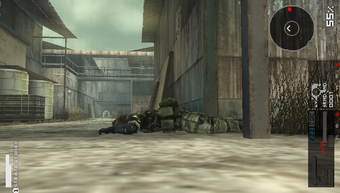
Don't move past this corner, just try to establish a line of sight between the camera and Soldier L on the distant catwalk. He should be facing your direction. If not, wait just a bit. If you interrogated Soldier J, confirm Soldier L's location and facing on the map before making your approach to point 7. If he is facing you when you get to point 6, make sure he turns before you hug the wall and approach point 7. Be sure to avoid getting caught on the geometry of the details sticking out of the wall.
- 7. Approah and Extract the Prisoner
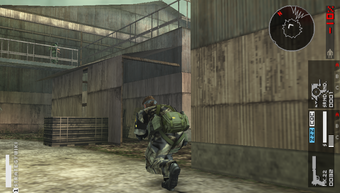
Stop and extract the prisoner. As you do so, try and use the Camera Buttons or the enemy intel from Soldier J if you have it to try and confirm Soldier L's location. Once the prisoner is in the air, hug the wall and make your approach, which should be covered by the terrain. Make your way to the northern entrance of the coffee plant.
Cafetal Aroma Encantado - Interior[edit]
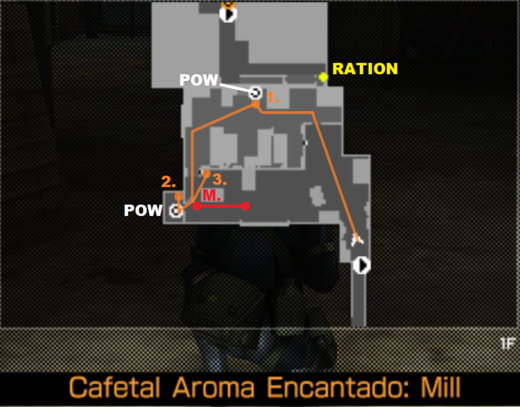
- 1. Approach and Extract the First Prisoner
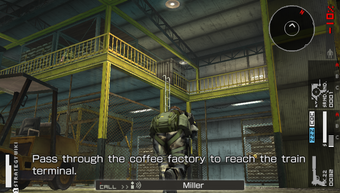
Soldier N is on the mezzanine above and to the west of you, but he's facing away from you. Once you're past the chain-link fence, you are completely concealed from the enemy. Find the prisoner in this area and extract him with the Fulton Recovery System, which works indoors somehow. Quickly move southwest, then south to the small room on the southeast. You may be able to see Soldier M on the other side of the fence as you move, but he should be facing east.
- 2. Extract the Second Prisoner; Observe Soldier M
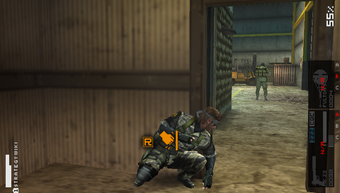
Move into this tiny room and extract the last prisoner in this mission. Now, you have to get past Soldier M. He'll likely be at his north endpoint, but he'll turn as soon as you're climbing the ladder. At the west endpoint of his patrol, Soldier M will turn south, which would make him easy to stalk past to point 3 if he didn't abruptly turn north as you're climbing. You will need for him to turn around to the east. Once he does, stalk to the ladder and start climbing.
- 3. Approach and Climb the Ladder
There is no ![]() prompt, just tilt the Analog Stick toward the ladder to climb it. Once you get to the top, you will be concealed from Soldier N to the east completely, but you should immediately try to confirm Soldier O's location among the stacks of coffee to the north.
prompt, just tilt the Analog Stick toward the ladder to climb it. Once you get to the top, you will be concealed from Soldier N to the east completely, but you should immediately try to confirm Soldier O's location among the stacks of coffee to the north.
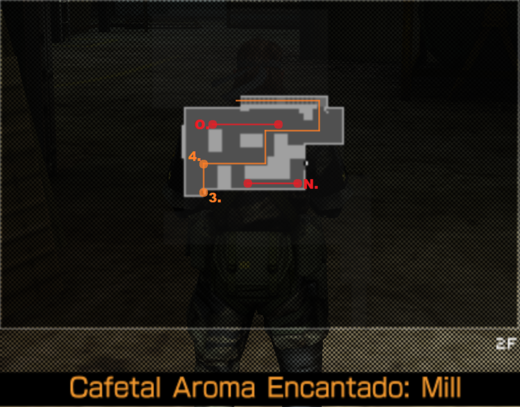
- 4. Rush Past Soldier O
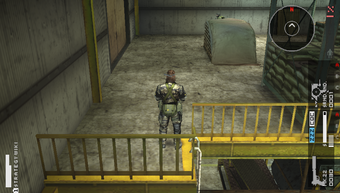
Before you get to the top of the ladder, look north at the west-most stack of coffee. If you see the top of Soldier O's head, then finish climbing the ladder. Get low and follow the orange line to the door. As you cross to the door, Soldier O would have turned around and faced your direction, but he's far enough away to not see you with decent camouflage. Your goal is at the bottom of the stairs and the northern exit to the rail terminal, and the nukes.
El Cadalso[edit]
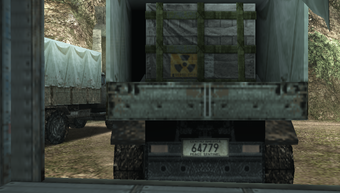
You have reached the rail terminal. The trucks are here, but so is a large security team. Curiously, these US-backed mercs are all brandishing Soviet RK-47s... Just like at Río del Jade, you must neutralize the entire team to complete the mission. And just like back at Río del Jade, you may as well extract as many as you can. The direct route is well-monitored. The best approach is at the edges of the map. Move southwest to point 1.
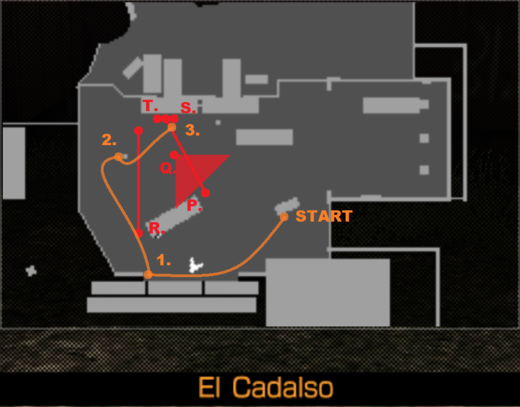
- 1. Neutralize Soldier R
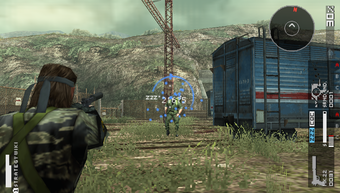
Move to this corner between the wall and this shelf and use the Camera Buttons to angle the camera north at Soldier R, who should be making his patrol north. Either wait for him to come back south, or try to neutralize him before he goes to far past the rail car. The distance is hard to judge, but you can neutralize him such that he will be outside the visual range of Soldier T, who would respond to Soldier R being neutralized. The most newbie-friendly approach would be to turn on Auto-Aim and neutralize Soldier R with the Mk.22 once he's at the south endpoint of his patrol route. Extract him if you can or wish before making a long J-shaped line to point 2, at the base of the westmost crane.
- 2. Observe Soldier P
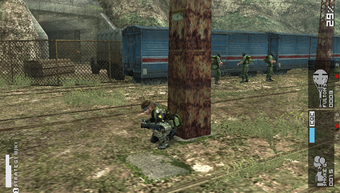
Soldiers T and S turn at 45-degree angles to cover the south and east. At the base of the westmost crane, you should be just outside of Soldier T's sight, but you should stay behind the crane to be on the safe side. Watch Soldier P until he moves back to the northwest endpoint of his patrol route, between soldiers T and S.
- 3. Neutralize Soldiers P, S, and T
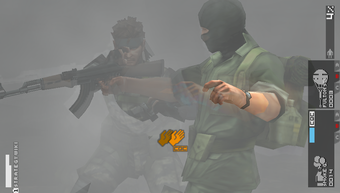
Once Soldier P does reach his north endpoint, get a clear line of sight to the southeast of the crane and chuck a Smoke Grenade at Soldier P's feet. Quickly move back behind the crane until the grenade detonates. Once it does, quickly move to Soldier P's position. Once you're at CQC range, release the Analog Stick then press and hold ![]() to Restrain Soldier P. Throw him at the blue rail car by tilting the Analog Stick in its direction, initiating Consecutive CQC. Neutralize the other two soldiers by pressing
to Restrain Soldier P. Throw him at the blue rail car by tilting the Analog Stick in its direction, initiating Consecutive CQC. Neutralize the other two soldiers by pressing ![]() when the Icon appears. Extract them if you can or if you wish.
when the Icon appears. Extract them if you can or if you wish.
Finally, Soldier Q, who only faces the southeast, is vulnerable. Neutralize him how you see fit. Extract him if you have any Fulton Recovery Systems left. After all five soldiers are neutralized, the game gives you some time to sweep the map before fading to black.
Completion[edit]
For completing the mission, you receive the following:
- M60 Design Specs RANK 1
- Sonic Eye Design Specs RANK 1
If you're lucky, one of the guys you extracted at El Cadalso will have one of the randomly-assigned C-ranks. By now, you'll likely start experiencing morale problems due to low FOOD%, but the C-Ranked Mess Hall Soldier you extracted from Aldea Los Despiertos should solve that as soon as you assign him to the Mess Hall. One of the Prisoners you extracted should be a Three-Star Chef. If he raises your Mess Hall Team to LV 5 and unlocks the Tortilla Chips project, you'll be in great shape.
Go ahead and start development on everything available. If the RPG-2 isn't complete, consider going back to an old mission for an S-Rank run or an Extra Ops mission you haven't completed yet. The RPG-2 will be invaluable in the next mission.


