Rolling Rock!![edit]
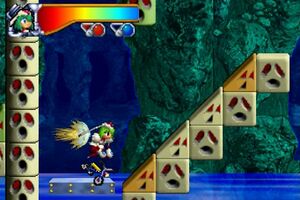
To complete the level, you need to race against a boulder that chases after you.
The gold gem can be obtained by grabbing the gate mid-way through the course. To get out of the gold gem area, dig the ground for a clanbomb.
Toadly Raw!![edit]
Your first opponent is a frog that will leap towards you, and attack by throwing out its tongue. Grab the tongue, and throw it to damage the frog.
When it runs low on health, it will summon a clancer on a floating cloud. This clancer will shoot a lightning attack at you; grab the attack, and continuously press ![]() to increase its size. When it is ready, throw it at the frog.
to increase its size. When it is ready, throw it at the frog.
The gold gem is obtained by defeating the frog.
7 Clancer kids[edit]
Rescue! Act 1[edit]
Rescue! Act 2[edit]
TARUS!![edit]
Tarus is the mid-stage boss for this chapter.
When he pauses in a mid-air jump, he will hit the ground causing rocks to fall from the cave ceiling. Grab any rock you can, and throw them at Tarus.
Tarus will also throw punches as well. When you see the attack indicator light up, grab his arm just before the punch connects, and throw him. He is generally resistant to other thrown attacks.
Ghost Catcher![edit]
Aster's Tryke![edit]

Quickly grab the tricycle, and boost as quickly to the right as you can.
For the greater part of the map, simply head to the right whenever possible. There are only two left turns required, both of which are obvious when you can't proceed further right.
The gold gem is at the end of the course, which you can recognize by the drop down onto a blue platform (which begins to fall). You can get the gem by attempting a slightly shorter jump or by backtracking (if you didn't fly too far).
Moley Cow!![edit]

The miniboss is a simple mole. To defeat it, grab it and throw it against the ground.
It's usual attack is to make a simple swipe, but it can also dig into the ground for a few seconds and re-emerge elsewhere. However, it may decide to make a charging attack that can damage for half of the health-bar.
Jump on the mole's stomach to collect blue gems, and eventually the gold gem.
Aster's Maze![edit]
The maze is composed of sixteen rooms, and starting from the top left and zig-zagging down, are numbered from 1 through 8. The maze also has two sections - the green and red sections. Each room in the maze has a warp, and has a one-way obstacle separating the rooms on the same floor. Even numbered rooms are linked to a downward path to the next room.
The fastest route is:
- Reaching Green 3 (by warping or walking to Green 2)
- Warp to Red 4.
- Warp to Green 6
- Drop to Green 7.
- Warp to Red 2
- Warp to Green 4
- Drop to Green 5.
- Warp to Red 1
- Warp to Red 6
- Drop to Red 7.
- Warp to Green 8, then warp to Red 8.
For the gold gem, shake the Clancer at Green 4.
Sasquatch β[edit]
This boss has two forms.
- The first form is a giant tank. Take the rocks thrown at you, and him for the driver. When the tank begins to charge the cannon, grab it, and boost upward as much as you can to get the tank to hit itself.
- The second form is a walking robot. It will approach to kick you (if it doesn't, move closer yourself), and grab its foot when it does. Boost to the right, throw it into the air, then smash it against the cyborg. If you miss (which you shouldn't), try adjusting the mech's position by boosting left or right.
