On the shrine island[edit]
At the very beginning of the game, you are asked to choose a character, either the boy Lemele/Remeer or the girl Ferris/Fellis.
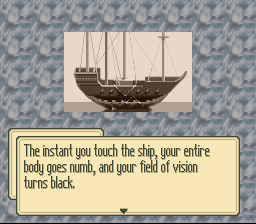
Follow the instruction of the voice, toss the Goddess' Tear into the hearth, then talk to the Goddess statue outside; go back indoors and talk to the hearth flame: it will direct you to the first door, that is a model ship on the upper floor.
Items:
- Goddess' Tear (used to make the Crystal)
- Leather armor (def+1)
- Crystal
First quest: arrival in the world of cats[edit]
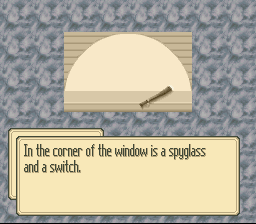
Once you touch the ship, you'll find yourself in a hut. The door is locked, so look for the key. First, though, examine the window: a hidden switch allows to open a locked drawer; inside the drawer is an HP seed.
Remember to equip the bronze sword from the menu. Push the table to get to the last chest.
Items in the hut:
- Empty bottle (fill it with honey; 3 portions in the pot)
- 200 G
- Bronze blade (atk+3)
- HP seed (examine window to unlock drawer)
- Bottle of honey (restores 10 HP)
- Rusted key (opens door)
The Bloodhook[edit]
Leave the hut and walk to the east, until you see a beached purple ship: that's the Bloodhook.

First, talk to all the cats onboard, open the chests before purchasing any equipment, save at the inn; then, leave the beached ship and fight the Crows to grind a few levels. Save the Ice claw for the later boss fight.
Items onboard the "Bloodhook":
- Leather hat (def+1)
- Spare mast
- Potion (restores 50 HP; talk with item seller behind the counter)
- Onion (talk with cats)
- Ice rock (ice attack lv.1; hidden behind inn beds)
- Ice claw (ice attack lv.2; solve chess puzzle)
Shops onboard the Bloodhook:
| Weapon shop | Armor shop | Item Shop | ||||||||
|---|---|---|---|---|---|---|---|---|---|---|
| N/A | Armor | Price | Def | Item | Price | |||||
| Leather armor | 80 | 1 | Potion | 40 | ||||||
| Leather hat | 8 | 1 | Antidote | 15 | ||||||
| Buckler | 18 | 1 | ||||||||
[edit]
Leave the Bloodhook and walk east, then turn north and keep following the crevasse to the west. Continue west from the Gunboss ship, then north. You can enter the tower: Matoya will blast you with magic lightning, but there's a magic fountain that fully replenishes both Health and Magic Points. Just east of the tower is the entrance to the abandoned tunnel.

You should better be at least at Lv.2 when you enter this dungeon. This tunnel is quite straightforward, and there is one enemy species only.
Items:
- Torch (fire attack lv.1)
- Rusted sword (atk+1; occasionally dropped by Skeletons)
- Pirate scimitar (atk+6; very seldom dropped by Skeletons)
- Report (talk to Pinkhead, who is at the end of the Dungeon)
Second quest: the healing sapling[edit]
Onboard the Gunboss[edit]
After you backtrack to the Bloodhook, the officer Sixpack gives you a paper-thin disguise (a Gunboss rank insigna), so that you can now infiltrate the enemy ship. Onboard the Gunboss, talk to everyone, then help the bartender; as a reward, you'll get two good weapons.
Items:
- Rank insignia
- Spare ribs
- Pirate scimitar (atk+6)
- Pirate axe (not fit for Lemele/Fellis)
Shops onboard the Gunboss:
| Weapon shop | Armor shop | Item Shop | ||||||||
|---|---|---|---|---|---|---|---|---|---|---|
| Weapon | Price | Atk | Armor | Price | Def | N/A | ||||
| Pirate knife | 10 | 2 | Leather armor | 80 | 1 | |||||
| Pirate scimitar | 30 | 6 | Chain mail | 140 | 3 | |||||
| Leather hat | 8 | 1 | ||||||||
| Buckler | 18 | 1 | ||||||||
- Trivia: The Gunboss apothecary is probably named after the German pharamceutical company Bayer (that is pronounced "buyer").
Upper bridges of the Bloodhook[edit]
When you come back from the Gunboss, Sixpack allows you to get a room on the upper bridge of the Bloodhook, where you can replenish HP and MP without spending money.
Before you continue, talk to the Bloodhook weaponseller: he asks you to bring him ten weapons from the Gunboss or elsewhere. One is your starting sword, second is the pirate axe, then any rusted sword dropped by skeletons; buy pirate knives on the Gunboss to reach a total of ten weapons. The reward is 100G (to cover the expenses), plus a mana perfume.
Items on upper bridges of Bloodhook
- 100 G & Mana perfume (restores 16 MP; bring 10 weapons to Bloodhook weapon seller)
- Potion (restores 40 HP)
- Potion (restores 40 HP; inside pot)
- Stone moon & Torch (inside drawer: check it twice)
- Torch
- Antidote
- Empty bottle n.2
New shops onboard the Bloodhook:
| Weapon shop | Armor shop | Item Shop | ||||||||
|---|---|---|---|---|---|---|---|---|---|---|
| Weapon | Price | Atk | Armor | Price | Def | Item | Price | |||
| Pirate knife | 10 | 2 | ||||||||
| Pirate scimitar | 30 | 6 | ||||||||
| Shark tooth | 20 | 9 | ||||||||
Dungeon 2: Cave of healing herbs[edit]

Travel to the bridge in the south-east. Use the Moonstone to open the gate, continue south until you get to a green patch, that is the cave of healing herbs.
You should better be at least at Lv.4 when you enter this dungeon. Again, there is one enemy species only.
Items:
- 2 Healing seeds (each one restores 30 HP)
- Healing seed (each one restores 30 HP)
- 2 Healing seeds (each one restores 30 HP)
- Healing sapling
Upper bridges of the Gunboss[edit]
When you return to the Gunboss, give the healing sapling to the Apothecary Bayer. He and many other cats leave to the cave of healing herbs, so that you can access the upper bridges of the ship.
Items:
- MP seed
- Iron helm (def+2)
- Deck brush
- Empty bottle n.3 (talk to Jalacy in the bar)
Third quest: the black iron[edit]
Dungeon 3: Bloodhook quarry[edit]
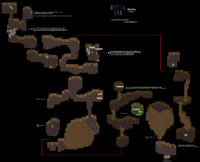
You can now access the quarry under the Bloodhook, looking for ore. The dungeon includes three puzzle rooms, described in the map (see image). You should better be at least at Lv.6 when you enter this dungeon.
Items:
- Portable hook (temporary item: it resets the 1st puzzle)
- 100 G & MP seed (prize for solving the 1st puzzle)
- Foundation seed & Flame pot (prize for solving the 2nd puzzle)
- Ice rock
- Antidote
- Intelligence seed & Torch (prize for solving the 3rd puzzle)
- Shark tooth knife (atk+9; not fit for Lemele/Fellis)
- Black iron
BOSS: Sand Worm[edit]

Use the Flame Pot and the Ice Claw for a quick victory.
Fourth quest: Hearts & Figurines[edit]
You can now access the kitchens of the Bloodhook, where Bullminch the Chef disappeared. Only a floating heart is left: take it, and bring it out of the cats world, back to the island shrine. Imbue the heart in Bullminch's figurine and bring the latter back to its world. Bullminch gives you no reward, unfortunately. Also, navigate the quarry once more to get another sample of black iron: it will be useful in a later chapter.
Item:
- Empty bottle n.4 (from Jalacy of the Gunboss)
- Bullminch's heart (in the Bloodhook kitchen)
- Bullminch's figurine (in the island shrine)
- Black iron (n.2)
Fifth quest: the King Mole[edit]
BOSS: the King Mole[edit]

You are charged with the mission of infiltrating again the Gunboss. There, you discover that a monster is causing trouble in the forge. The monster is nicknamed the King Mole. You should better be at least at Lv.8 when you attack this enemy. He's resistant to any type of magic available so far.
Black iron equipment[edit]
Before chasing the King Mole in the mines under the Gunboss, visit the Bloodhook and rest. New Shops are available onboard the Bloodhook:
| Weapon shop | Armor shop | Item Shop | ||||||||
|---|---|---|---|---|---|---|---|---|---|---|
| Weapon | Price | Atk | Armor | Price | Def | Item | Price | |||
| Black iron scimitar | 120 | 10 | Black iron armor | 320 | 7 | Antidote | 15 | |||
| Black iron knife | 240 | 9 | Black iron helm | 140 | 4 | Potion | 40 | |||
| Pirate axe | 80 | 7 | Black shield | 250 | 3 | |||||
| Black iron axe | 510 | 11 | ||||||||
Dungeon 4: The Gunboss quarry[edit]
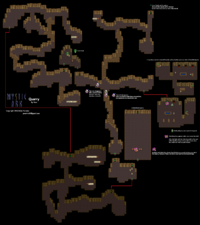
Follow the new path opened in the mines, until you reach the King Mole. He's fighting the Bloodhook cats, but you're with the Gunboss army right now: embarassing, indeed.
Items:
- Empty bottle n.5
- Potion
- Rusted sword
- Buckler
- Potion
- Healing seed (occasionally dropped by Grey Slimes)
Dungeon 5: Matoya's lighthouse[edit]
Many people from both ships suggest to ask Matoya's help to tame the monster, although Captain Cribut is afraid that her help could backfire. You already know where Matoya lives; unlike before, she opens the gates instead of blasting you. You should be at least at Lv.10 before you can fight your way through this dungeon.
- Ground floor: healing fountain and savegame statue.
- Floor 1: notice where the different tiles are, and walk around the pit traps; walk across the spikes; take your time to solve the magic door puzzle and access the two chests.
- Floor 2: activate the levers to get to the chest; its contents will be useful in a later chapter.
- Floor 3: push the rock, open the chest, continue upstairs.
- Floor 4: one fountain heals HP, MP and status, the other one is poisonous.
- Floor 5: walk into the pit across from the chest, so that you can get the four chests on the floor below; examine the lever and activate a third one to open paths through the spikes everywhere in the lighthouse.
- Floor 6: there are two pit traps in the lower-left quarter; step onto one of them and get the chest on the floor below.
- Floor 7: this is where Matoya lives; help her folding her clothes, then find her eyeglasses in the cupboard; after that, she'll agree to make a taming potions, provided you bring her five ingredients.
Items:
- Thunder scarab & Power seed (prizes for solving door puzzle)
- Topaz (raise levers to make bridge)
- Mana perfume (occasionally dropped by Vampire)
- Magic bottle
Matoya's room:
- Crumpled clothing
- Matoya's eyeglasses (inside cupboard)
Items jumping down:
- HP seed (drop down from lower-left tile on second-to-last floor)
- Magic bottle, Antidote, Speed seed, Thunder scarab (drop going right from chest with HP seed)
Matoya's medicine[edit]
Matoya's ingredients:
- a chess piece: in the brig of the Bloodhook
- an onion: in the kitchen of the Bloodhook
- a mouse tail: ask Bragg, in the brig of the Bloodhook
- a healing sapling: ask Bayer in cave of healing herbs
- some Fire Scotch: bar on the Gunboss
Resulting item:
- Matoya's medicine
New shops onboard the Gunboss (the armor shop is available, just talk across the bar and the weapons seller will move there):
| Weapon shop | Armor shop | Item Shop | ||||||||
|---|---|---|---|---|---|---|---|---|---|---|
| Weapon | Price | Atk | Armor | Price | Def | Item | Price | |||
| Pirate knife | 10 | 2 | Leather armor | 80 | 1 | Bottle of honey | 10 | |||
| Pirate scimitar | 30 | 6 | Chain mail | 140 | 3 | Healing seed | 90 | |||
| Leather hat | 8 | 1 | Potion | 40 | ||||||
| Buckler | 18 | 1 | Herbs | 120 | ||||||
| Herb cookie | 180 | |||||||||
BOSS: enraged King Mole[edit]

As Captain Cribut feared, Matoya's potion backfires, and the King Mole gets more angry instead of calming down.
Use the two Thunder Scarabs that you collected so far, then continue using physical attacks.
Sixth quest: the Altar of Chavez[edit]
After you defeat the King Mole, the whole area gets flooded, and Matoya grounds the two cat captains, Cribut and Alonso. Now the endless cat war is over, and you can collect a few more items on the two ships.
- Speed bottle (Bloodhook brig)
- Potion (Bloodhook brig)
- Mana musk (prize for answering a riddle on the Gunboss; answer is 96)
- Ice claw (Gunboss, captain's room)
- Speed bottle (Gunboss, captain's room)
Furthermore, the flooding allows to easily reach the Shrine where the first Ark is kept. A diary in Captain Cribut's room on the Gunboss tells about this strange location.
The Altar of Chavez is a dungeon on five floors. On the second floor is a healing spring: stop there and grind up to Lv.12 at least, before you explore the deeper floors. On the deepest floor there are no enemies.
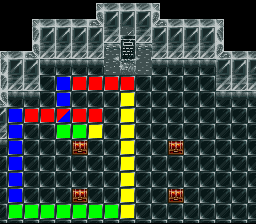
The path of power:
- 8 to B (down)
- 7 to Y (left)
- 6 to X (up)
- 5 to A (right)
- 1 to B (down)
- 2 to Y (left)
- 3 to X (up)
- 4 to A (right)
Items at the bottom of the dungeon:
- Ark of Power (follow path of power)
- Black Bastard sword
- Magic mirror
- Speed seed
- Mana perfume