This is the last part of Portal. Once you complete this, you may get the heartbreaker achievement.
Walkthrough[edit]
Getting to the top[edit]

Get past the sewers and at the end you see a wall with a drawn arrow, pointing to a drain you can portal through. Place one that looks close to the drain. Now just try to portal out of the gooey – but not lethal – water. Once you get to the surface, you hear an alarm and turrets will shoot you to death as some sudden intense music plays. If you need more time, drop back down into the drain area, and it will be easier to avoid most of the turrets.
Quickly put a portal behind them and put another near you (wall or floor, your choice). Then take them out one by one, portaling into each’s room. Some you may be able to place a portal underneath and save yourself the trouble of getting there yourself.

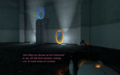
Once you take out all of the turrets, look up and notice that above the second-highest room, there appears to be another platform. That is your goal. Find the turret that's on the highest floor. You will not be able to put a portal on the cover of that room from ground level, so put a portal in that alcove, and another nearby to get yourself there. Once in that location, scan the room for a slanted wall (across from your position). Once you find it, put a portal on top of it.


Now it’s time for some fun flinging. Fall down and place the other portal so you whiz through it. You will not be able to land on the highest slanted door in one fling, but you can easily put a portal on it in the first pass. If that was the opposite color of the ground portal, your ground portal was right against the wall, and you look into it, it is possible that you’ll continue your fling all the way to the high platform. If not, simply place a portal below you. You’ll come out of the high portal and fall to the ground, so place one on the ground before you hit, and that will be enough momentum.
To the boss[edit]

Now quickly go behind the turrets as they will be delivered to kill you, then take out the two turrets. Placing a portal under them works if you didn't manage to get behind them. Now you have to jump your way up a hole. Put a portal somewhere on your ground level of the hole, and put another on the floor of the main room. Now jump on the portal and you may find that it is enough to build your way up the hole.
Now just aim yourself to the next platform and then follow a catwalk followed by some doors you just need to open.
Note that it is also possible to, from the initial high platform right before the two turrets, jump way down into a ground portal to fling up out of another placed on the high platform and maneuver onto the catwalk, thus skipping the two turrets and a couple other steps.
GLaDOS[edit]

Now you get to battle the boss: GLaDOS.
After her talking, put the spherical core that she drops near the incinerator. Put a portal near this point, and another near the room with the button. Press the button, and quickly put the core in the incinerator.
GLaDOS explains that the core you just destroyed was a recent morality core that stops her from filling Aperture laboratories with neurotoxin and other deadly gasses. Within the six minutes GLaDOS contaminates the facility, you need to finish her off and dodge the rockets. The computer has the advantage, since you can't shoot her cores out with the portal gun.

However, you can redirect rockets back at the core. Shoot a portal to a wall, and a second portal that gives a direct line of fire between the turret and GLaDOS (the floor under GLaDOS is a good place for this portal). When you stand in front of the first portal, the turret should obtain a lock. Dodge the rocket, and it will hit GLaDOS.
The next core is on a pipe. Portal to the core and incinerate it with the same method as the previous core. The following two cores are on the glass platform above, and in mid-air, respectively. The one in mid-air you must either run into or grab as you're falling. Torch them and win the game.
-
Core 2 location.
-
Core 3 location.
-
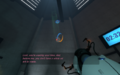
Core 4 location.


No Cheating SpeedRun in One Segment for Mere Mortals[edit]

Of all the behind-the-scenes parts of the game, this one offers by far the best opportunity to be clever and cut a big chunk off your speedrun time. You will, of course, not take the time to dispose of the turrets. But you will also not use the rocket turret to damage GLaDOS and make her release the cores, one by one. Instead, you will use a normal turret. It turns out that the damage from a single bullet is enough to make GLaDOS release a core. Also, she does not wait for a core to be incinerated before she can be induced to release the next one by another bullet. So, a short spray of bullets is all it takes to get all of the cores. Whether using a turret in this way qualifies as "No Cheating" is certainly open for debate. However, it is very effective, enjoyable to execute and really does improve your time. You must be the final judge.
Getting to the top : From under the floor of the huge room, find the grill in the ceiling against the end wall with the arrow pointing up. Stand to the left of it and away from the wall. Sight up through it and adjust your position until you can get a portal high on the wall of the room, bypassing the drainage channels entirely. When you place the other portal close by and look through, you should be looking across the room from a high position towards one of the turret-alcove doors that opens at an angle to form a launching place for a fling. Go through, drop to the ground and move all the way to the left wall and slightly forward to find a safe position near a pillar. This drop is necessary to start the opening up of the doors (and the intense music). Move the lower portal to the wall near you and again look through and across the room. Line up your portal gun on the door panel of the alcove opposite, which is now at an angle.

If it is still moving, wait until it stops. Now, move through the portals and as soon as you are on the other side place a portal on the angled door. Immediately look down and place the other portal on the floor underneath you. Fall through and fling out of the angled door panel and across the room. Your objective is the broad and deep platform towards which you are flying. However, you will not quite reach it. So, in mid-air, place a portal on the floor of that platform and wait until you crash land. Quickly, so as not to take too much damage from the turrets, place the other portal close by and go through, emerging on the platform. There are variations to this move, so find the one that works best for you and practice it. You should be on the high platform thirty seconds from the start of the level.
To the boss : Don't go towards the back of this high platform. You're not going to follow the Walkthrough and there's no need to trigger the two turrets there. The suspended walkway that leads to GLaDOS crosses the huge room above you and you're going to fling directly up onto it. When you're practicing, face into the large room and look straight up to see it, but, of course, don't waste time doing this in the speedrun; you should remember exactly where it is. Place the orange portal on the floor of the platform to one side of the center. Make sure that when you come flying up out of this portal you will pass close to the walkway, but not hit it or any other obstruction. Practice so that you know where to put this portal. Go to the edge of the platform exactly in the middle. The position of the blue portal on the floor way down below is going to be very important, not for the fling but later on. Center it exactly on the little bridge that crosses the gutter and make sure it is lined up along the length of the room. Do not move this portal until you are in the same room as GLaDOS. Now, hop off the edge and plunge down. When you fly up out of the orange portal, you should know, by rehearsing and getting the portal in the right orientation, which way to turn and strafe, and when, so that you land on the suspended walkway. Your feet should touch down at forty two seconds.
GLaDOS : Walk (or jump) all the way to the glass-sided corridor that leads to GLaDOS. Under no circumstances move the blue portal. Facing towards GLaDOS, place the orange portal about a third of the way along the corridor, then go around it and continue, stopping just short of the Emancipation Grid. Turn around and look through the orange portal. You will see one of the turrets that you ignored in the huge room full of turrets in alcoves. This was the purpose of the careful placement and preservation of the blue portal. The turret will start to shoot at you. If it does not, move towards it or try different positions of the orange portal (always shooting the portal from the far end of the glass-sided corridor towards GLaDOS) until you can get this right on your first attempt in the speedrun. Take some damage, but either move the orange portal or back away through the Emancipation Grid before it kills you. Backing through the grid is faster, but you need to be confident that at least three bullets have whizzed past you and hit GLaDOS. You should be through the Emancipation Grid by one minute nine seconds from the start of the level. In the room with GLaDOS, set about collecting the released cores from their respective locations and putting them on the ground in front of the incinerator (portal them, don't carry them). Then, portal and walk to the round room with the button that opens the hatch.

With one portal above or high on the wall behind the incinerator, put the other portal under each core in turn to dump it in and so end the game. The view from the round room is quite restricted, forcing you to gather the four cores into a small space. As an alternative, jump over the railing onto the flange around the base of the room and walk around the outside until you can operate the button through the window. This way, you can see and place portals in a much larger area and so can spend less time moving the cores around beforehand. You should be pressing the pedestal button to open the incinerator at the two minute mark.
The speedrun ends when the aiming crosshairs disappear. This should be at about two minutes and fifteen seconds from the level start. From the moment that the crosshairs appeared in Chamber 00 to this moment, measured on a real-world clock or stopwatch, is your single-segment speedrun time. Using the paths and techniques explained in these sections for each chamber, you should be able to get this time down to around thirty minutes. You will have spent about ten of these minutes inside chamberlocks and waiting for the next level to load.