| Map Name | Initial Coordinates |
|---|---|
| boss1 | (1144 -167 1086) : 135° (facing southwest) |
Starting the final unit, you should have collected all the available weapons.
Unit objective[edit]
Locate and destroy the Strogg leader, then escape from the asteroid.
Note: There is no cut-scene transition to this unit, and the unit is not specifically named in the game. However, it is not possible to return to the Upper Palace once you have arrived here.
Level objective[edit]
The objective for this level is to locate the Makron and pursue him through a matter transporter to his base on an asteroid, where you will face him in single combat.
Strategy[edit]
This is an easy level and no particular strategy is needed except that you might want to plan for the next level, which is the Final Showdown with the Makron. You want to arrive there with full armor and ammunition. So, unless you are low on armor now (below 100), pass by the Body Armor and ammunition stash when you first see them and come back for them after you have disposed of all the Strogg in this level. Proceed as far as pressing all the buttons to extend the steps, but don't go up the steps. Instead, backtrack all the way to the start to collect the armor. If you've been conserving armor in the Palace, this will put you at 200 armor, which is where you want to be in the fight with the Makron (unless you're going to fight the sissy way with Invulnerability and Quad Damage). The wide lift with the button won't come up for you when you approach it. To avoid damage from the drop, jump across the width of the lift and onto the button, then down from there.
Walkthrough[edit]

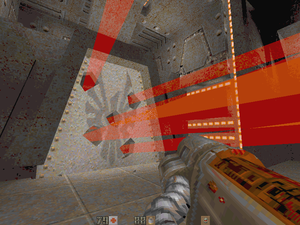
Go out of the room in which you arrive. There is Body Armor to the right; either take it now or come back for it before leaving the level. Go either to the right or to the left and down a short flight of stairs to white door. Approach it, but then step back and to one side. You will hear a slight humming noise and five laser beams will shoot through the door and destroy it; you don't want to be standing too close when this happens.
Step through the doorway and go either left or right around a large circular wall until you come to an alcove that leads to a button-operated elevator platform. Next to the platform you'll find a cache of ammunition. Either pick up what you need now or make a mental note to come back for it later. Take the elevator up to a higher level.
Leaving the elevator you come upon another white door. This one is harmless. Step through and you will see a large piston-like lift periodically going up and down. You cannot enter it, because it is behind a force field curtain.
To shut off the force field, you need to press two buttons that can be found around the right and left sides of the piston-lift. In between them is a platform on which two Iron Maidens are waiting. You can use the central structure for cover from their rocket fire as you pick them off using the weapon of your choice. There were rockets and slugs in the cache, so the rocket launcher and rail gun are good choices as you can replenish the ammunition used. Now you can use carefully timed jumps from the sliding bridges to get across the lava pool to the buttons. Wait for the bridge to approach the button a second time before jumping back. If you need health, you can jump from the bridge to the platform on which the Iron Maidens were standing. Return to the piston-lift and ride it to the surface.

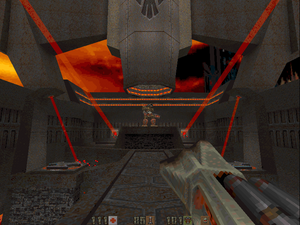
Step off of the piston-lift. You will see the Makron standing on a matter transporter platform at the opposite end of a causeway across a pool of lava. He is invulnerable to your weapons at this point, so don't waste any shots on him. He will not shoot at you, so you can take in the scenery here, such as it is. Approach the platform and he will transport to his asteroid base in a shower of sparks. To follow him through the matter transporter, you must push the two wall buttons on either side. To turn off the pulsing, deadly lasers that guard them, you must first press the two floor buttons on the narrow extensions that go to the left and right from the central causeway. These are guarded by sweeping laser beams, also deadly, so wait until the beam is at the back of the button before you step on. As you press each floor button, a group of Fliers will appear over the wall on the opposite side. Shoot these down with the weapon of your choice, for example the Chain Gun. This is where, on this level, you are most likely to take damage, although if you're liberal with bullets you can take the fliers out before they get a hit on you. If you do take a hit, you will lose some armor, so if you left the Body Armor behind you can go back for it and recover full armor. With the lasers off, press the wall switches on either side of the transporter platform. Some steps will extend from the platform. Go back now for ammunition and/or armor that you left behind. When you have collected everything from this level, climb the steps and stand in the middle of the transporter pad to exit the level and follow the Makron.
Secrets[edit]
This level has no secrets.