| Map Name | Initial Coordinates |
|---|---|
| command | (744 -1695 46) : -180° (facing south) |
Level objective[edit]
The primary objective for this level is to destroy the black hole generator, which is the second of the two objectives for the City unit (the first was to close the main hangar bay door). This is accomplished by first shutting off the coolant to the CPU core and, having done that and gained access to the launch systems command room, destroying the computers. Note that your field computer does not update to show these objectives until you enter the launch command building. Prior to that, it will tell you to "Proceed to surface", even though you are obviously already on the surface.

Strategy[edit]
This is an easy level for this stage of the game. Approach it using your favorite strategy. If that is charging in with guns blazing you may like to know that there are eight Tanks, and you will meet them in pairs, so taking cover may turn out to be a good idea from time to time. If what you're supposed to be doing gets vague, just go everywhere you can and do the obvious things and it will all work out in the end. You can bypass a substantial part of this level with a trick, if that's your sort of thing, but to figure out what the trick is you'll probably have to play through normally at least once (or read the Walkthrough, below). Health, ammunition and armor are available in about the right quantity. One last tip before you begin - if you walk out into a space with a high roof, think about what might be up there.
Walkthrough[edit]
The elevator from the Inner Hangar brings you up to the surface in an open area dominated by a huge machine that turns out to be the black hole generator. It has a large, round platform that seems to be too high for you to get up onto, three towers supporting electrodes of some kind and three rings of light spinning between the electrodes. Steep rock walls surround the area and there is a building carved into the cliff face on your right. Occasionally, an aircraft flies overhead. In between the black hole generator and the building there is a dead Marine, a Combat Suit and Rockets. Hmm, Rockets (see Secrets, below, if you're so inclined).

Deactivating the Side Chambers[edit]
Go into the building. Kill the Gunner that is patrolling the passage inside and follow it around a left turn, then a right turn and though a door into a wide hallway that curves around a circular structure in the middle. At some distance and on both sides are Iron Maidens. Take them out, being careful that while you are intent on the first you don't get hit by fire from the second. Rockets are good, two each, and fire at their feet in case they duck. Retreat into the passage for cover if necessary. Now, each Iron maiden was standing near a door. Behind the doors are large circular "chambers" of some sort with round water tanks in the middle and wheel valves at the ends of walkways up above. You need to turn the wheel valves to deactivate the chambers. Both chambers are the same and have the same Strogg inside, so follow the rest of this section through twice, once for each chamber.
The door opens onto a tee intersection. Both to the right and to the left are Tanks, but they are looking into the room and not at you. Obviously, if you start a fight with one of them here, the other will attack you from behind. It is very difficult to run past them into the chamber, so get their attention, perhaps a quick Rocket each, and withdraw into the central hallway. Check through the door and soon enough the tanks will lumber up and you can take them out one at a time using the passageway for cover or going far back and dodging. Now go to the tee again and turn right. Turn to the left when the passage ends and you will be looking out into the chamber. At the very far side there will be a Gunner who will start towards you when he sees you. If you're quick with the Blaster, you can set off the exploding barrel near him, otherwise kill him any way you like without advancing very far from the protection of the passage. Go back into the passage and across to the other side. Look out into the chamber again and deal with the Gunner on the other side who will behave in the same way.

The next part can be tricky. Look up and you will see a walkway circling the chamber. There is a Gladiator and an Iron Maiden up there. You can try to take them down from the lower level or, at any time, you can make a run for the elevator on the far side of the chamber, between where the Gunners were standing, and take it up to the walkway and face them there. Shoot for the Gladiator first, he is more dangerous, unless you can find the Iron Maiden before the Gladiator sees you. If it doesn't make you feel too much of a wimp, quicksave before this battle. When these two are gone, go up and around the walkway to a short passage directly above the passage by which you entered the chamber and kill the Gunner standing there. Back near the elevator, operate the wheel valve and receive either the message "Chamber 1 deactivated" or "Chamber 2 deactivated". The lights dim. To get back to the floor level, jump to the sloping sides of the water tank in the middle and slide down. Look around for exploding crates and shoot them to reveal some minor goodies.
Two More Wheel Valves[edit]
When both side chambers are deactivated, pick either side and go to the passage on the walkway level where you took out a Gunner. Open the door and look into the area beyond. It is a circular passageway. The first thing to do is to deal with the two Tanks and two Technicians there. Use the doorway and the curve of the passage for cover. Four doors open from this passage. The one you came through and the one opposite, leading to the side chambers, are no longer important. The pipes above them are empty. Of the other two, one has the words "LAUNCH SYSTEMS" above it (the Strogg are posting signs in English?) and when you approach it you get the message "The core CPU has locked this door." So, go to the fourth door, which has a pipe above it carrying flowing water. There is a Gunner just inside and then a tee intersection. To the right is a Tank; deal with him first. Then go into the room and deal with a second Tank and two Technicians floating above the doorway.
The room contains a large deep pool. Take a swim by all means, but there's not much of interest down there. On the opposite side of the pool from the door, there is an opening blocked by a force field. If you go up to it, you will get the message "Force field controlled by the launch computers". To the left and right are small elevators. Pick one and take it up to a short walkway to a wheel valve. Operate the first wheel valve and get the message "1 more to go...". Drop down and use the other elevator. Turn the second valve to get the message "Sequence completed!" and the room becomes dim. After quite a long pause you receive the message "Core CPU is no longer functional" and finally "Access now possible to launch system". The last door off the circular passage is now open. On your field computer the secondary objective has changed to "Take out the blackhole generator computers".

The Blackhole Generator Computers[edit]
Leave this room by the way you came in. There will be a Technician in the passage to the door and another one somewhere around the circular passage outside. Go 180 degrees around the central column and through the door under the "LAUNCH SYSTEMS" sign, which now stands open. Beyond the door, a Gunner patrols a passage which takes you to the left, then to the right and to another door. Open that door and deal with the four Guards inside. You will get the message "destroy the computers". The computers are on the walls to the left and right. First, take a look through the bars at the far end of the room where you can see the black hole generator merrily spinning away. OK, now shoot the computers. Take another look through the bars and ... it's gone! Your field computer, which previously showed "Destroy the blackhole generator", now shows "Primary unit objectives complete" and "Launch systems destroyed. Force field disabled. Proceed to exit".
Go back around the circular passage. If you have left anything useful behind, go back for it; the whole level is accessible and you can even go back down to the Inner Hangar or any other level in this unit. Enter the room with the two wheel valves and go around the pool to the opening, which is no longer blocked by a force field. Proceed to the exit, as instructed by your field computer (but, see Secrets, below, first).

Bypassing the CPU Core Coolant[edit]
If you want to mess with this level, get up onto the big round platform under the black hole generator (see Secrets for how to do this) and stand right up against the tower closest to the elevator that brought you up. Look up at the barred opening above the door into the launch command building. Aim your blaster for the gap in between the left-most bar and the next one, just a little above the bottom of the bars. Shoot repeatedly, varying your aim slightly, until you see a small explosion in there. Then, go diagonally across the platform and stand right up against the opposite tower. Aim between the right-most bar and the next to the left, again just a small distance up from the bottom. Shoot until you see another explosion. The rotating rings will disappear. Your field computer will read "Primary unit objectives complete" and "Launch systems destroyed. Force field disabled. Proceed to exit".
Without messing with the CPU core coolant, you can now get to the exit. You will be able to score both secrets, but you won't make all the enemy kills unless you decide to explore the whole level anyway. Follow the general idea of the walkthrough, above, but clear only one side chamber and then go to the room with two wheel valves and just make for the exit. Ignore the other side chamber and the launch systems computer room, which you have already shot up. Dodge past any enemies you don't feel like killing.
Secrets[edit]
This level has two (2) secrets:
- At the very beginning of the level, get up onto the large platform under the nested, spinning rings of the black hole generator. You'll need to do this with a rocket jump (or grenade jump, if you prefer). To minimize the damage you take, stand with your back right up against the platform and point the Rocket Launcher straight down at your feet. Jump, and at the highest point of your jump shoot the rocket and hit and hold the move backwards key. If you start with good health and armor, you will lose maybe 8 points of health and 34 points of armor. Sometimes, but not all the time, you get a message congratulating you on your rocket jump. Go over to the back of the platform, slightly to the right of the tower back there. You will find Health, a BFG10K and assorted ammunition. There is a ladder to get back up onto the platform after you have collected them.
- At the very end of the level, just as you enter the exit corridor that was blocked by a force field until you messed up the computers, notice the cracked pane of glass on the left. Shoot it, go through and dive to the bottom of the pool to collect some ammunition. You will get the message "You have found a secret area!".
- Gallery : Secrets in the Launch Command Level
-
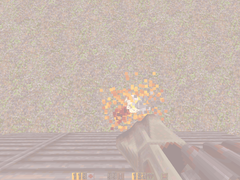
Rocket jump up here.
-
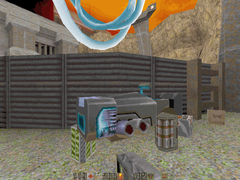
The rocket jump reward.
-
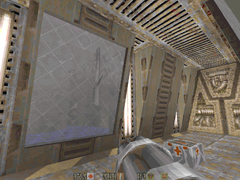
Cracked glass near exit.
-

Shoot the glass away.
-
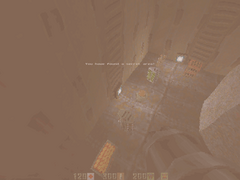
Dive down deep!


