Most of this level can be played by sniping from cover or by rushing in with powerful weapons. Health, ammo and armor are not in short supply. At one point, you will find an enemy on a landing above and behind you, so look carefully around as you advance. You will also be attacked by Strogg lurking in dark areas. At two points along the most obvious path, you will find yourself attacked with no cover available. Therefore, keep your health and armor levels reasonably high. There are ways to avoid both ambushes. Either read the walkthrough, below, or look for them yourself.
As there are (at least) two ways to bypass large parts of this level, you should make up your mind ahead-of-time whether you just want to make for the exit or play the entire level. If you're not following the walkthrough, it is possible to get confused and, in fact, arrive almost at the exit with no way forward. Just go back and explore places you haven't yet been and everything will work out in the end. The level has only one entrance and only one exit.
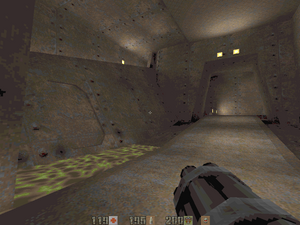
When you enter the level from Pumping Station 1, you come to a hallway that dog-legs to your right and goes up a ramp. A Gladiator and a Gunner patrol this ramp, so deal with them. Advance up the ramp cautiously; there is a Gladiator on a landing over your head. Either use the landing as cover and take him out now or run and dodge up the ramp, hoping that his rail gun doesn't hit you, and meet him in combat later. At the top of the ramp, turn right and fight two Berserkers. If you've left the Gladiator behind, don't let them push you back into his view. Turn right again and you will see the Blue Key door on your left and an open doorway on your right. Just as you made the turn, on the inside, you can see that there is a level below you with green toxic waste. (See also Secrets, below.)
You can leave the next section until later, when you have the Blue Key and come back here to go through the door. It is, however, a good idea to clear away some Strogg now. Go through the doorway on the right and fight a Gunner and, if you didn't kill him earlier, the Gladiator on the landing. Around another right, through a door and in the pump control room you will find Guards and two Tanks (at hard difficulty). At the back is another room at a higher level in which you can see, towards the right side, the Blue Key. There are also two Gunners up there waiting for you to come from the left. Try pushing one of the exploding barrels up to the opening to the Blue Key room and jumping up onto it and then into the room above (but, this isn't easy). The Gunners won't notice this and since they are facing the other way you can pop them off with a Rail Gun slug each.
Exploding barrels in the pump control room.
If you can't jump up, you could explode the barrel under you to get a boost, or try a rocket or grenade jump, but the damage will probably be worse than facing the Gunners later and they will be alerted to your approach. However, once in the room, you could take the key, drop back down into the pump control room, turn on the pump and head for the Blue Key door and the exit. If you want to play the level to the full, or haven't jumped up into the Blue Key room, go back out to where you found the drop to the lower level with green toxic waste. The fight in the pump control room may have exploded some barrels and made a hole in the floor. Don't go down unless you like ambushes! In fact, don't even look over the edge. One final word about the two Gunners. From the floor of the pump control room or standing on a barrel near the opening, you can probably get a grenade along the wall on the left and/or behind the pillar to flush them out into the open. If you leave them alone, they will cause trouble later.
Unless you have the Blue Key already and are skipping ahead, drop down to the lower level. Crouch to avoid fall damage and land on the ledge, not on the platform where the BFG10K is. (Before you get down off of the ledge, see Secrets, below.) There is Body Armor behind some bars that you can reach by walking along the ledge and shooting away the bars. A passageway leads off behind the armor, but this walkthrough is not going to take you that way. If you decide to explore in that direction, you will find that this is another way to bypass a lot of the level and, in fact, get to the exit without the Blue Key as long as you went into the pump control room, as described above, and started the pump. You will have to wade through toxic waste and fight Gunners, Technicians, Berserkers and Guards. If you did not start the pump, you will not be able to reach the exit and will have to backtrack through the toxic waste. So, to continue as suggested here, after getting the armor, drop down and either take the BFG10K or leave it for later when you need its ammunition. When you take it, Technicians will appear along the channel of toxic goo.
Leave this small area through the tunnel and enter a large room with some kind of huge machine in the center. Deal with a Gunner around to the right and a second one on the far side of the room. If you climb the ladder and walk around the room on the ledge, you will find a Mega-Health, but this does not count as a secret. Leave the room from the far left corner via the walkway over the toxic waste and under the horizontal pipe. Go through an opening on the left and cautiously look along the passageway to the right. Here you will find two Technicians and a large number of Guards (eight at hard difficulty). This is the ambush that you would have fallen into if you blew open the floor in the pump control room and dropped down. Using the corner as cover, you can kill them now without taking much damage. Advance along the passageway to find an elevator around a corner at the other end (but, first, see Secrets, below). At the top of the elevator, you will find the Blue Key room.
If you did not go to the pump control room earlier and clear the area, you will be in a tight spot here. The two Gunners will attack you with their usual barrage of grenades. You are also surrounded by explosive barrels. You can try to take the Gunners out quickly or run to the left and forward away from the barrels but you will probably take damage here so don't be low on health and armor at this point in the game. Also, through a large opening on the right, is the pump control room. If you haven't already dealt with them, there are Guards and Tanks out there. Use the sides of the opening as cover. Take the Blue Key and drop down. If you forget the Blue Key, stand away and blow up the barrels on the lower part of the floor to break it open, crouch and drop down into the passageway to the elevator which will bring you back up into the Blue Key room again. Start the pump with the switch on the right-hand wall (you will receive the message "Pumping Station Two activated") and leave through the door in the far left corner. Look out for Strogg if you did not deal with them earlier.
Back at the Blue Key door, you can now go through. On the other side, you will find a hallway that dog-legs to the left. There will be a Berserker to deal with immediately. Look cautiously around the corner as there are Guards at some distance on the other side of a round toxic waste pool. Use your Blaster to shoot the barrels near them. As you advance, you're going to have to deal with several Gunners, coming from an area that branches off to the right and from dark alcoves on either side of the toxic waste pool. You can ignore the area to the right, but there's an Environment Suit down there and this is going to be useful, so it's best to go in. After the Gunner in the hallway, expect Berserkers in the room beyond, both to the right and left, and another Gunner around behind the vertical pipes and standing guard over the Environment Suit. When you go down the ramp and take the suit, three Technicians will appear, one bursting from a vertical pipe and the other two from behind the grating high on the back wall. Yet another Gunner will materialize up the ramp and to the right of the vertical pipes. To avoid damage, take the suit at a run and go up the ramp, around the left side of the pipes and out and around the corner. From cover you can pick off the enemies individually. If you explore the toxic waste pool at the lowest level, all you will find is a tunnel leading back to where you found the Body Armor near the BFG10K, so it would be a waste to use the Environment Suit for this.
In the hallway above, before crossing the toxic waste pool, go back for any useful items that you've left behind. Don't forget the backpack of ammunition on the lower level or the Body Armor, if you passed them up when you first saw them. Everywhere in the level, other than the far side of the pool, is accessible. Swimming across the pool you will take damage unless you equip Invulnerability or an Environment Suit (see also Secrets, below). Note that if the level in this pool is low and you can see the turbines at the bottom, then you have forgotten to turn on the pump; go back to the pump control room and do it now. On the other side of the pool, just collect any useful items and go up the steps to the exit, which will take you back to the Toxic Waste Dump.
A panel on the wall to the right of the Blue Key door bears a sort-of "wings" symbol and is paler than the surrounding area. Shoot it and it will rise, revealing armor. Due to a defect in the game code, when you jump in to take the armor, the secret does not register, however it is one of the secrets of this level.
A narrow channel of toxic waste runs away from the area where you find the BFG10K and goes around a corner. Reaching the end of the channel counts as a secret. If you dropped onto the ledge around this area, you can walk along the ledge and back to score the secret without dealing with the toxic waste. There's an Adrenalin and a few Stim-Packs that you could collect by dropping down at the end, but then you'll have to come back through the toxic waste. If you are not on the ledge, either go around again or run all the way there and back through the toxic waste. If you have and can spare an Environment Suit or an Invulnerability, you can use that to avoid damage or use a Power Shield or just take it like a human.
Shoot the recessed panel on the left. Where you fight the Technicians and Guards on the way to the elevator that takes you to the Blue Key room, a recessed section of wall breaks away when you shoot it. Jump over the toxic waste into the tunnel behind and follow it around a dog-leg to an Invulnerability.
When swimming across the round pool of toxic waste near the level exit, dive down, looking ahead, to find a Quad Damage in an alcove. Don't get caught by the turbines!