Regular enemies[edit]
| Beruberumu | Beruberumu MkII |
|---|---|
  The gold Beruberumu are the basic enemies that appear in formations at the start of each horizontally scrolling stage. They provide you with power-ups when you destroy the entire formation. They are the key to your success when you are in a low firepower state. Gray Beruberumus appear much later in the game, including a seemingly never-ending parade of them at the end of Stage 5. |
  Similar to the original Beruberumus, the Mark II variety usually appear during vertically scrolling stages. However, the gray variety are much more common this time around. Gold Beruberumu Mark IIs still appear at the beginning of the stage, offering you with the chance to power up provided you take out the whole formation. |
| Swarm | Octa |
 Appearing very similar to the Amoebas found towards the end of Gradius, Swarms float through spaces inside of the Bionic Germ in search of things to eat. When destroyed, they will always leave behind a power up. Because of this, it's easy to get excited when you see them, and end up getting lured into a dangerous location. |
  Octas are small anti-bodies that patrol the surface of the Bionic Germ, looking to absorb any material that doesn't belong. They don't stray very far from the edge and are very susceptible to missiles. Gold Octas provide power ups. If only one is in a formation, you only need to kill that Octa. If the entire formation is gold, you must kill all of them to get the power up. |
| Hair | Suparugu |
 These small strands of hair are used to sense disturbances around the air inside the Bionic Germ. When a presence is detected, the hair becomes straight and sharp, and the follicle launches the hair at the intruder in an effort to keep it from the more sensitive membranes further inside. The hair is easily shot down. |
 Suparugus are another variety of anti-body inside the Bionic Germ. Unlike Octas, they can't move around of their own free will and are rooted to their location. However, they detect nearby intruders, aim at them, and shoot projectiles to get rid of them. They are also easily cleared with missiles. |
| Amukakemudomira | Fire Geist |
 Despite the amazingly long name, Amukakemudomiras are not very dangerous. They appear in long row formations from above, stop somewhere along the upper half of the screen, fire at your ship, and retreat after a short delay. They are easy to pick off, but don't ignore the projectiles that they shoot at you. |
 Fire Geists are a rather slow moving enemy. They try to track down the position of your ship like Kepittos. They are very easy to out maneuver, but they are much more dangerous to destroy. When shot, they explode into eight jets of flame that fly outward from their last position. If you fill the screen up with too many flame jets, subsequent Fire Geists may not produce as many jets. |
| Kepitto | Fose MkII |
  Kepittos are found in a variety of stages. Their behavior corresponds to the Ruguls found in Gradius. They are free to independently fly around and home in on your location. They are much slower than you, but they will hunt you down relentlessly until you destroy them. |
  The Fose Mark II are an upgraded design from the original Fose found in Gradius. They only appear in the fourth stage, the Volcano. Once again, they move about in a rather slow snake like formation. The gray Fose are more numerous, and the gold ones provide power ups when destroyed. |
| Phoenix | Fire Planet |
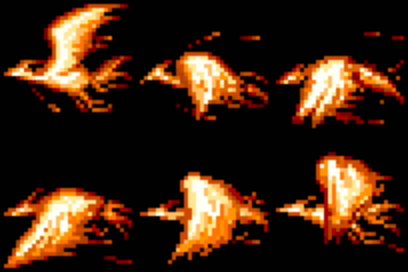 The fire birds known as the Phoenix thrive in the third stage known as Burning Chaos. They actually appear in a variety of sizes, but they all behave in the same predictable manner; they appear on the right side of the screen, and fly in a sinus wave to the left. A small few may leave power-ups behind. |
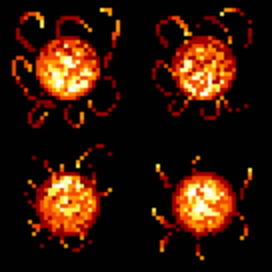 Ejected from the very flames that foster them, Fire Planets are large accumulations of mass that become super heated and fly out into the cooler sections of space. They are especially attracted to objects giving off powerful energy signatures, so they will lock onto your ship and fly straight for it. |
| Ugu | Ugu MkII |
  The Ugu are a unique enemy which are launched from the floor which is seen in the background of the fourth stage, the Volcano. They appear from hatches, and slowly rise up to your ships altitude before flying at you in a kamikaze attack. Gold Ugu, though rare, provide power ups. |
 Towards the later half of the Volcano stage, the hatches will stop releasing the original version of the Ugu, and begin to launch the far more aggressive Ugu Mark II. These Ugu fly up to meet you much more quickly, and launch their attack quicker. They continue to appear all the way until you reach the triple core fortress at the end of the stage. |
| Rush MkII | Dome 2331 |
 The Rush Mark II is an upgrade version of the original Rush found in Gradius. They are launched from domes, fly out in a diagonal direction toward your ship, and then drop down when they line up with it. Destroy them or get out of their way. |
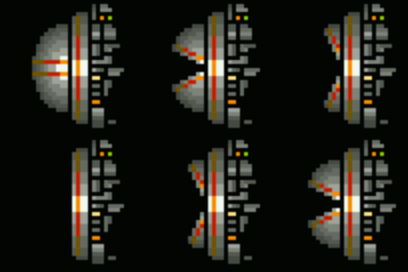 Domes can be seen mounted along the cliff walls at various points along the Volcano stage. These domes are similar to the various hatches found throughout Gradius. Likewise, they release squadrons of small enemies, the Rush Mark II. You can take them out directly, or let your missiles do the work. Domes are also known to release Gremlins on occasion. |
| Gremlin | Baruganisu |
  Gremlins are an upgraded design of the Ducker cannons found in Gradius. They walk along the cliff walls, picking and choosing their moment to fire at you. They are easily picked off my missiles, but they typically position themselves in places where missiles have a hard time reaching. Gold Gremlins leave power ups behind when defeated. |
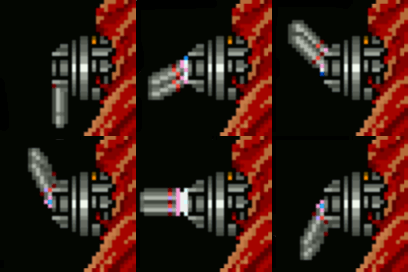 These mounted cannons line the cliff walls in the Volcano stage. The turrets track you as they fly by, releasing a volley of artillery at you until they exhaust their supply. After a short delay they are ready to fire again, but they are likely to be scrolled off the screen shortly after that. Missiles are an effective weapon against them. |
| Thunder Myu | Phalanx |
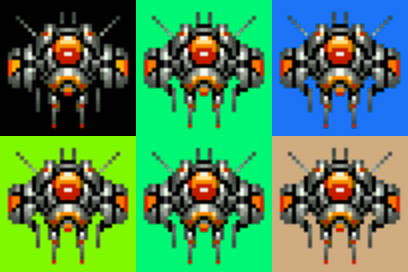 Thunder Myus are commonly found in stages with dense populations of asteroids, namely the second and fifth stage. When they appear, they don't attack your ship directly. Rather, they fly in lazy circles just ahead of your ship. However, the threat they pose is by the effect they have on light in the surrounding area. They cause the screen to flash bright vivid colors, making it difficult to determine where other threats are coming from. Destroy them fast before they cause you to crash into something else. |
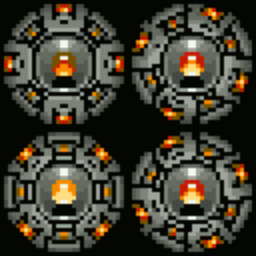 Seen only a few times throughout the fifth stage, known as Asteroid Hell, you'll be thankful they don't appear too frequently. Reminiscent of the "Mother and Child" enemy from Gradius, they are large spheres that fire off volleys of missiles in every direction. These missiles are heat seeking and hunt down your ship. The Phalanx takes an enormous amount of damage before being destroyed, and when they do, they scatter parts in eight directions. |
| Zabu II | Crystal Bomb |
  In Gradius, the Zabu were an enemy that appeared in some random location in space and flew towards your ship. Only seen at the end of the fifth stage, the Zabu Mark II appears in a circle around you and they attempt to crush you all at once. The variety on the left appear in groups of eight and, though tough, are not too hard to escape from. The variety on the right however, appear in a large circle of sixteen and are more of a threat. |
 You encounter a large quantity of Crystal Bombs as you fly over the middle portion of the sixth stage, Zelos' Fortress. They appear from various locations along the top of the screen and streak down at your ship as you attempt to breech the fortress. They are easy to destroy, but their large number and distracting appearance makes it very easy for them to overwhelm you if you're not vigilant. |
Large enemies[edit]
| Death Hand | Sharp Cross |
|---|---|
Death Hands are a large and effective anti-body found in the Bionic Germ. They consist of claws mounted on the end of a large tentacle. They grow from the surface of various tissue and can only reach so far, but they are quite effective at removing any threat within their reach. They have only one vulnerability, and that is the oddly colored segment along the tentacle. Fire there to destroy it, or stay out of their way entirely. |
 A Sharp Cross is a large fang-like appendage that juts in and out from the lining of certain tissue that is meant to help aid the process of digestion by grinding larger particles of food into smaller pieces, like teeth. They are unintelligent and move at a constant rate, but they are large and create quite difficult navigational situations. They can't be destroyed or stopped, and should be avoided at all costs. |
| Big Core | Moai |
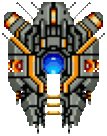 Once you breach the interior of Zelos' Fortress, he will have two surprises waiting for you. The first is a fleet of Big Cores which were the staple boss at the end of each stage of Gradius. You must destroy a number of them repeatedly in order to advance to the inner chamber, and now you must fight them in a vertical orientation. Aside from this shift in perspective, they are identical to their Gradius counterparts, including the quad lasers which are shot simultaneously. |
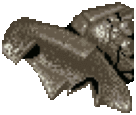 The second surprise waiting for you in Zelos' Fortress is another familiar "face", the Moai statues. Zelos has set them up as the last line of defense against your intrusion. In addition to blowing power rings from their lips, they now have an additional talent: the ability to hop. Though slow and predictable, their size and number can make them difficult to find a safe place to rest, so be sure to shoot them in the mouth and destroy them before they can overwhelm you. |
