Free to Fly[edit]
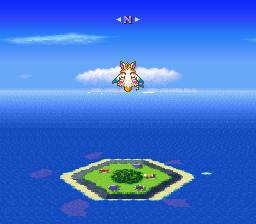
Now that Flammie has effectively joined your party, you can freely fly tojust about any location around the world. Take some time to soar through the sky and travel around the world while you get used to controlling Flammie. In addition to using ![]() to fly around, you can use
to fly around, you can use ![]() to rise higher into the air, and
to rise higher into the air, and ![]() to descend. When you get close enough to the ground the view will automatically switch to a bird's eye view, but you can manually toggle between the two views by pressing
to descend. When you get close enough to the ground the view will automatically switch to a bird's eye view, but you can manually toggle between the two views by pressing ![]() or
or ![]() . You can also view a map of the world by pressing
. You can also view a map of the world by pressing ![]() while riding Flammie. In this mode, you can toggle between a globe view and a flat map using
while riding Flammie. In this mode, you can toggle between a globe view and a flat map using ![]() or
or ![]() .
.
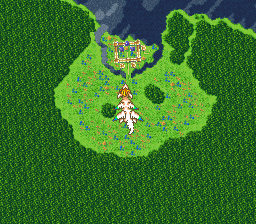
Your first objective is to return King Truffle to his home in Matango, which he indicated would be Southwest of your current position. Since you are new to flying, it may be difficult to identify locations from the sky at first. Mantango looks like a clearing in the forest, with a castle nestled at the foot of a mountain range which boarders the sea. Hold ![]() while you hover over the castle until Flammie drops low enough to let you all off. Speak with King Truffle, and he will tell you about Flammie's map modes. Then he directs you to continue on to the Southwest in search of the Lofty Mountains.
while you hover over the castle until Flammie drops low enough to let you all off. Speak with King Truffle, and he will tell you about Flammie's map modes. Then he directs you to continue on to the Southwest in search of the Lofty Mountains.
Before you summon Flammie again, be sure to step inside and speak with Watts to upgrade the various weapons you collected orbs for. If you've been following along with this walkthrough, then every weapon should be at level 5, with the exception of the whip which will be at level 6. When you're ready, step outside and use the toy drum to call Flammie back and take to the sky again.
Mandala[edit]
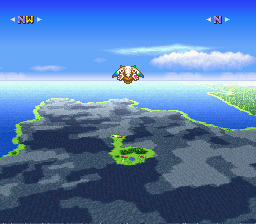
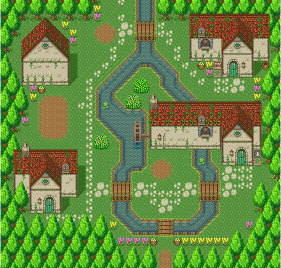
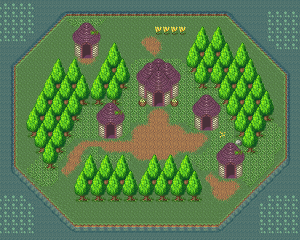
The Lofty Mountains are indeed a rather small trip Southwest from Matango. In a vast mountain range, you will see pockets of land. The one closer to the north is the village of Mandala. Even if you happen to miss it and land in the region a little further south, you will be deposited in front of a cave. To reach Mandala from here, simply run left and follow the path up a hill until you reach the town.
The inhabitants of the town have a bit of information, and many will mention Sage Joch. In the item shop, you'll find new defensive gear like the Ivy Armlet, Magical Armor, and Circet. Buy everything you can afford, and remember to equip the new gear and sell off the old. If you have any weapons to upgrade, you'll find Watts hanging out in the house in the lower left corner of town. And of course drop by the Inn in order to save your game.
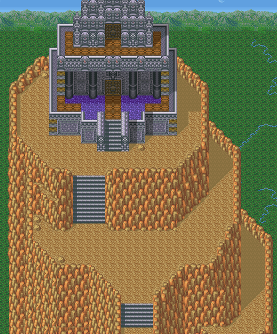
When you're ready, pass through the opening at the top of the town, and you'll be on a path to a temple at the top of a hill. The visitors there will tell you a bit about the temple, like that it pre-dates the Mana war, and it contains archives of events in video format, which the speaker seems unfamiliar with. Climb the steps and enterthe temple. You won't find anyone inside, but there are seven objects on the alter. You can examine each one, and they will play back some videos from a previous era. Some will contain random recordings, others will contain footage from the Mana War, and others simply won't work.
There's a door in the back of the far right side of the room. Enter, and you'll see a staircase to the floor above. Continue to follow the path to the exit on the right side, and you'll reach the balcony on top of the temple. The man there will explain the Sage Joch will not see you until you prove yourself.
Climbing Lofty Mountains[edit]
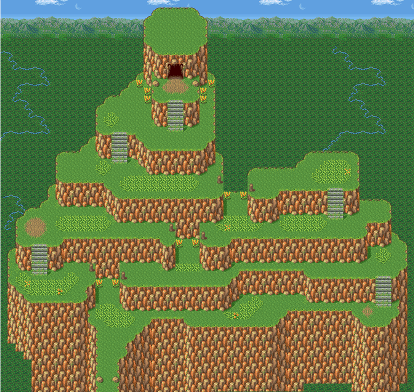
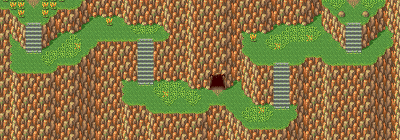
Despite what the man at the top of the temple had to say, you can attempt to visit Sage Joch. To do that, you must exit Mandala through the bottom, and follow the path over to the right. Walk past the cave for now, and begin climbing up the path on the right side. This will wind you up the mountain side. You'll encounter Trap Flowers which like to cast sleep spells, Bomb Bees, and Eggatrices. You'll need a character with the whip handy to help pull your party over the multiple gaps in the path that you'll encounter along the way.
Near the top, you'll find Neko waiting to sell you items, or save the game. (You may not see him if there are too many monsters on the screen at the time.) At the very top, you'll see a cave entrance. Step inside and you'll see an odd looking creature by the name of Jehk. Jehk happens to be Sage Joch's assistant. He will inform you that Joch is not here. He mentions that the sage went to the Palace of Darkness, which you passed on your way up the mountain. It was the cave at the bottom. You can return there the long way, or use a shortcut by calling Flammie to pick you up, and then immediately descend back down to the ground. He will deposit you right in front of the cave you need to explore.
Palace of Darkness[edit]

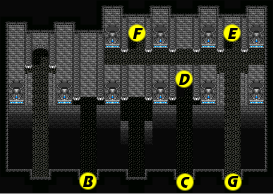
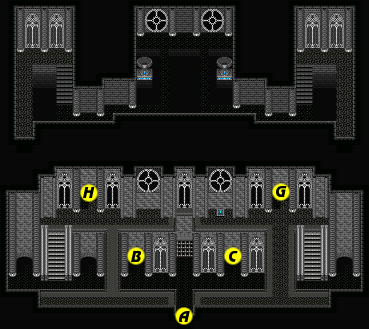
Step inside, and fight the Fierce Head in the entrance. Continue through the back, and you'll enter a large room. There are Dark Knights all around, some of who are on the lower level where you arrive, while other occupy the tops of the walls that divide the room. There are two exits from this section. The left one leads to a dead-end, so take the right. Fight your way past Dark Ninjas, and continue through the door in the back.
|
|
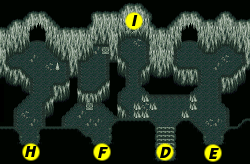
This will take you to a cavern where you'll need an ax in order to chop down the spikes that prevent you from exploring further. Remove them and watch out for the multiplying Embermen that occupy the area. The section to the left goes nowhere, but the area to the right has two exits. The one in the back leads to a small room with two Fierce Heads, but nothing else. Instead, explore the doorway at the bottom.
This will bring you back to the room you were in previously, only you will be on the upper level. Detour to the left, and pass through the entrance back into the cavern. This will take you to a small section with a switch. Step on the switch and a spike will appear just above you, which you will need in a moment.
Return to the previous room, and follow the path past a Dark Ninja straight down back to the room occupied by Dark Knights. Explore the area to the left to find a switch which opens the center gate. Then head back to the right and climb down a large set of stairs. Follow the path as it leads to a doorway which transports you to the back of the room. Continue along this path until you find a treasure chest guarded by two Dark Knights. The chest contains 1000 gold. Continue following the path as it winds its way to the left, and then down through another doorway, back to the section below. Ignore the door in the lower right corner and climb the steps.
Pass through the door at the top, and cross over another bridge past a Dark Ninja, to return to the cavern area. You will see the spike you raise, along with another spike close to you. This signifies that you can use the whip to get back and forth across the gap. Do so, and step on the switch near the top of the room. A cave will open up to your right. Use the whip to get back to the left,

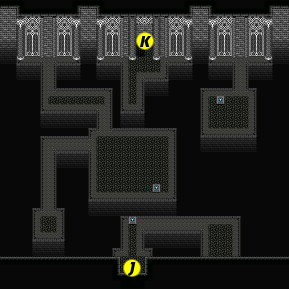
At this time, you should retrace your steps all the way back to the original floor of the entrance, where you recently opened the gate. Pass through the gate to find a small room with some Fierce Heads. Inside will be a treasure chest, and the chest will contain a Glove orb. Collect it, and then exit the room and return to the cavern to explore the door you opened up with the last switch that you stepped on.
Passing through the newly opened door takes you to a long hallway occupied by Embermen. Fight your way through them as you continue up to the top of the hall and pass through the door. You'll be greeted by an Imp as you approach a green switch on the floor. Step on it, and some blue flames will appear in the darkness, indicating the presence of a path to the left. Follow it and continue around until you reach another switch. Step on it, and more blue flames will appear to lead you to a third switch, which in turn leads you to the left, and ultimately to the exit from this room.
Boss: Lime Slime[edit]
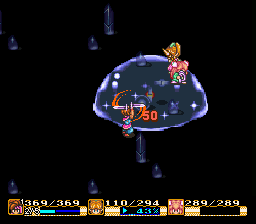
The moment you enter the room, you will be sharing the space with a gigantic slime. Shade will announce that he will test you. Lime Slime changes color and its attacks vary depending on what color it is. It may try to drown you or burn you, and it may cast Dark magic on you. What it can't do is harm you through touch. Instead, it may lob some goo into the sky, which will hit one of your characters if they stand still. It's only vulnerable portion is the orb in the center. If you Analyze it, you will discover that it fears Salamando. Have both the Girl and the Sprite stun it into inaction by casting consecutive fire spells on it. You may notice that the slime continues to get smaller, the more damage you do to it.
It will take a number of fire spells to destroy the slime, even at level 4, but once you do, you will obtain a Javalin orb. Then you will be given access to another room. Run to the back, and you will see Shade waiting for you. As a reward for beating the slime, he will grant you his powers. Note, however, that they are only bestowed with the Sprite. The Girl does not obtain any dark magic. Then climb the steps of the altar and use your weapon on the Mana Seed to restore its seal. You can now rise to a fifth level of magic.
Once this step is complete, you must make your way back out of the Palace of Darkness. When you're outside, it would be wise to heal up in Mandala, and visit Watts with any orbs you have collected. Then prepare to climb back up the Lofty Mountains to see if Sage Joch has returned.

