Stage 1[edit]
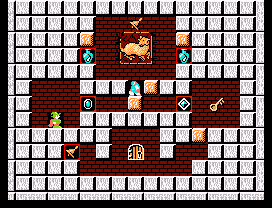
Drop the golem, then grab all the items. There's another fireball on the next stage, so turn the blue diamond into something else for now. Remember to grab the hidden bell.
Stage 2[edit]
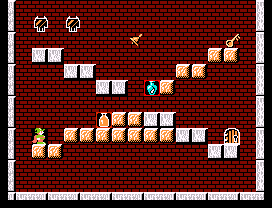
Wait for the demon heads to drop to your level, then use the jar to kill them. Remove the block two spaces right of the jar to keep the demon heads from reaching you, then build blocks to make your way to the bell and key.
Stage 3[edit]
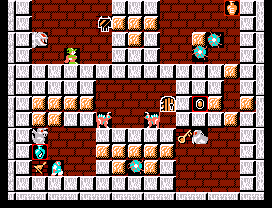
Make your way right, to the second room, run under the block with the circling Spark Balls, then remove it from the right side right after the balls pass you to send them flying. Wait for them to go through the passage to the first room, then block the passage to prevent their return.
Grab the extra life, drop down to the third room, and get the key. Release the Spark Ball in the passage between the third and fourth room, run back to the third room and wait for the ball to pass, then go back into the passage and block it's right exit.
Kill the Golem in the fourth room with a fireball, get the bell, and drop the Gargoyle to get your fireball back. Alternatively, kill the Gargoyle with a fireball, as he often releases a bell. Then use jumps to avoid the Golem as you regain your fireball.
Make your way to the final room, wait for the Dragons to move away from the left side of it, then place a block on the floor, walk onto it, then start making a series of blocks one space over the floor to get to the door safely.
With caution, if you can eliminate both Dragons with a single fireball (wait until they cross paths), they will often release scrolls or an extra life. Rather than use special timing to line up the two Dragons, strategic placement of a block to slow one down will line them up nicely.
Stage 4[edit]
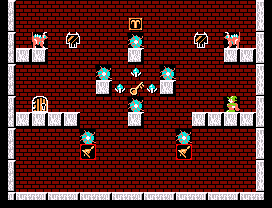
Start extending the platform you start on towards the left by making two blocks on it's left edge. Wait for the ball circling the above block to pass, then complete the passage between the right platform and the bottom of the middle blocks. Jump the ball that was circling it as it goes right, get onto the solid block, then make a block to your right to send the ball circling the right middle block to the right as well. Jump around the get all the items here, make your way to the top of the right middle block, and use blocks to make your way upwards, so you can jump to the top block and grab the zodiac sign without releasing the ball from the block. Get to the top right corner and drop the salamander here for a fairy, then drop to the floor. Grab the two bells here, while blocking in the balls that get in your way. Finally, climb upwards, drop the golem guarding the door, and make your exit. Hidden room!
Stage 5[edit]
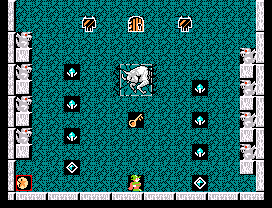
Before you begin your ascent, convert the blue diamonds to fireballs and uncover the orange star-coin at the left corner.
- Conservative method
Drop each gargoyle as you make your way upwards, grabbing items as you go. Try not to linger too long or your time will run out.
- Quick method
Build a tower of blocks (two high) in the middle of the screen and jump on top of it. Then build a block on either side to shield the incoming fire. Wait for the nearest gargoyle to destroy one of the blocks, then hop on to the remaining block (don't forget the key on your way up). Repeat these steps until you reach the door and exit.
- Greedy method
Fire on each of the gargoyles as you climb up each side. Gargoyles tend to drop fairy bells more commonly than any other enemy. Using flame spells or the super flame from the previous hidden stage can yield up to eight extra fairys.
- Note
The top right gargoyle will turn into a fairy if you drop him.
Stage 6[edit]
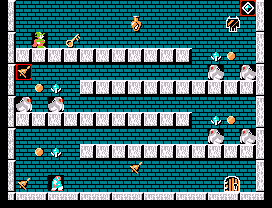
Use the provided nuclear fire ball to smoke all enemies in one shot. Move as far left into the first alley as you can, fire, and quickly make a block. The fireball will turn around and should take out every other enemy on the board, even the one on the bottom. If you're a pacifist, just walk down the alleys and make blocks to reverse the ghosts as necessary.
Stage 7[edit]
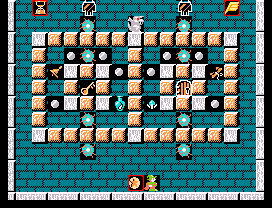
Resist the urge to use fireballs against any Sparkie. For every one that you kill, the rest will go faster and faster. If you need to neutralize any, you should build jail(s). This is a skill that will serve you well in later boards.
Move right a bit and wall yourself in for protection. Burrow your way upwards and right to the scroll. Close yourself in as necessary to avoid the Sparkies. The exact path will depend on your timing. Now go back left for the key, and then head for the door.
There is too much variability in how this level will go based on exactly when you make blocks to give an exact path. However, contrary to intuition (going up the left side first for the key), it is much easier to make your way up the right side first.
Stage 8[edit]
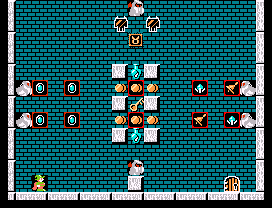
Work your way straight up. Things may be easier if you can reverse the ghosts such that they are very close to each other in their flight path. Once at the top, take a glorious plunge down the middle. Nuking a Neul or both makes this much easier. Walk out and enjoy the hidden room.